

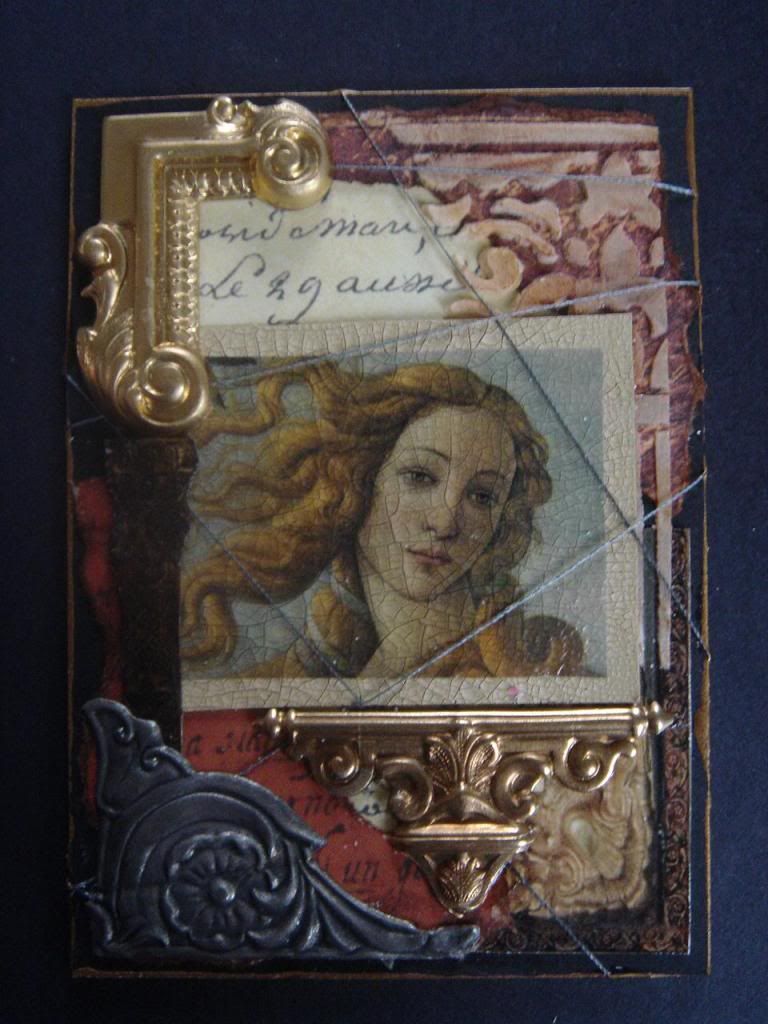
When I was designing the ATC below I wanted the image of Botticelli’s Venus to have the look of an aged crackle painting. The problem is that the crackle techniques and products, with which I’m familiar, would cover the image when painted over with crackle medium and paint or crackle paint. I had been working with Grafix Rub-Onz for a while and I got the idea that maybe I could achieve the effect I wanted by first crackling paper and then applying a rub-on over the crackled paper. It worked! Not only does is look aged but also has a worn texture.
Step 1 – Crackling a Surface Using Ranger Distress Crackle Paint
You can use any crackle method you choose but I find when working with small projects the Ranger Crackle Paint works the best because it gives you fine detailed cracks. If you use something like Delta’s Crackle the cracks are too large. Ranger Crackle is also nice because the paint and the crackle medium are all in the same bottle so it’s a one step process. With other methods, you must apply the crackle medium first, wait for the perfect level of dryness and then apply paint. With Ranger Crackle, just paint your surfacet; let it try and you’ll get a great result every time. Distress Crackle Paint comes in a large variety of colors. You can use this technique on any surface that the paint sticks to.
- First, stir the pot thoroughly as the crackle component of the mixture tends to sink to the bottom of the container. I use a popsicle stick.
- Apply a very thick coat to your piece stroking in one direction. Try not to over stroke the same area if possible. In other words, go over the same area as few times as possible.
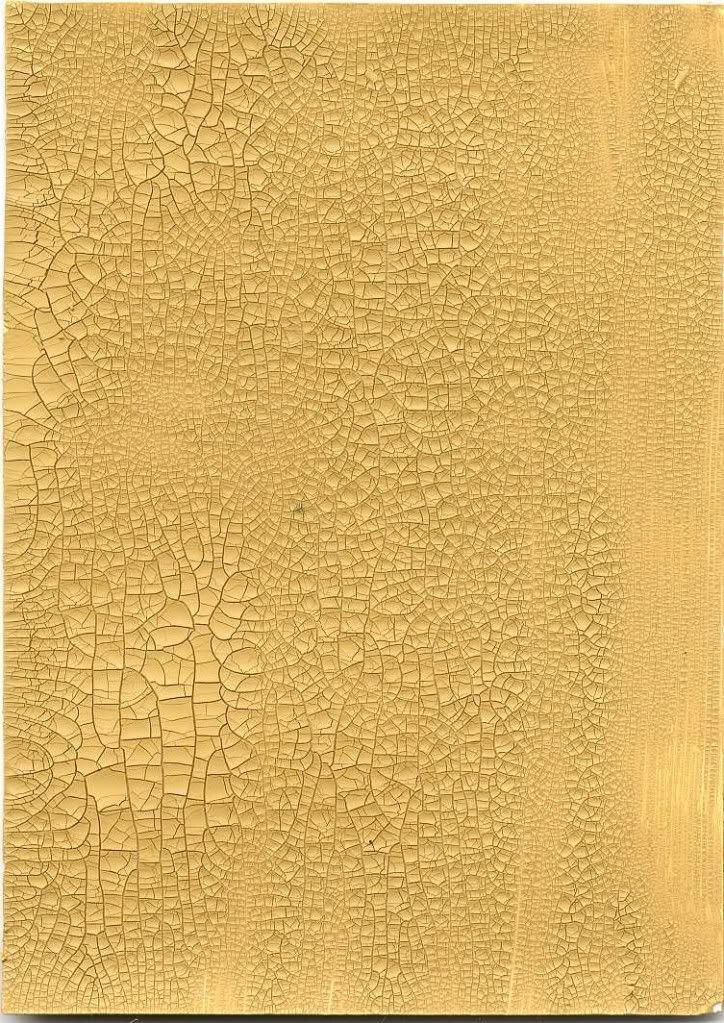
- Let it dry and you should get a nice detailed crackle effect.
Below I used the color “Antique Linen” to crackle an ATC size piece of white cardstock. Crackle paint and cardstock color combinations give different results. For example, if you use the crackle color “Picket Fence”, which is white on black cardstock the end result will be a light blue.
TIP: Crackle paint is a use it or lose it product, as it slowly dries out once you open the container. I check my containers every so often and add water so they don’t dry out.
Step 2 – Create a Rub-on Using Grafix Rub-Onz Transfer Film
I’m not going to cover the steps to create a rub-on as they are covered in the tutorial “How to Create Your Own Grafix Rub-Onz. Here is the link http://artfullymusing.blogspot.com/2010/12/tutorial-create-your-own-rub-ons-using.html
Step 3 – Apply the Rub-on To the Crackled Surface
- Once you have created your rub-on, separate the transfer film from the adhesive film at the edge.
- Place the image (sticky side) on to the crackled surface and using a popsicle stick, rub the image until you can lift the transfer film.
- Once you’ve removed the transfer film rub the image with your fingers to press the rub-on into the cracks.
- You’re done and ready to embellish.
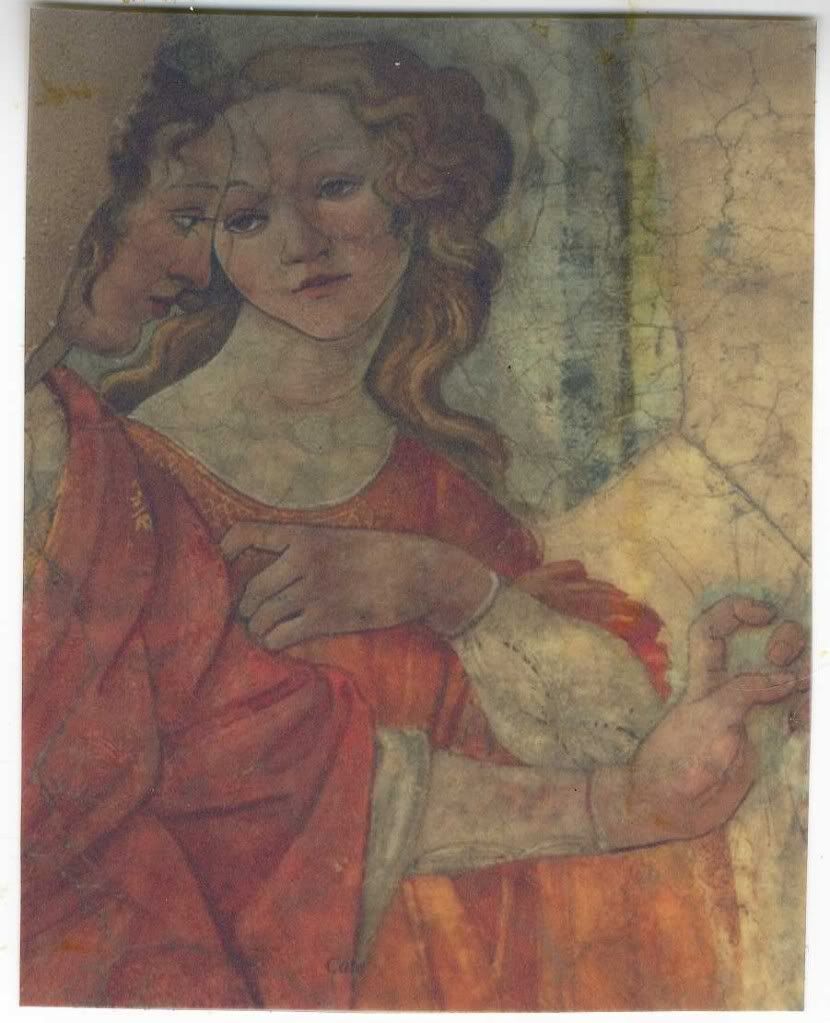
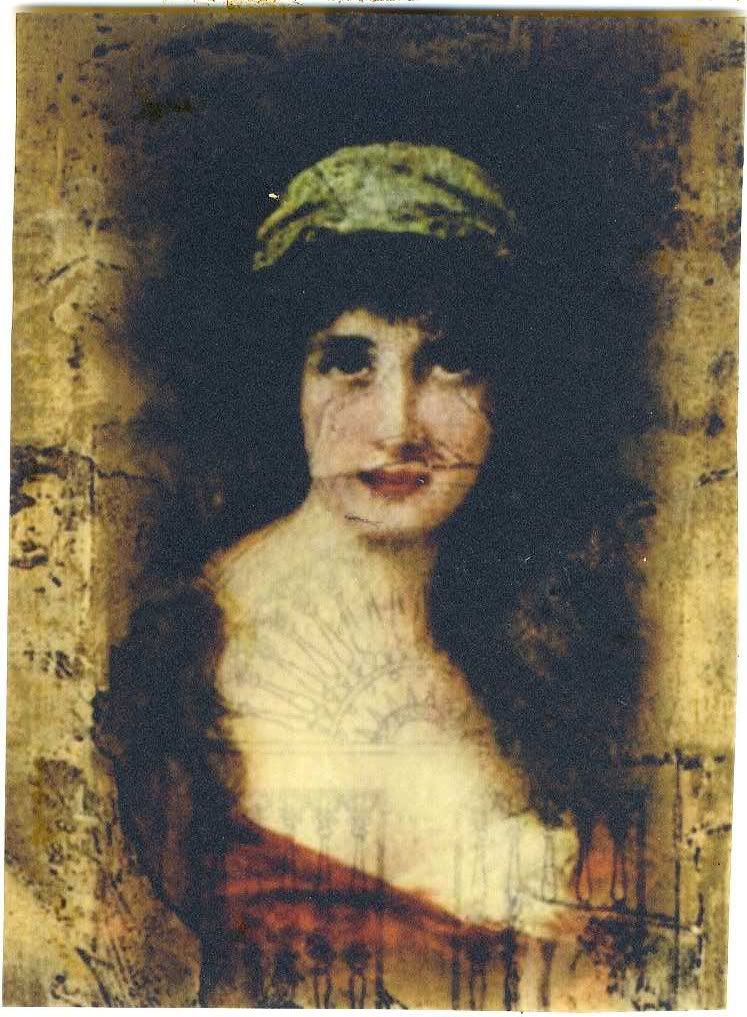
Rub-On
Rub-on Applied to the Crackled Cardstock

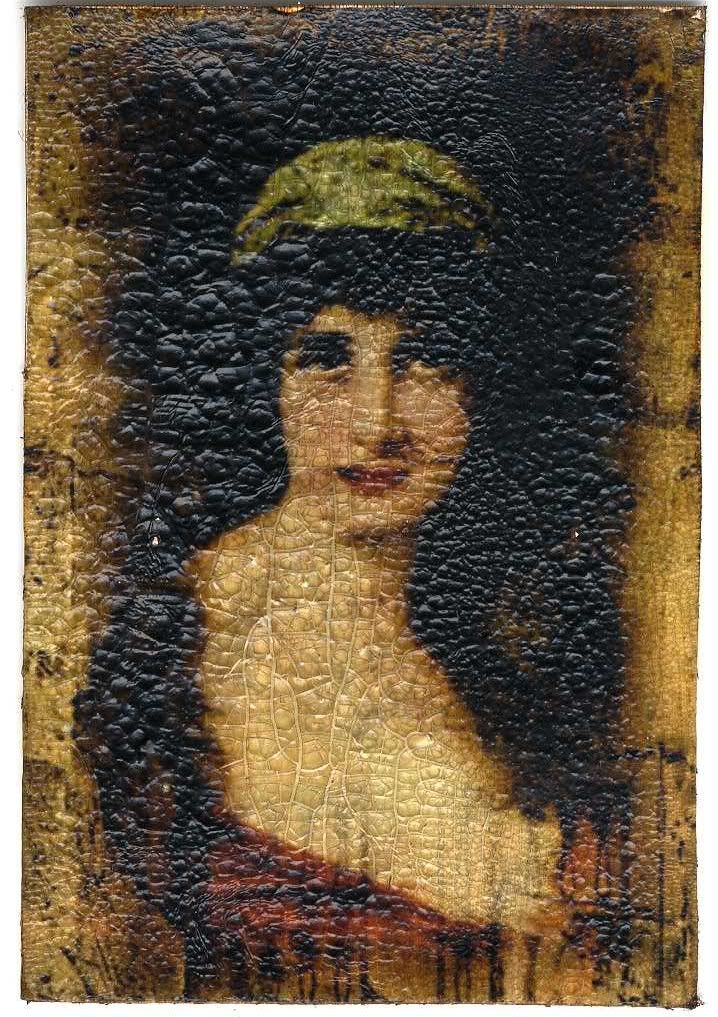
Finished ATC

More Examples of the Technique
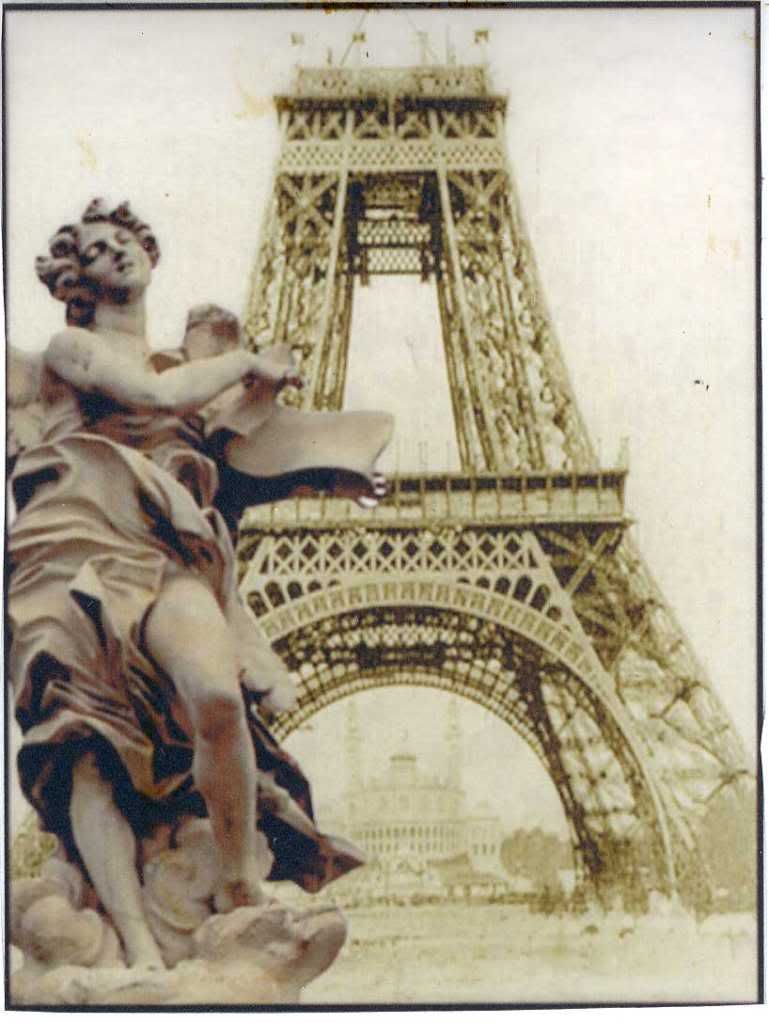
Rub-On
Rub-on Applied to the Crackled Cardstock
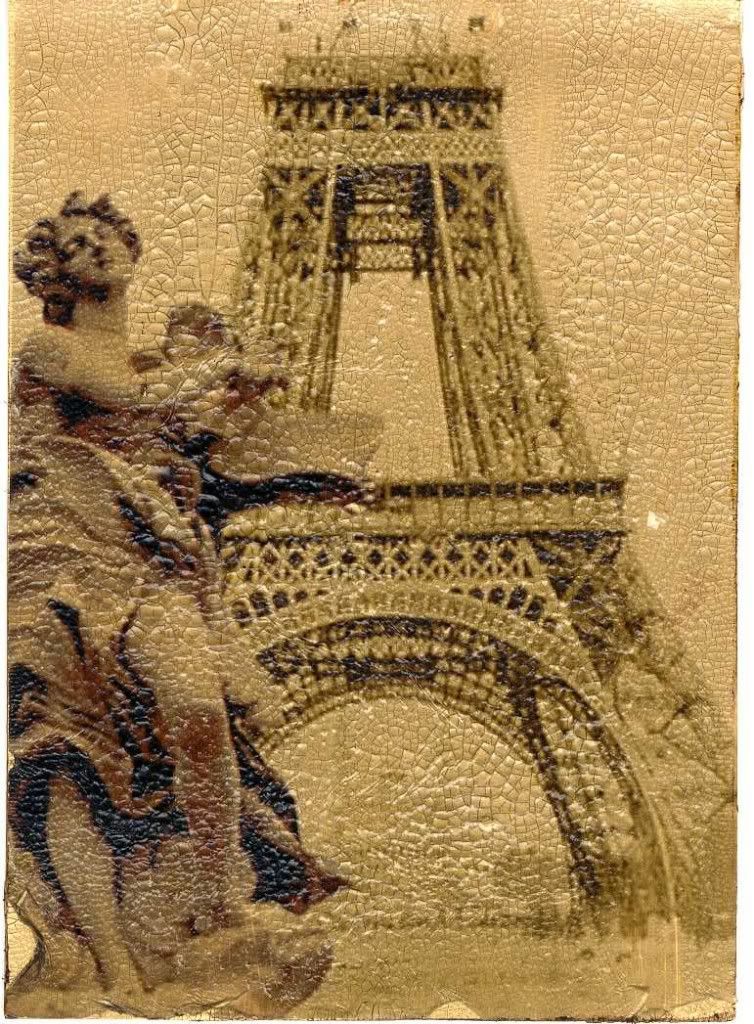
Rub-On
Rub-on Applied to the Crackled Cardstock
You can purchase Ranger Distress Crackle Paint at http://www.franticstamper.com/search.asp?keyword=crackle&sortby=0&catid=591
The Grafix website where you can find sites to purchase Rub-Onz Transfer Film
Click here to download PDF file of this tutorial https://docs.google.com/viewer?a=v&pid=explorer&chrome=true&srcid=0B3KkKmhVX3Z4MTViOTQ4NmUtMjcwOS00NTMxLTk1ZDEtZTg2MTk0ZmFmZjk1&hl=en
6 comments:
thanks for this wonderful tutorial. this is something i'd like to try. your samples are stunning! xo
thank you for a great tutorial I love the effect and will def. be trying this one
hugs
Oh wow, Laura, this is gorgeous, thanks so much for sharing the techniques!
Ranger always comes up with wonderful product with fantastic effects!! thank you for sharing this Laura :) i'm gonna bookmark it. i wonder if there is a way to make the cracks bigger so i have a choice ... i mean using the Ranger product ...
Hi, I'm new to your site. Is this rub on transfer something that you put through a copier so you can make your own image? If so, that would be incredible. I'll continue looking around you blog for your great tips.
I am blown away by your amazing techniques with products that a lot of paper crafters generally have at their disposal. Thanks for the wonderfully detailed tutorials and the side tips/tricks that the product manufacturers don't tell us :) I am truly inspired by your art and tutorials.
Post a Comment