-->

Welcome

I love answering your questions. If you ask them in the comment section, I have no way to answer you (if you haven't heard from me, that is why). If you use the "EMAIL ME" in the left column of this page, I will be able to respond to you. You can also use it if you want to be added to my newsletter. Laura

Saturday, March 31, 2012

Gypsy Heart

This is an ATC I made for a Gypsy swap in the VIP Yahoo group.  The image comes from the Alpha Stamps Cleo Collage sheet.  I printed the image on Grafix Transfer film and applied the film over Ranger Crackle Paint to give it an aged cracking paint feel.  Click here for the tutorial on this technique.  The embellishments in the lower left corner are images of jewelry and gold coins.
I’ve had a question about what people put on the back of ATCs.  Most people cover the back with decorative paper that coordinates with the front of the ATC.  Usually there is also the artist’s name, contact information (like email address and or blog address), and title of the piece (if there is one).  You can also include the date the piece was create and a series number if you make more than one of the same ATC (such as 1 of 4) with the first number being which card it is in the series and the second number being the total number of cards made.

Thursday, March 29, 2012

Cool Tools

On this past Valentine’s Day, instead of flowers or candy my husband gave me this tool set.  He definitely knows how to romance me!  The set is the 80 Piece Rotary Tool Kit by Chicago Electric plus two packs of additional drill bits.  It’s about half the size of a Dremel, has tons of attachments and is very inexpensive.  Now nothing can stand in the way of what I want to build!

Sunday, March 25, 2012

Tutorial – Raven Foot Book by Creative Team Member Karol Taylor

Karol Taylor has generously created this Raven Foot Book tutorial for you.  It gets its name from the way it is stitched.  If you enjoy bookbinding this tutorial is for you!
Thanks Karol!!!

Thursday, March 22, 2012

Tutorial – Making an Altoid’s Tin Book

If you want to check out my new tutorial Making an Altoid’s Tin Book”, hop on over to Gingersnap Creations.

Tuesday, March 20, 2012

Marie Gothic Arch

I created this 4 ½” x 6 ½” Gothic arch for a swap in the Marie group.  The turquoise curtains and the image of Marie are courtesy of Evelyn Duncan at My Fanciful Muse.  The jeweled image at the top is a picture of a piece of jewelry that I jeweled up using rhinestones, faux pearls and Glossy Accents.

Tuesday, March 13, 2012

Tutorial – Making a Chipboard Shoe Picture Stand – Designed for Alpha Stamps

In this tutorial I’ll cover how to construct a picture stand using chipboard shoes and a chipboard nametag.  These stands are simple to make with endless style and theme possibilities.
What You Will Need
Ruler
Pencil
Glossy Accents Glue or Glue That Works With Metal
X- Acto Knife
2 Small Hinges
Decorative Paper and Embellishments
Constructing the Back of the Stand
Select one of the chipboard nameplates.  I chose the longest one (the package comes with three different designs).  Using a ruler and pencil, draw a line through the center of the nameplate.
Using a ruler and an X-Acto knife, cut along the line.
Next, decorate the nameplate.  I used liquid chalk to color my nameplate and then papers from the Almanac 6” x 6” paper pad to decorate the front and back.
Place the nameplate on your table with what will be the front of the picture stand facing toward you and what will be the back of the picture stand facing the table.  I chose to use different paper on the front and the back so the side mattered.  It’s up to you if you want the sides to look different or not.  Next, note the placement of the hinges in the picture below.  Glue the hinges to the nameplate using Glossy Accents or a glue that works with metal. The hinge pin should be facing down towards the table.  My hinges were originally gold.  Before gluing the hinges in place I used Ranger Black Alcohol Ink to change the color.
To cover the holes in the hinge, I used metal beads.  Other options are; faux pearls, rhinestones or the heads of brads with the prongs removed.  Just be careful not to use anything too bulky or you will not be able to bend the stand.
Decorating the Shoes
I started decorating my shoes by punching holes for ribbon using a Crop-A-Dile hole punch.  It punches through thick chipboard as if it was butter.

I used two different papers from the Almanac paper pad to decorate the shoes.  Notice, I re-punched the holes after attaching the paper.  Using a makeup sponge, I edged the shoes Black Soot Distress Ink.
I added antique gold fold-over bails and black silk ribbon to the shoes.
Once your shoes are decorated, you can glue together the hinged nameplate and the shoes.  I used Glossy Accents.  Note the placement of the nametag on the shoes in the picture below.  Make sure that the shoes are even so that you don’t end up with a lopsided stand.  I suggest placing the shoes along a ruler.
View of the back of the picture stand.
I’ve used several of the papers from the Almanac paper pad to decorate the back of the art piece.
To create the art piece displayed on the picture stand, I used two of the frames from the London Ornate Resin Frame Set.  I mounted the small frame on the back of the large one. The image comes from the Drama Queens Collage Sheet
Below is a complete list of the Alpha Stamps Products used in the project above:
 Marie Antoinette Inspired Picture Shoe Stand
In this version, I decided to keep the original color of the nameplate and I embossed it with pink roses.  To the top, I added a metal butterfly and a pink tulle bow.
The shoes are decorated with various papers, gold beads and a metal heart filigree that I bent before attaching.  I also added stamped flourishes on the back of the shoes.  If you add heavier items to the shoe stand as I have in this version, you need to make sure that they are balanced or your stand will fall over.  For example, if I had just added the butterfly and tulle to the top and not the heart filigree to the bottom, the stand would fall backwards.
Below is a complete list of the Alpha Stamps Products used in the project above:

Monday, March 12, 2012

Tutorial - Making a Vintage Button Brooch


If you want to check out my tutorial Making a Vintage Button Brooch”, hop on over to Gingersnap Creations.

Sunday, March 11, 2012

Marie Inspired Art with Shoe Picture Stand - Designed for Alpha Stamps

The pink and gold background is brocade fabric.
A few days before my stuff came from Alpha Stamps, I met my friend Sue Young for lunch.  As a present, she gave me a piece of her art and a picture stand with which to display it.  Both items were sitting on my work table when the box came from Alpha Stamps.  I unpacked the box and  began playing with the small set of chipboard shoes; making them walk etc.  The kind of silly stuff kids do.  All of the sudden synapses started firing in my brain.  I looked at the picture stand and looked at the shoes and I thought “these would be perfectly for the base of a picture stand”.  The package from Alpha Stamps also included some chipboard tags, which I thought would work great for the back of the stand.  I guess the moral of the story is, do silly things with your art supplies, you never know what might happen.
Shoe Picture Stand
Stay tuned for more shoe picture stand examples, supply lists and a tutorial later in the week!

Friday, March 9, 2012

Paris Inspired Accordion Fold Book

The overall dimensions of this book are 5 ¼” x 6” and it’s 1 ¾” thick.  The cover is loaded with layers of paper, stamping, rub-ons, paper images, beaded trim, ribbon and other dimensional embellishments.  The inspiration for the book came from the image of the woman.  She is from a vintage perfume ad.
I used a stencil to add the peach color to the fabric spine.
Click here to see the tutorial on how to make an Accordion Fold Book.

Tuesday, March 6, 2012

Marie Antoinette Inspired Clock ATC

I used Glossy Accents to create a domed clock face.  The clock face is hinged using a miniature dollhouse hinge.

Saturday, March 3, 2012

Marie Antoinette Diorama – Designed for Alpha Stamps

Click on the pictures to see the details.
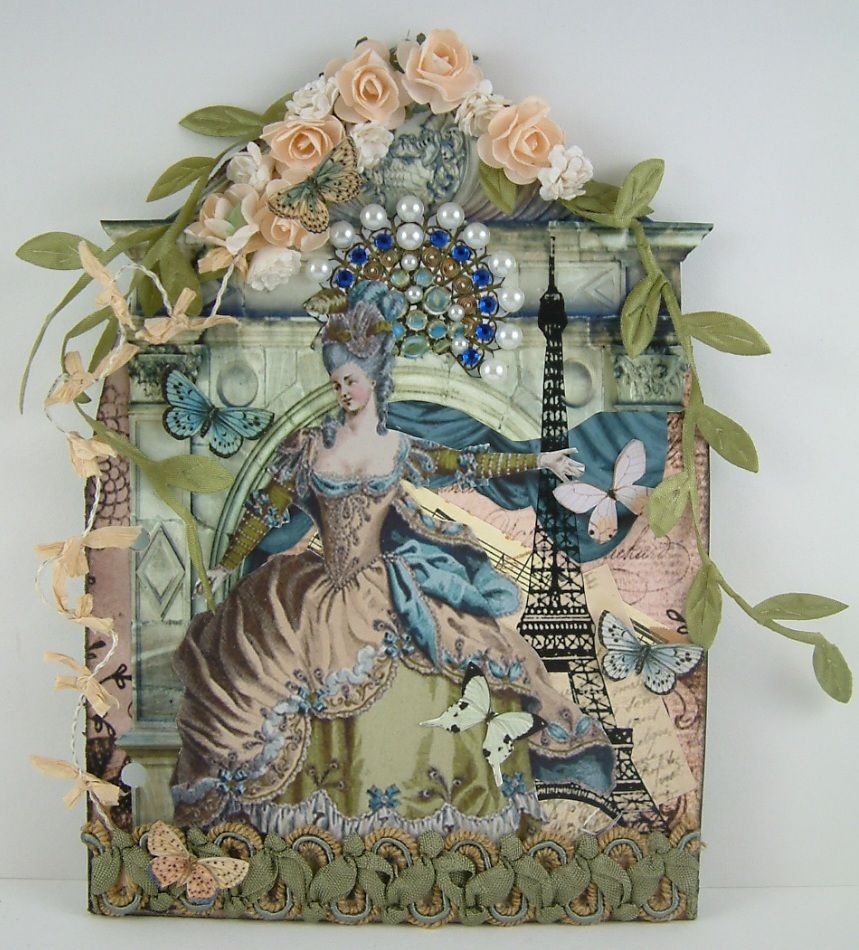
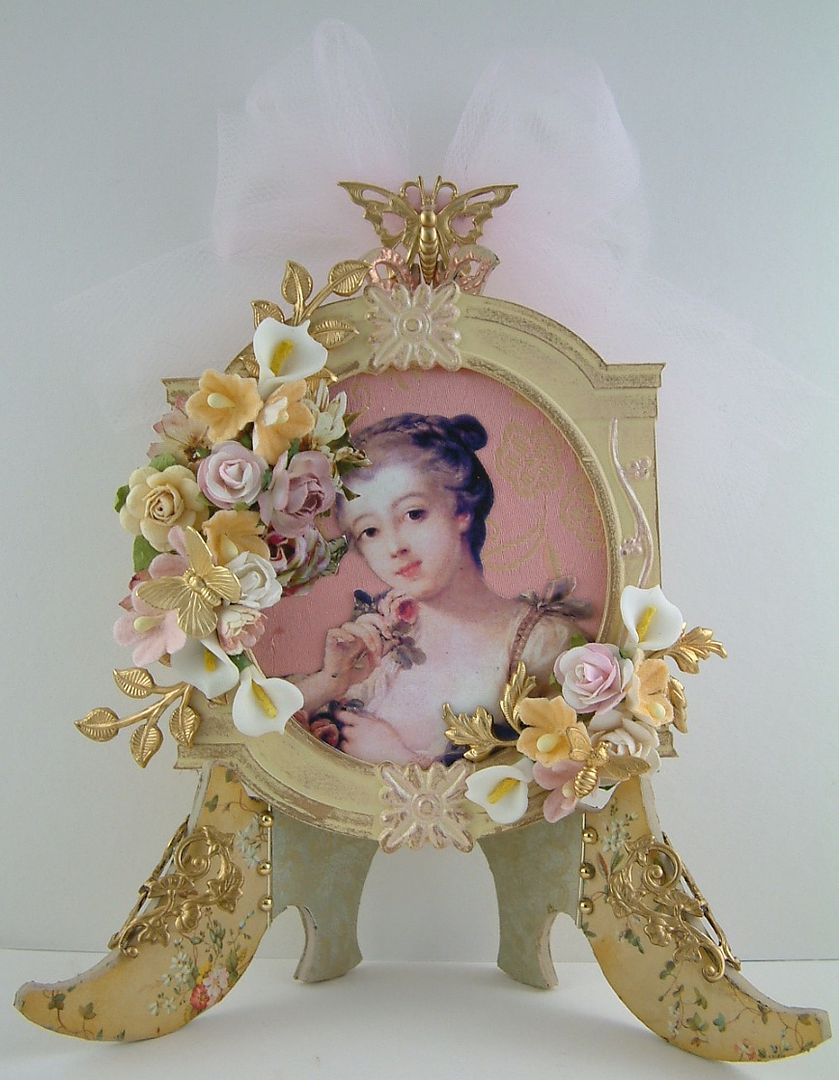
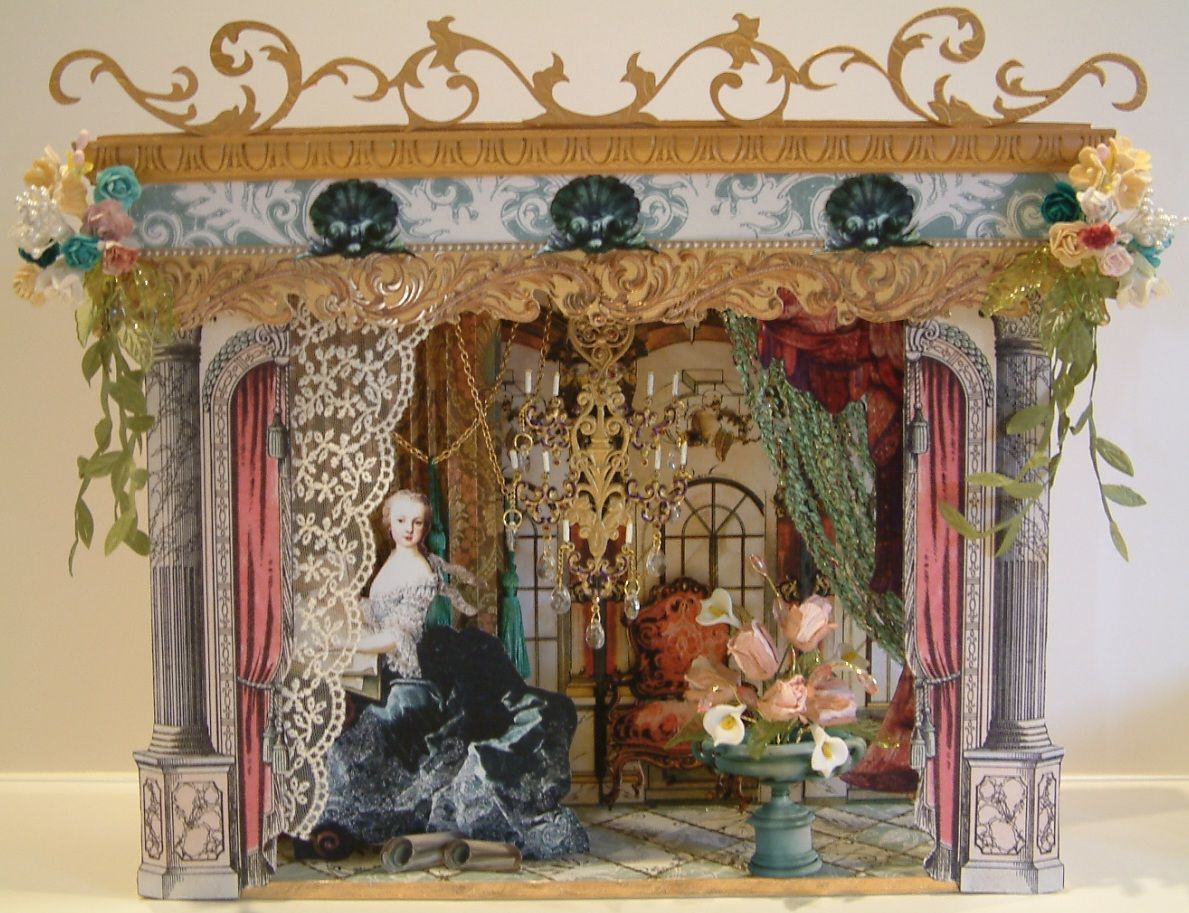
In the past, I’ve created a variety of Marie Antoinette inspired art but never a diorama. The overall dimensions are 11” high by 12” wide by 3” deep.  The floor and the top are made from foam core board.  The back is made from chipboard.  The columns and pink drapes on the front are backed with thin chipboard and supported and attached to the top with wooden dowels.
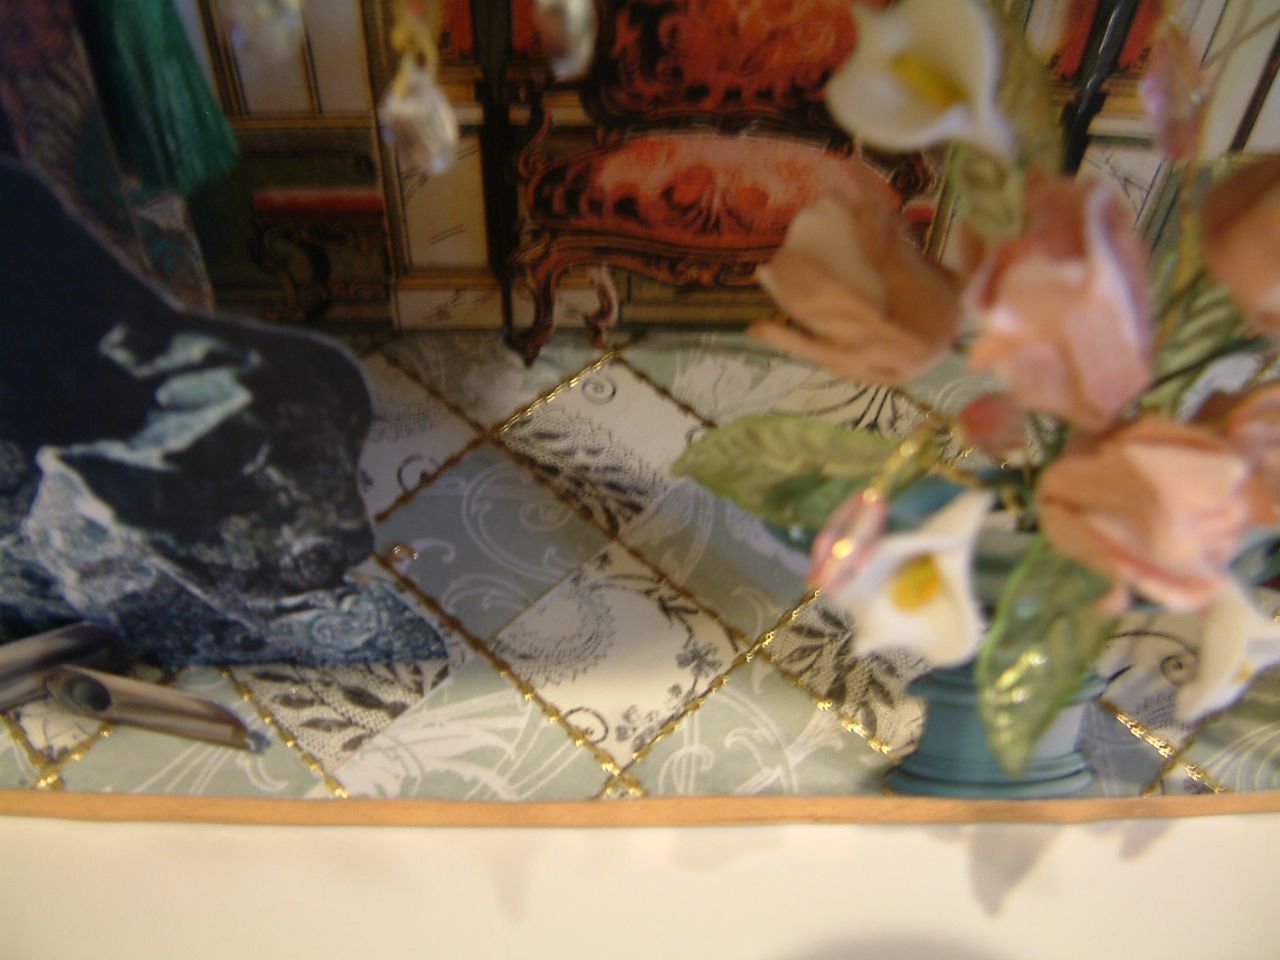
To create the design on the floor, I used a square punch to punch two different patterned papers.  I glued them to the foam core in a diagonal pattern and I used gold metallic stickers to create the grout lines.
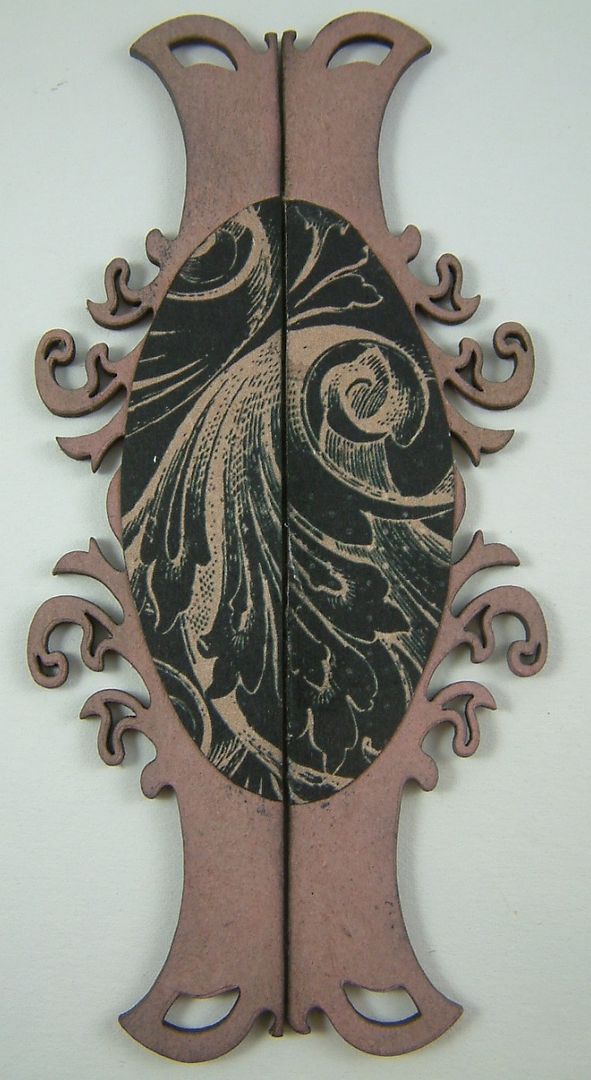
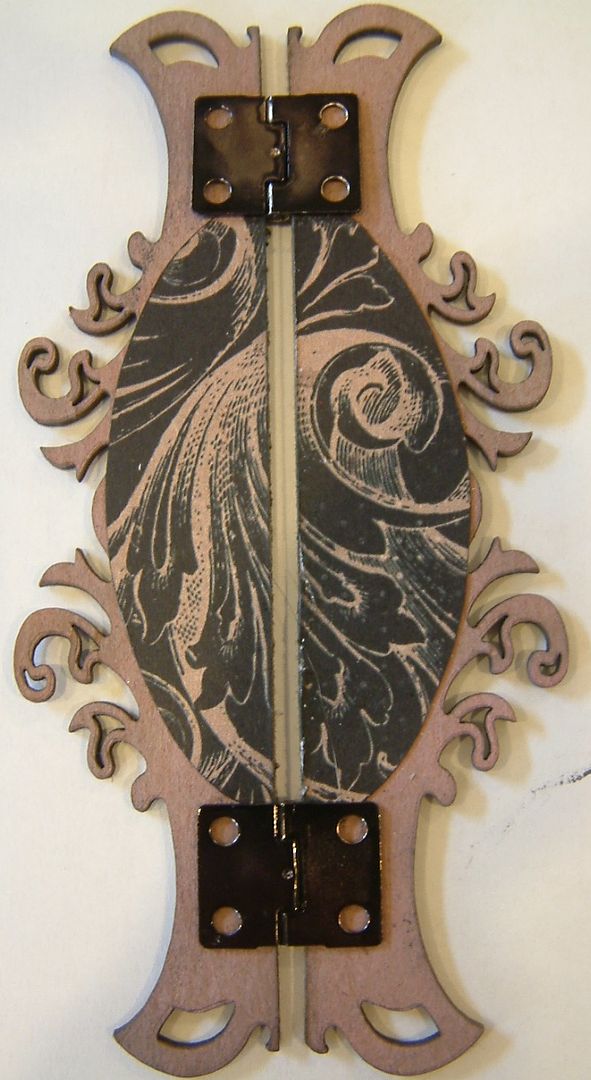
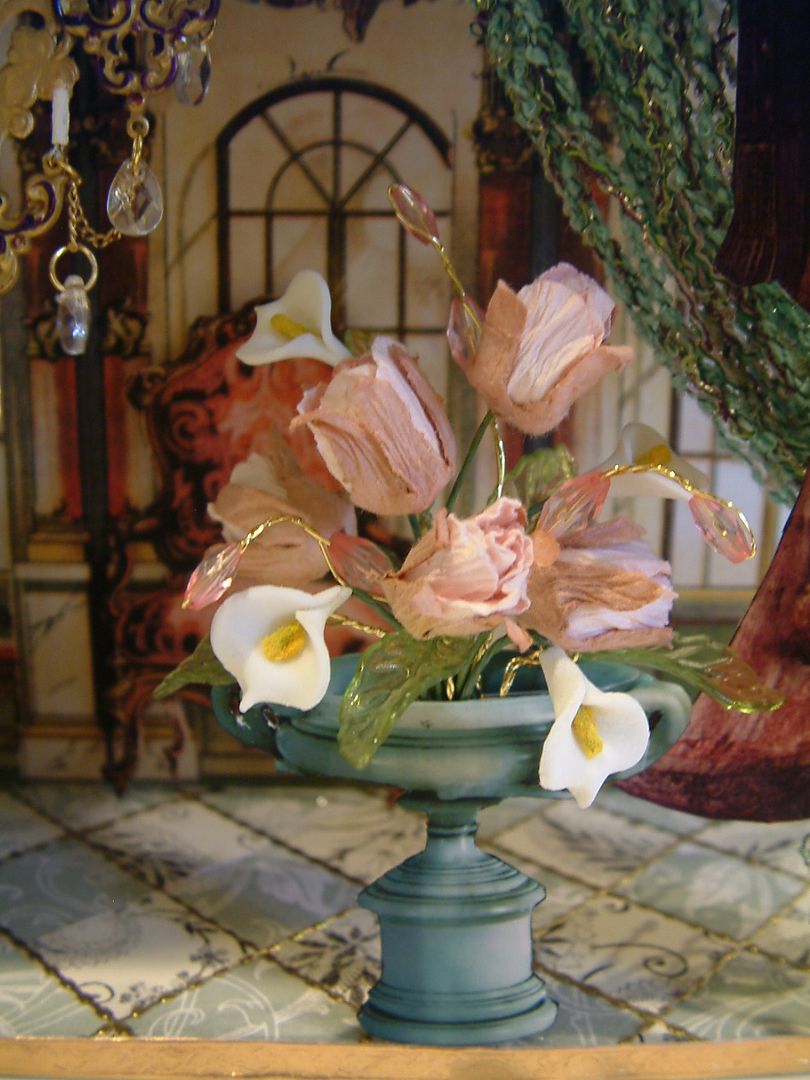
The urn containing the flowers looks dimensional but it’s not.  I used the same image twice (one the reverse of the other) and backed them both with heavy cardstock.  Next, I added foam core tape to the inside middle and glued the sides together.  This method created a pocket in the middle which gave me room to insert the flower arrangement.
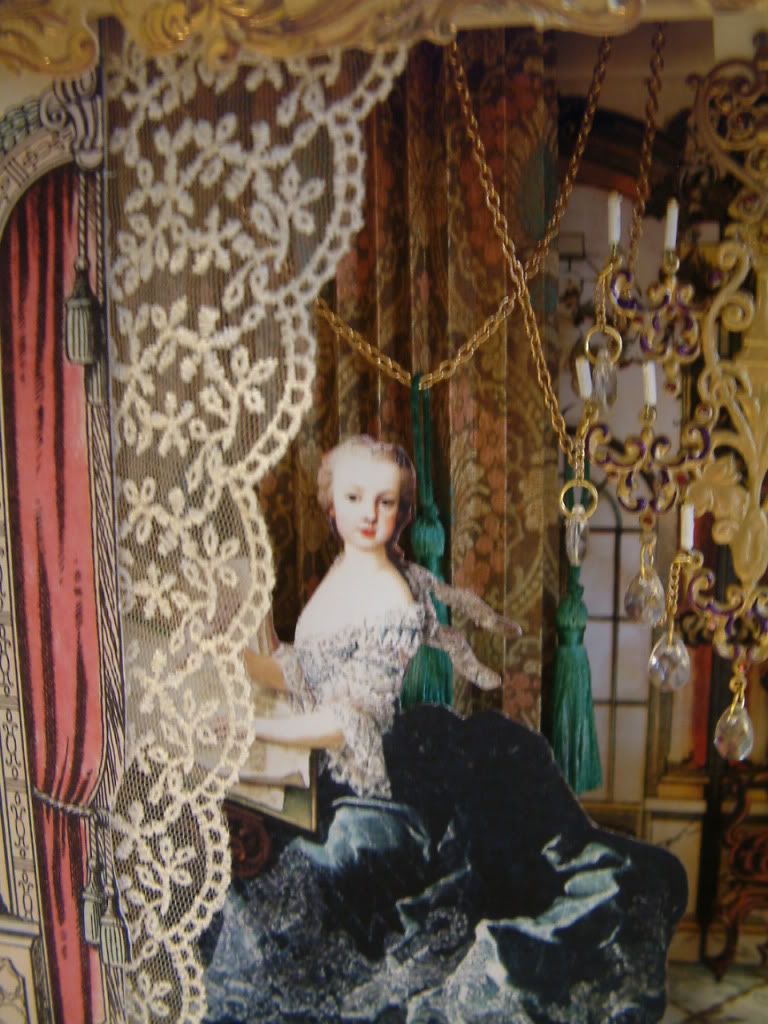
Hidden in the top of the diorama are foam core beams that I used for hanging the lace curtains on the left side and the turquoise fiber on the right side.  The flowered curtains in the far back on the left are made by accordion folding paper.  I used a gold chain to hang tassels that I died turquoise with alcohol ink.
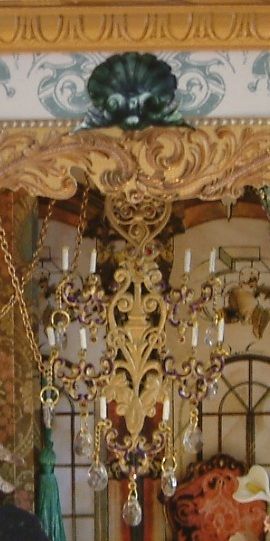
The chandelier is made from German Scrap (center support), brass jewelry drops (pieces holding the candles and beads), clear plastic beads hanging from the drops and clear long beads for candles which I painted white (these are attached with wire).  I used a dollop of yellow metallic paint for the candle flames.
To the foam core at the top, I attached paper borders and a piece of carved wooden trim (used for dollhouses).  The swirls at the top are chipboard.  On the top, is a piece of chipboard covered in decorative paper that I can lift to access the beams inside the top (in case I need to fix or add something).
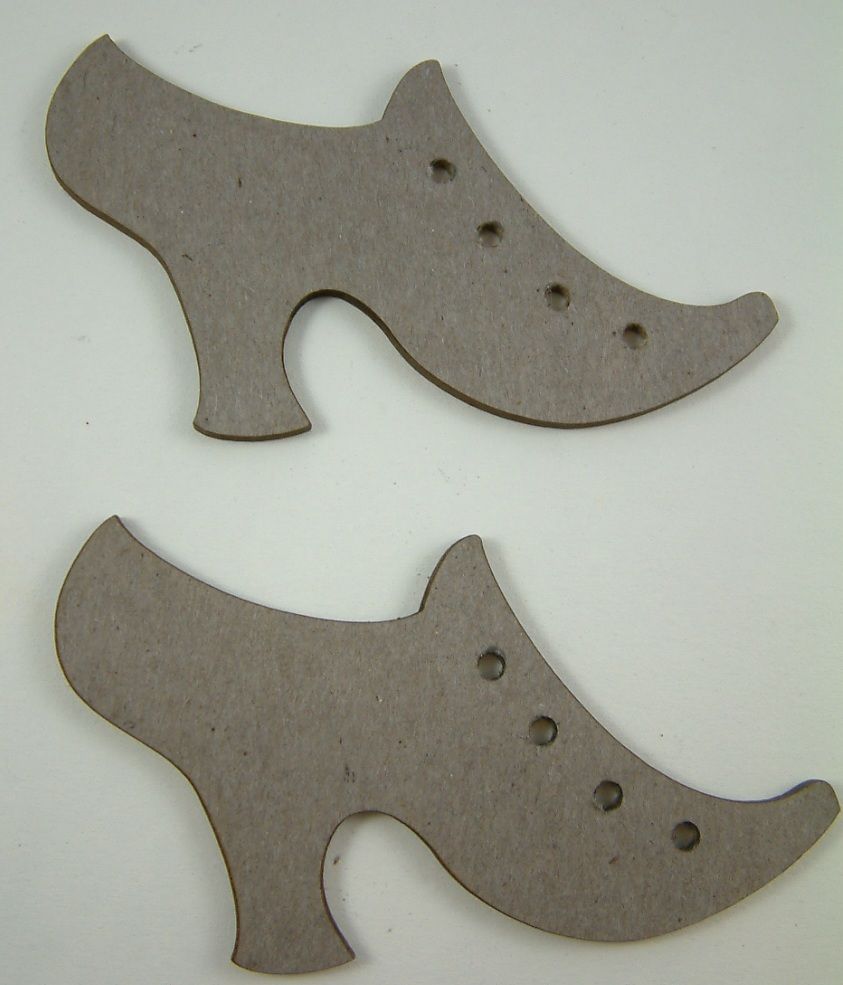
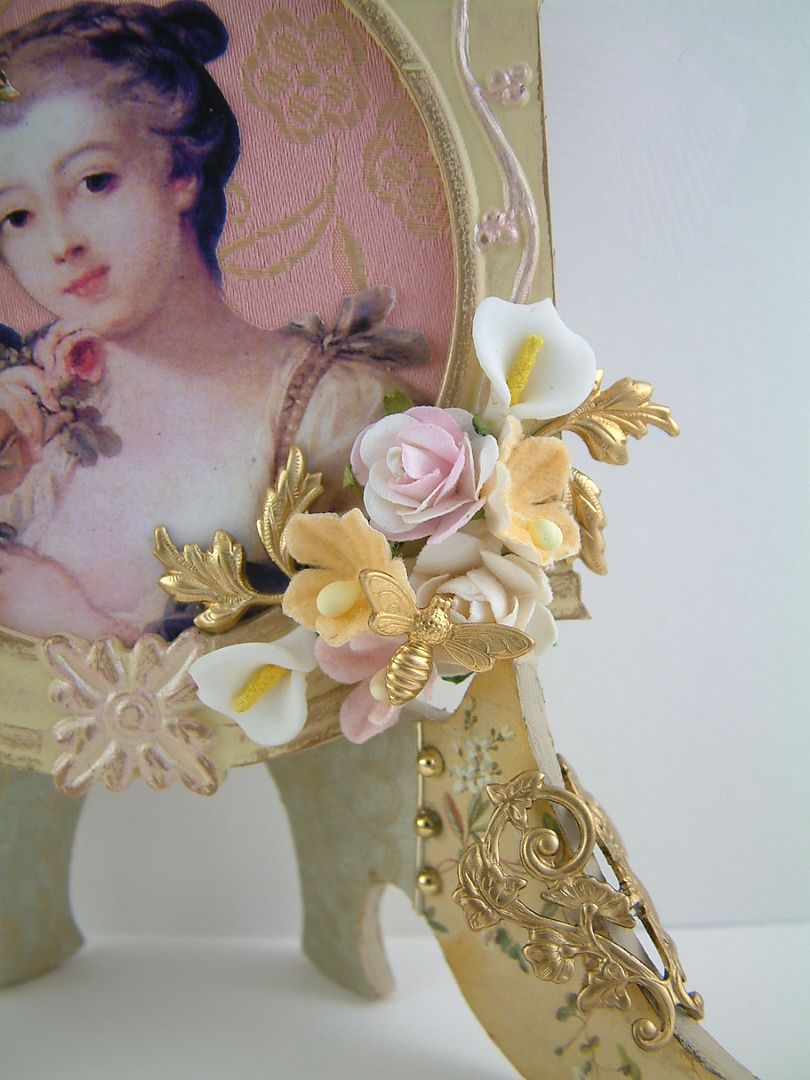
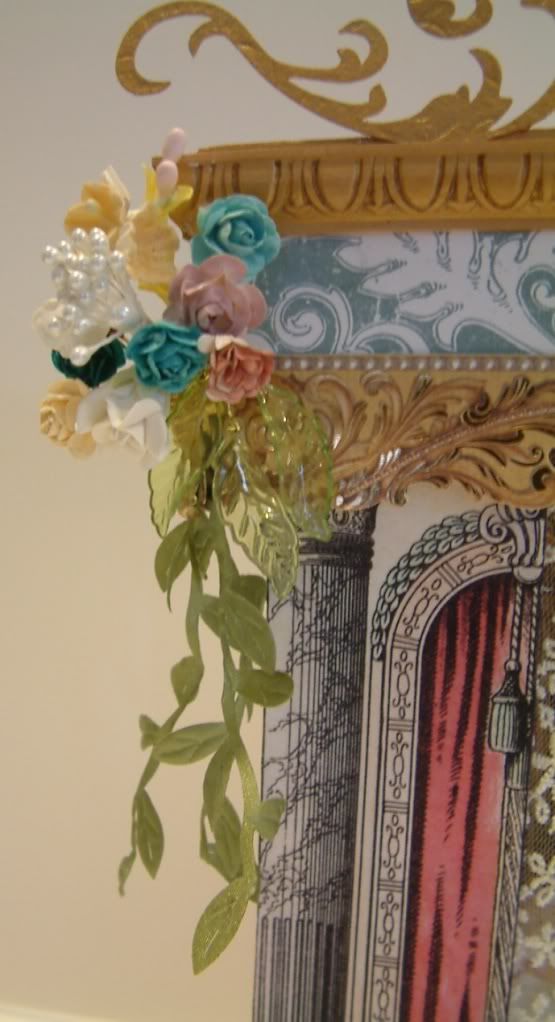
I used box feet on the corners to hold the sprays of hanging flowers.

Thursday, March 1, 2012

French Kiss ATC Designed For Alpha Stamps

 
In addition to designing the Vintage French Painter’s Canvas Book for Alpha Stamps, I also designed this ATC using the French Kiss 6 x 6 paper pack.  I thought you might enjoy going through my design process step by step. 
I started by covering an ATC sized piece of chipboard with the burgundy paper from the collection.  Next, with a pencil, I drew an oval the size of the frame I intended to use.  This oval acts as a guide for paper placement in future steps.
Then next step involves tearing small pieces of paper from various paper patterns in the collection.  Using a small sponge I inked the edges of the torn pieces.
I glued the torn paper pieces to edges of the ATC using the oval as my guide.  Note, at the top of the ATC I glued the paper slightly over the oval line.  You’ll see why in a further step.
Next, I trimmed the excess paper along the edges of the ATC.
I used a gold German scrap frame that I painted black with Ranger Alcohol ink to frame the image.  Note how you can see the paper at the top, peeking out under the frame.  Now can see why I glued the paper over the pencil oval guide.  I next added some torn pieces on top of the frame.
I added the Eiffel Tower that came from the Paris Collage Sheet. .  To give it a more vintage feel, I tore the image rather than cutting it.  In the bottom right corner I added a piece of cheese cloth.  I first the cloth by lightly sponging it with the same ink I used to ink the edges of the paper.
To balance the black in the frame I added a few black rub-ons at various points on the ATC.  Next, I started adding dimensional embellishments.  In the bottom right corner I glued a clock button to a piece of filigree.
To the bottom right corner I added a sprig of brass leaves, fabric leaves and a beaded flower.  To balance the weight of the items in the right bottom corner, I added embellishments to the upper left corner with a silk ribbon bow and a brass fleur de lys with a burgundy Swarovski crystal.  To attach the ends of the ribbon to the ATC I used miniature glue dots.
As a final touch I added a few flowers to the bottom right corner in colors that complemented the papers.  Note how the weight of the embellishments is heaver on the bottom right than on the upper left.   Without the embellishment at the top the bottom would feel too heavy.  With equal embellishment at both ends the focal point (the image) would be overwhelmed.  Also note the vertical line the tower creates contrasted by the oval of the frame.
The paper tearing technique is a great way to use leftover scraps of paper.  You can scale this technique up and use it for a greeting card, a scrapbook page or other piece of art. 
List of Alpha Stamp Supplies I used in the ATC
Alpha Stamps has created a French Kiss ATC kit which includes some of the supplies I used for this ATC and other items that complement French Kiss paper pack.