
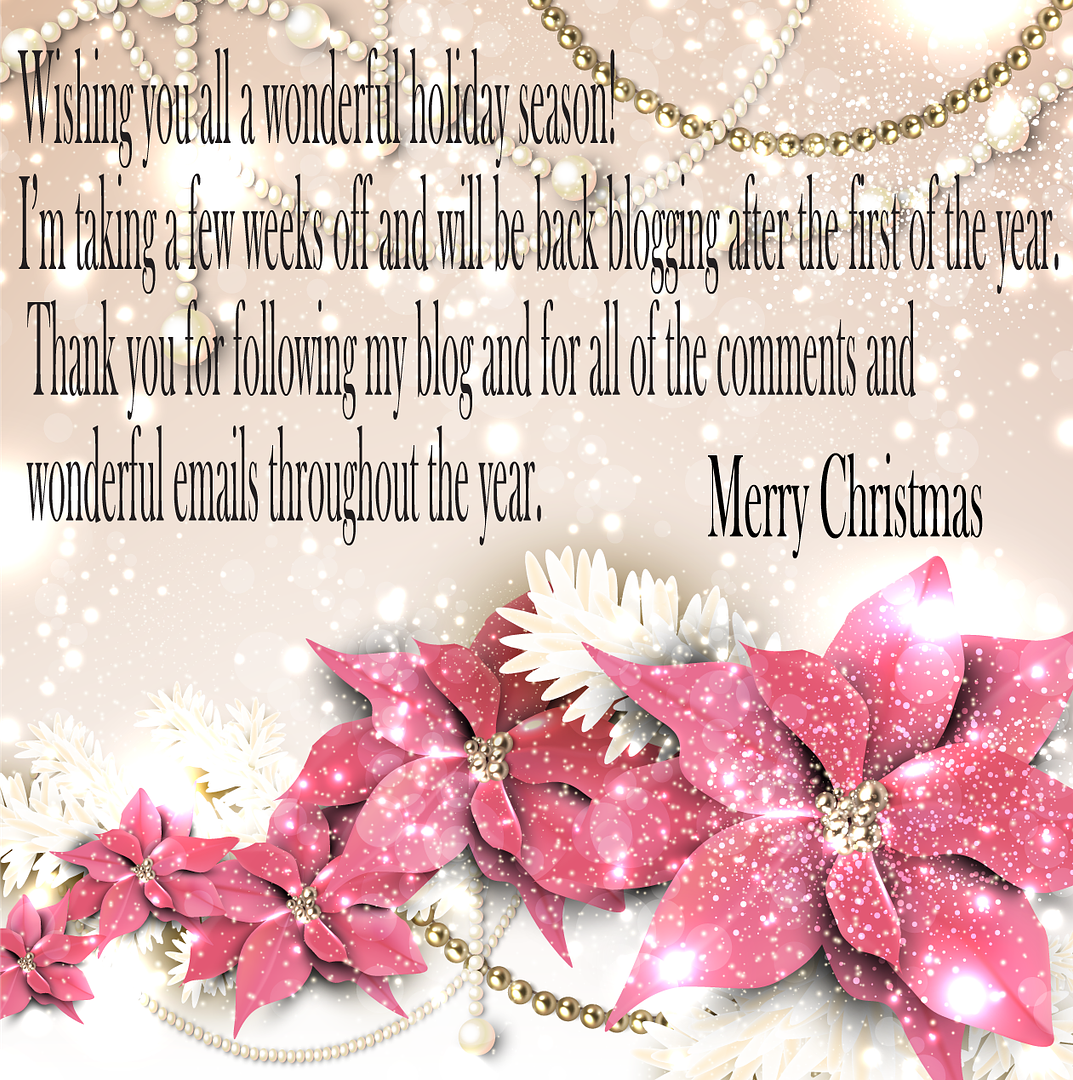

Wednesday, December 11, 2013

Saturday, December 7, 2013
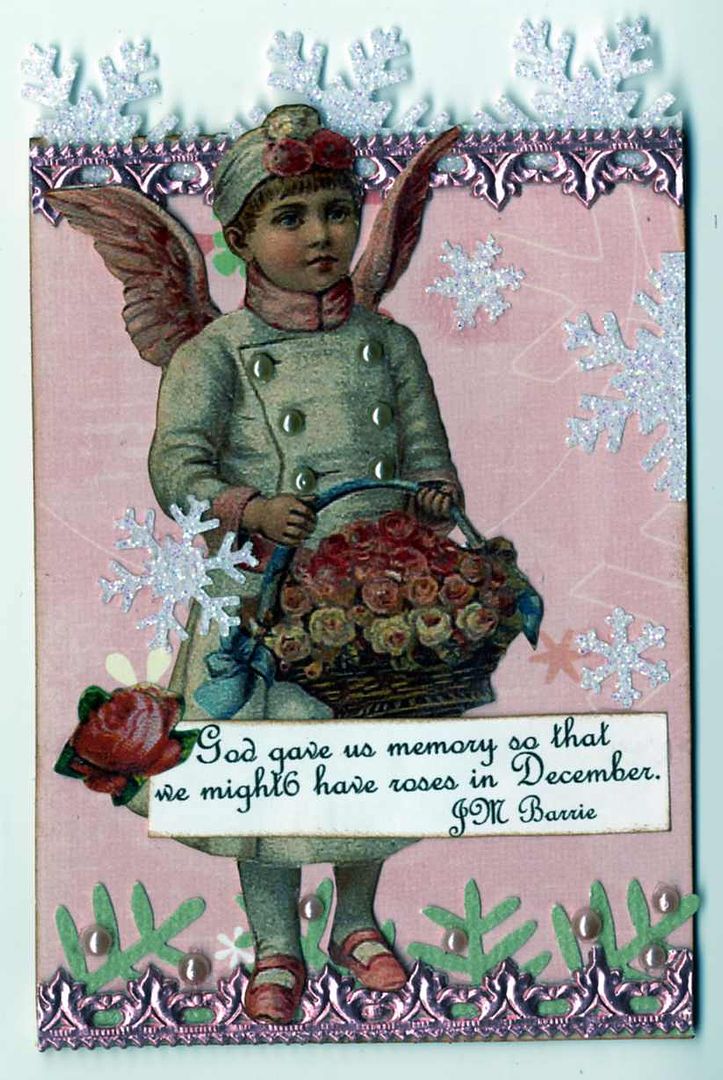
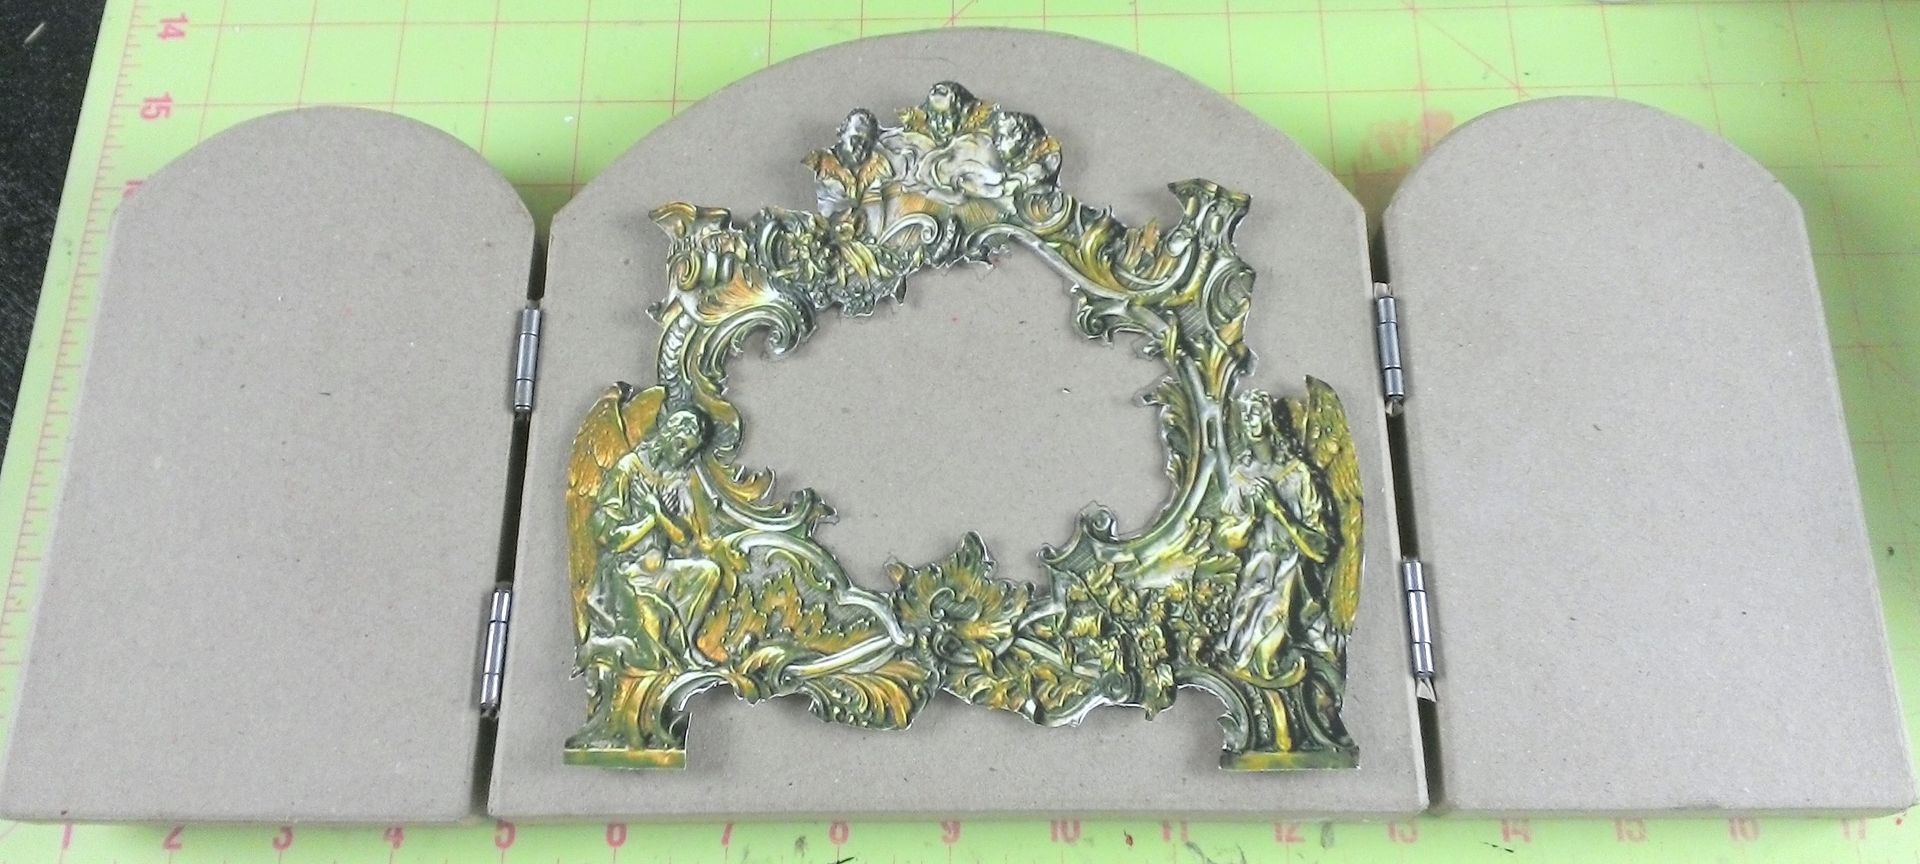
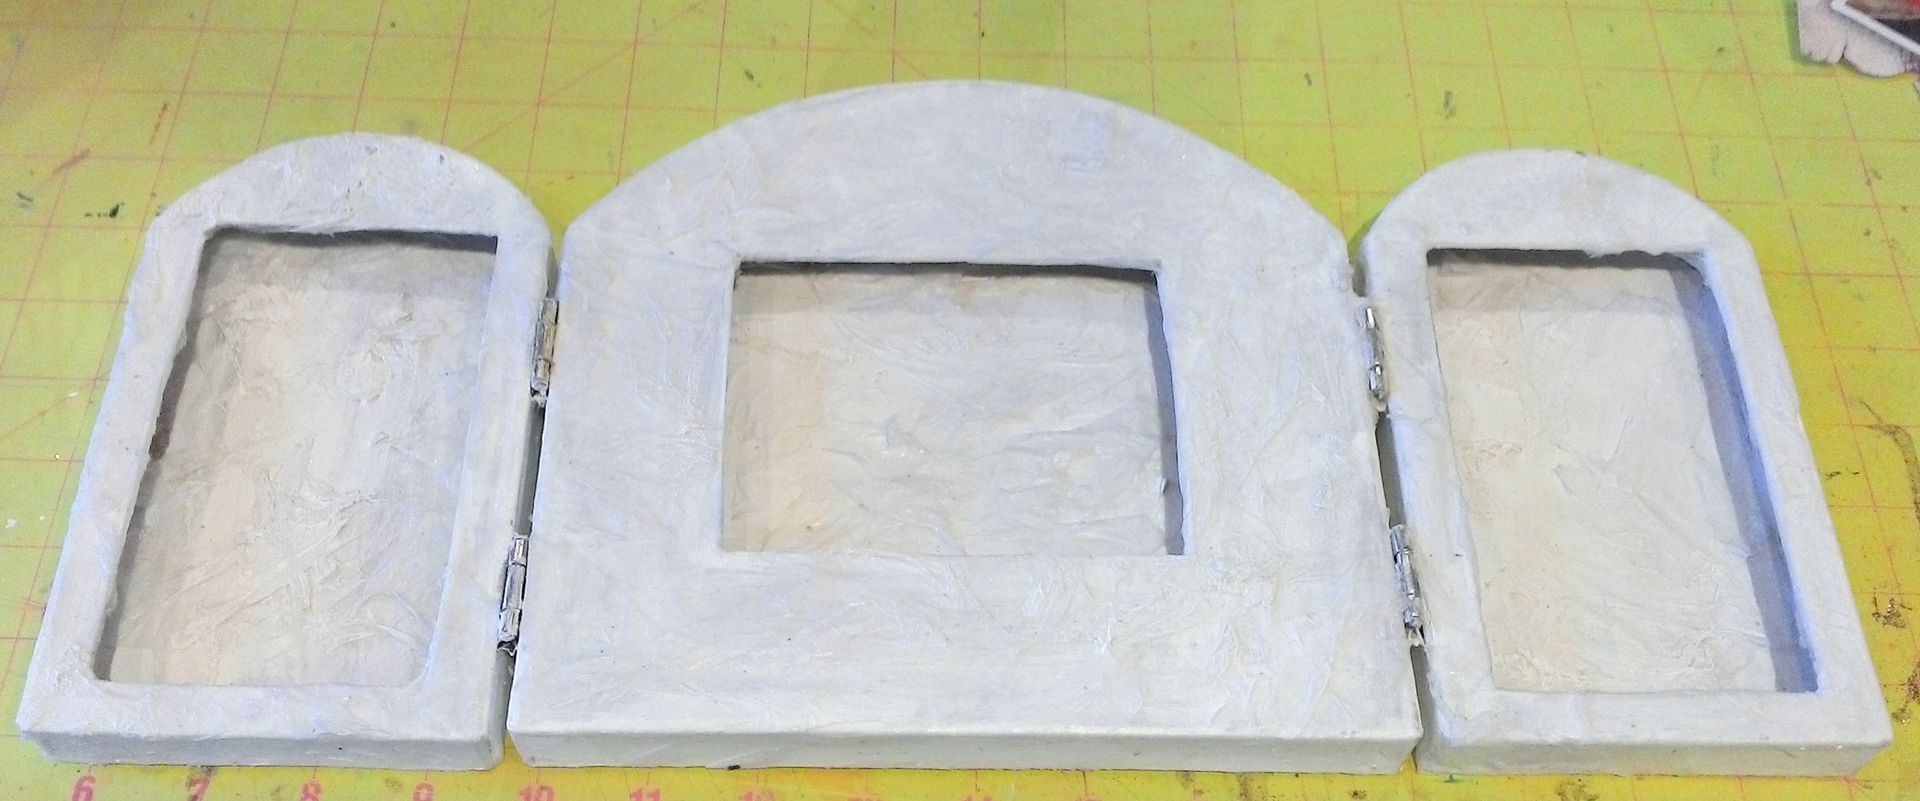
Angel Shrine & Tutorial
My
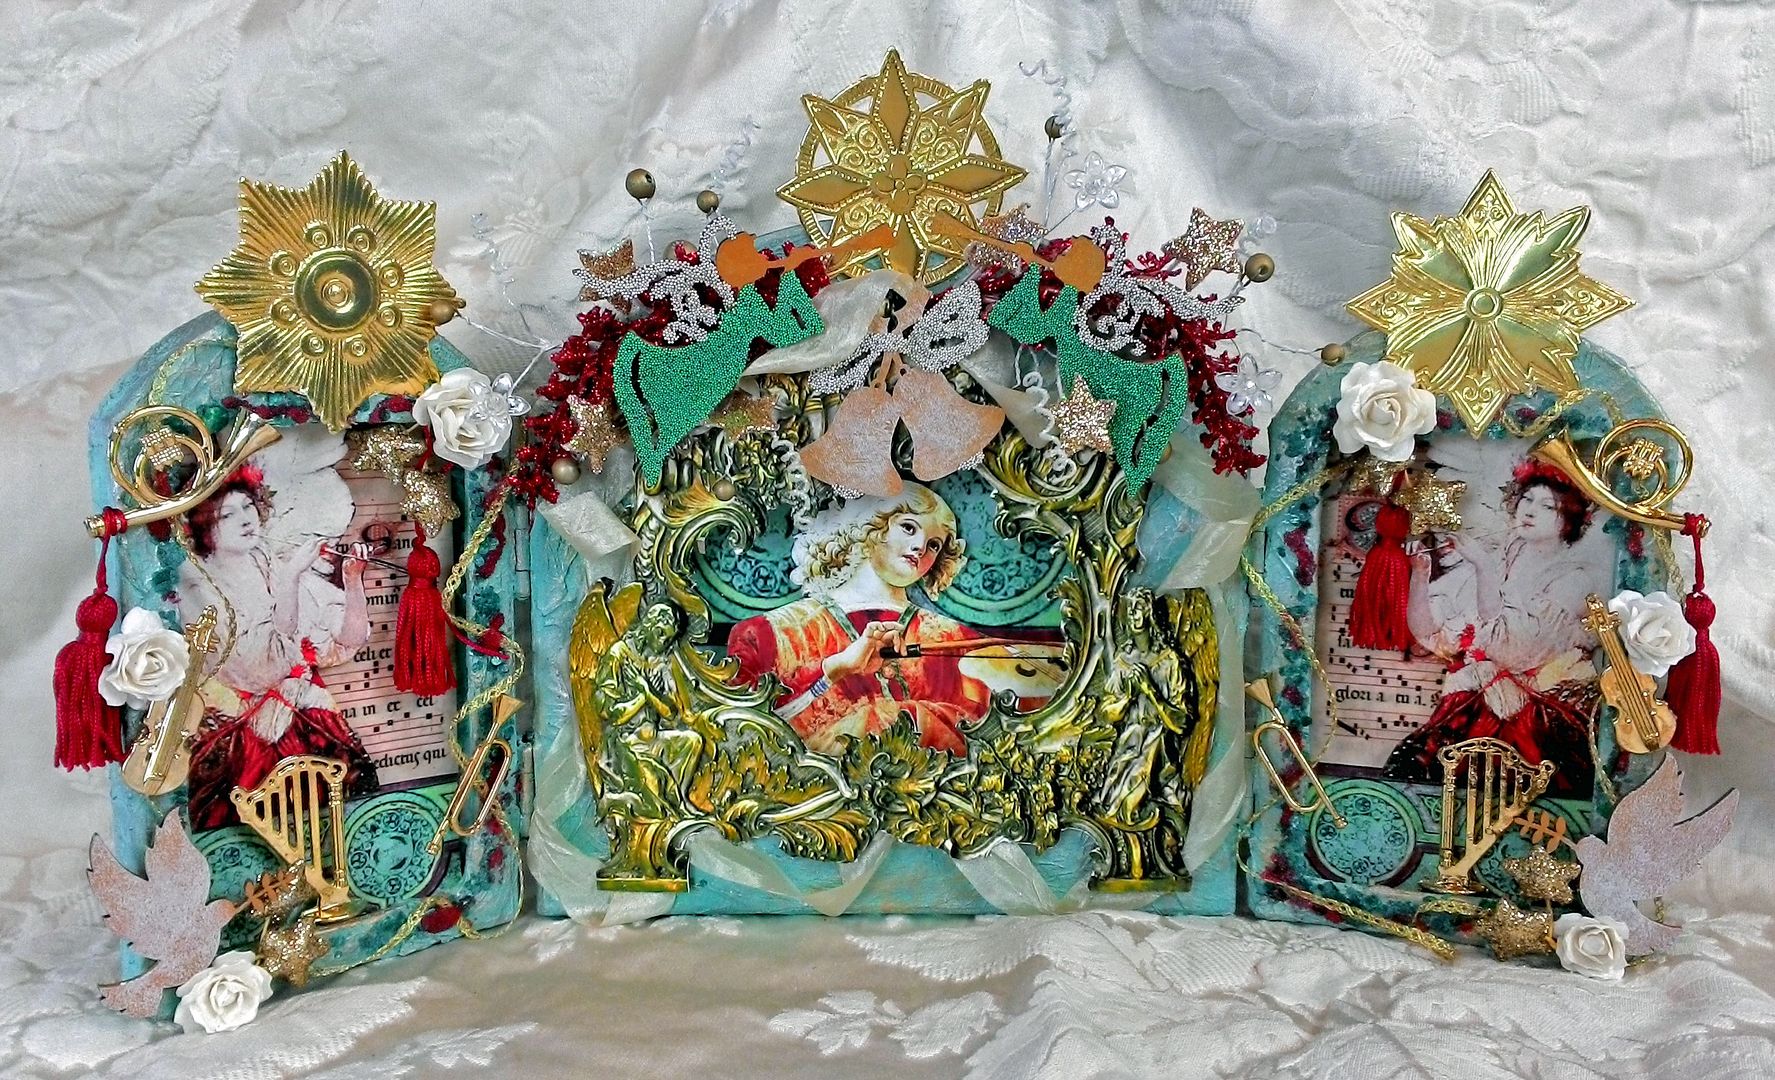
final Christmas project for you is an Angel Shrine. Angels are one of my favorite art subjects. The Paper
Mache Cathedral I used for the piece is approximately 8” tall by 14 ½” wide. It’s ¾” thick which makes perfect for cutting
niches.
 The
shrine comes already hinged and the large size means there is
lots of room for all kinds of embellishments!
The
shrine comes already hinged and the large size means there is
lots of room for all kinds of embellishments!
TUTORIAL
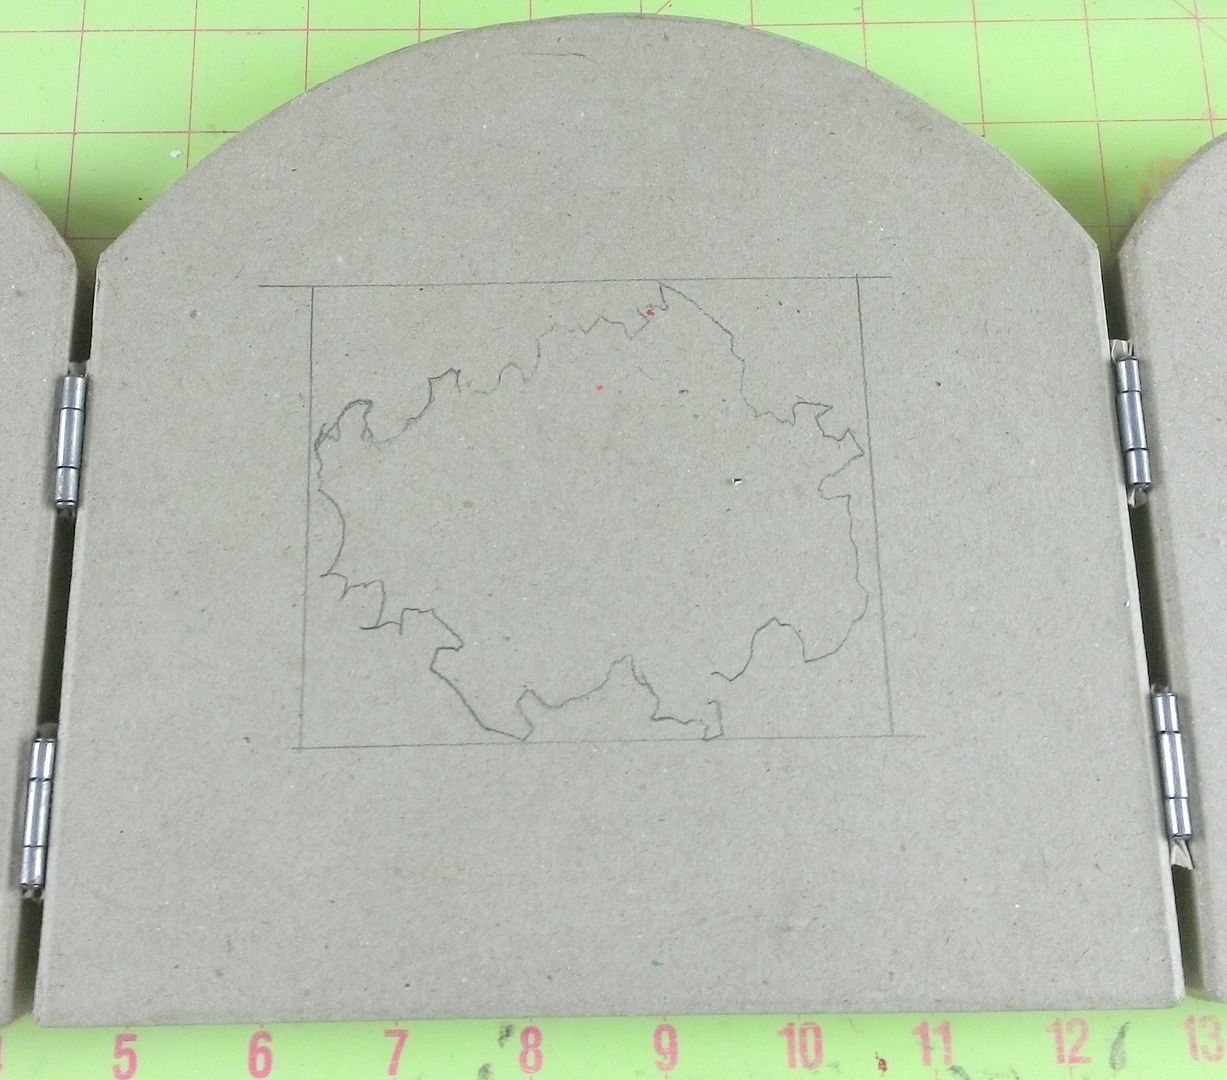
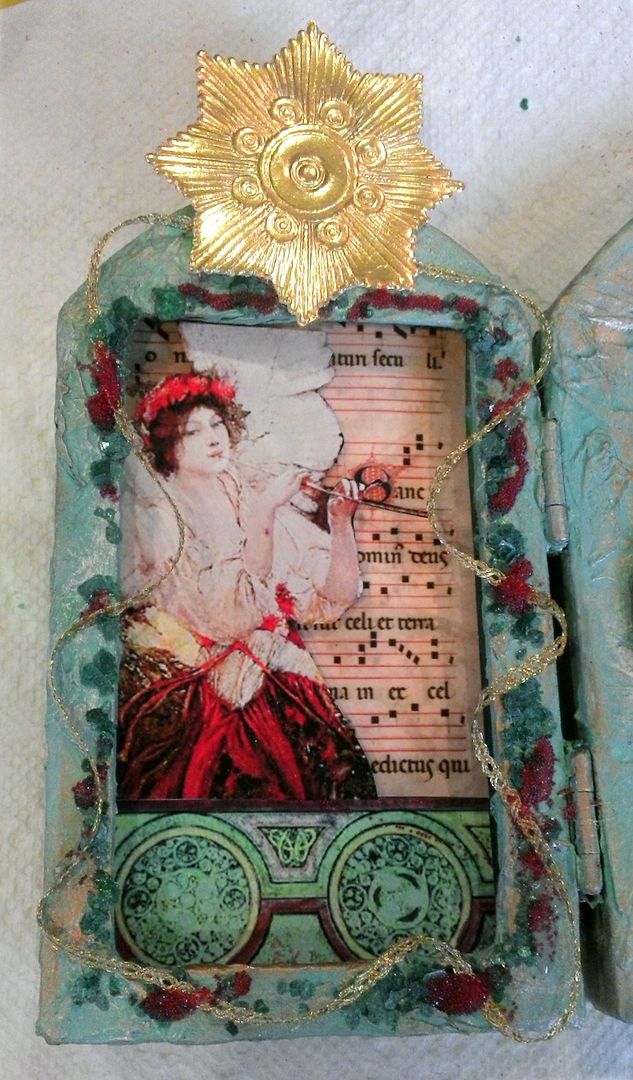
I
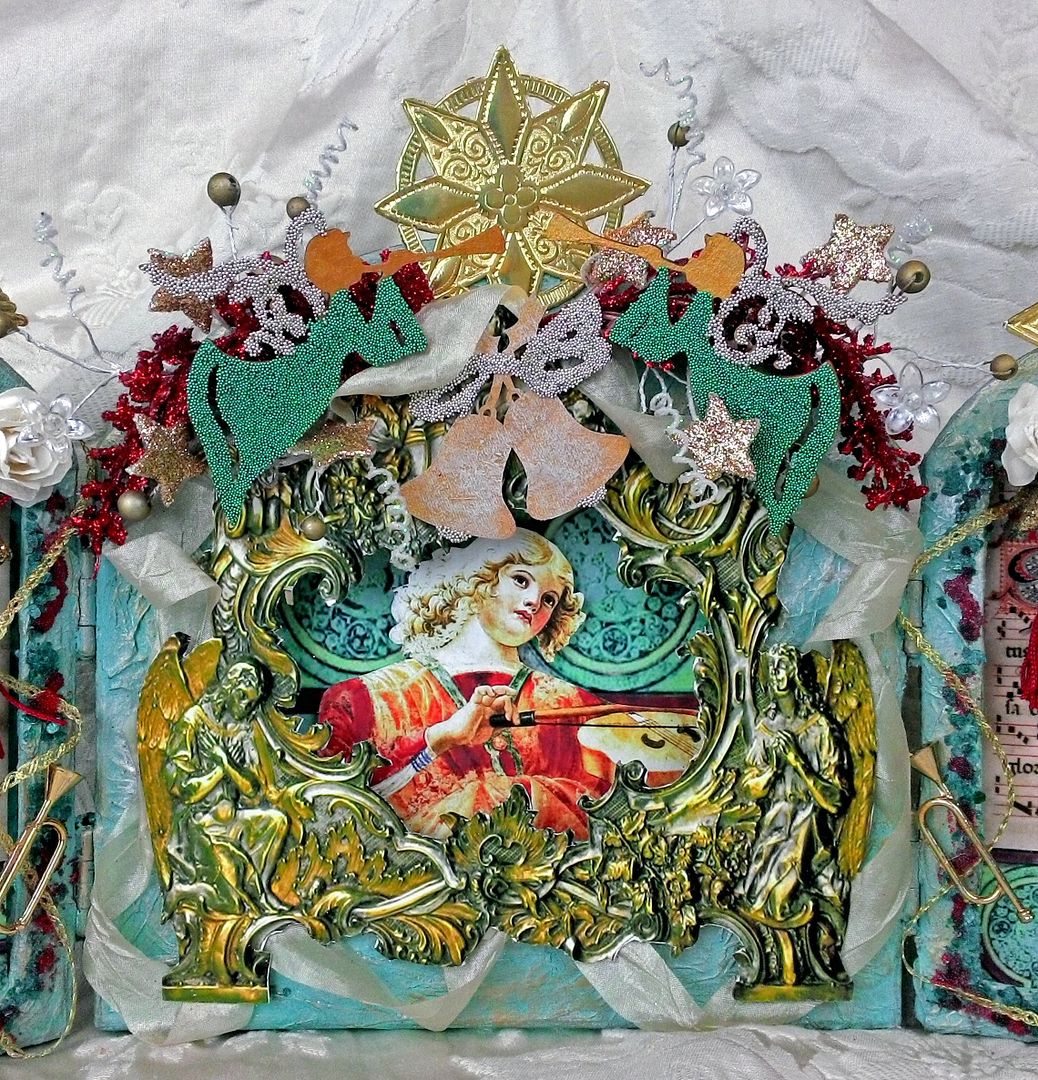
decided to showcase the center section by using one of the frames from my Vintage Frames Digital Image set.
After
sizing, printing and backing the frame with cardstock I placed it on the shrine
and traced the center section. I used
the trace marks to determine where to cut the hole.
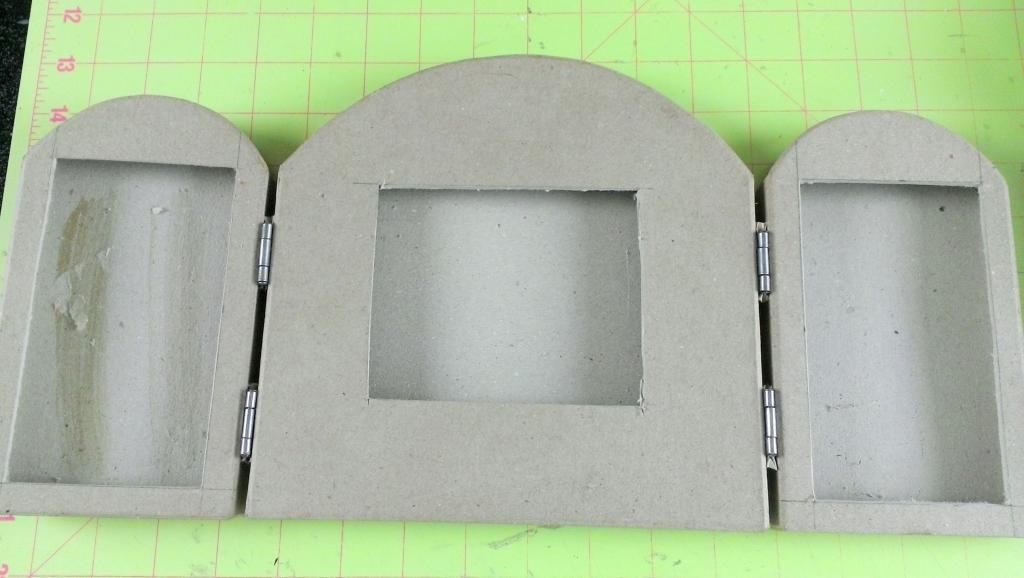
Next, I
cut holes in the sides and the center.
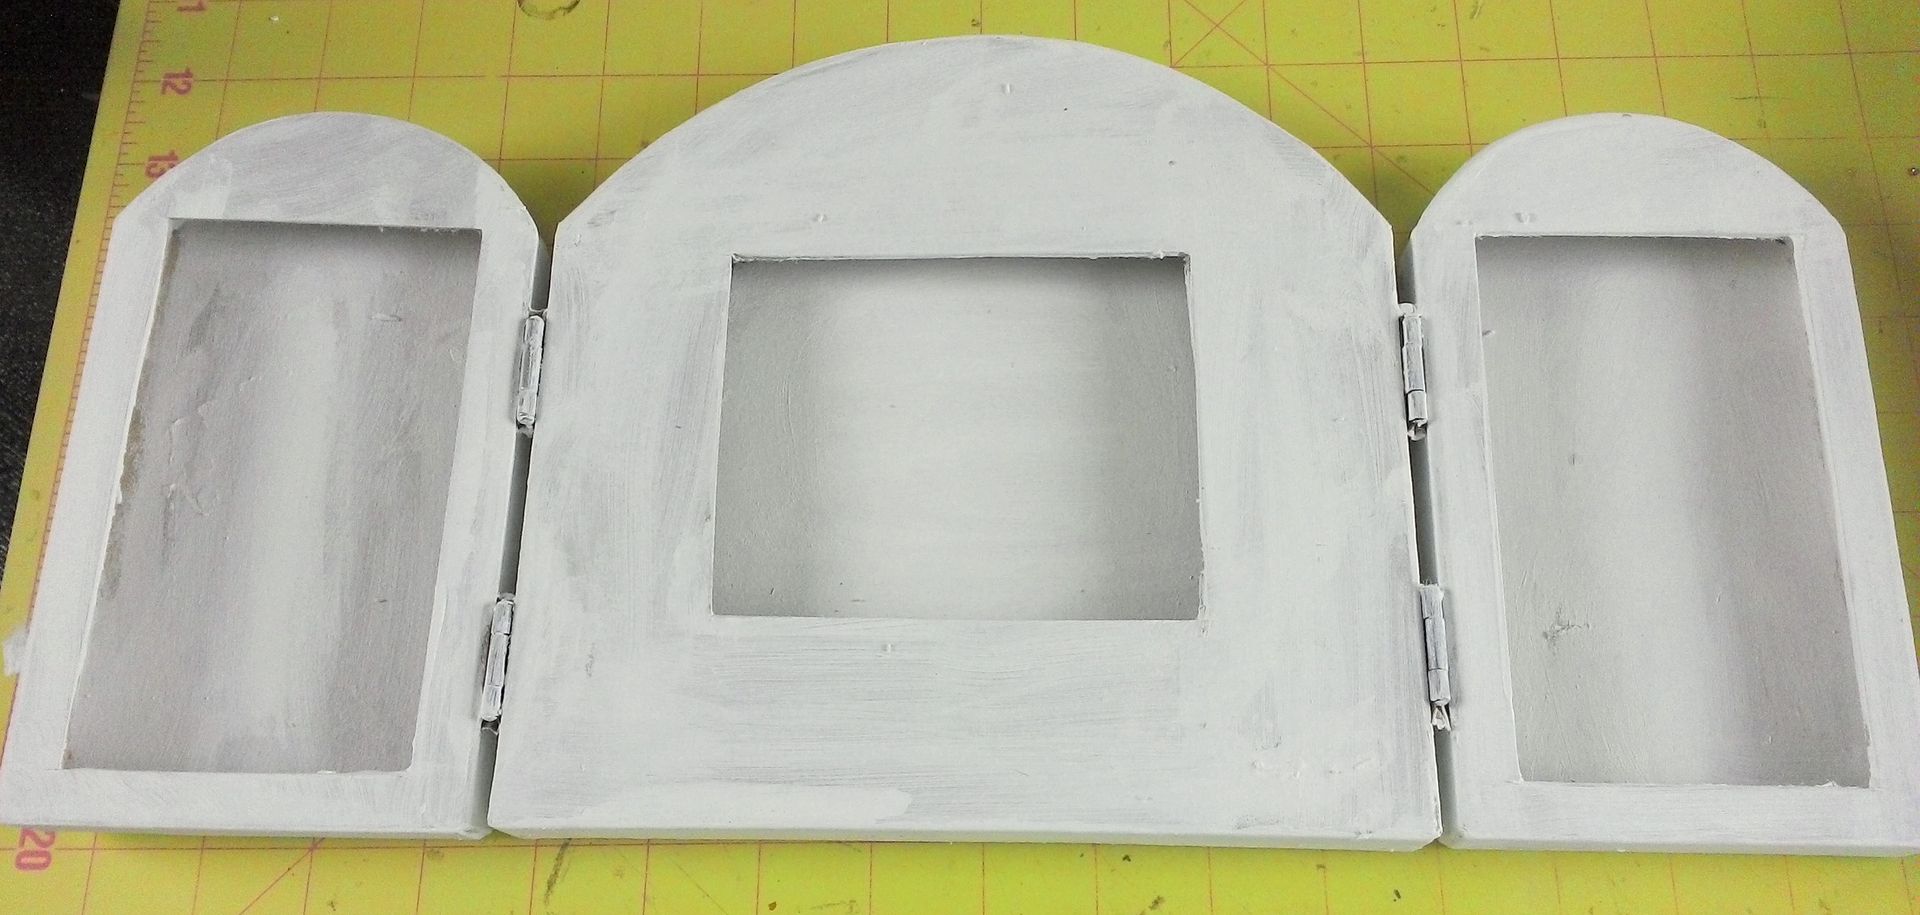
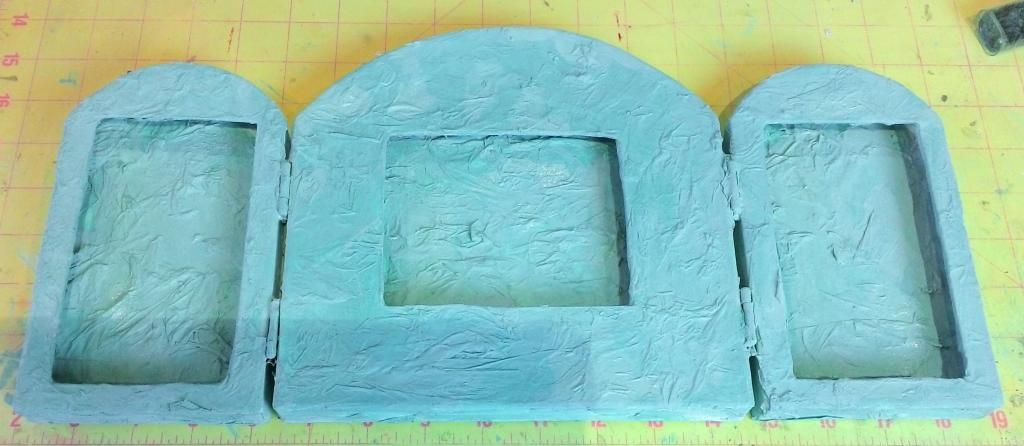
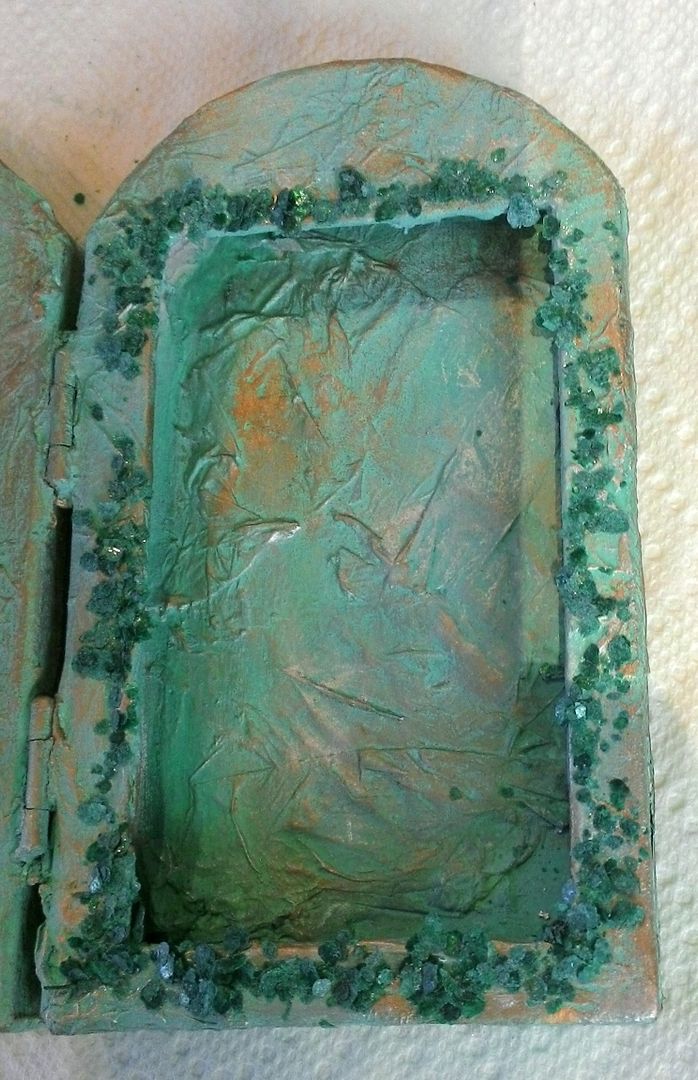
At this
point, I knew I wanted to use a tissue paper technique to add texture to the
shrine. I had not decided on how to color the shrine so I started by painting
everything white. By painting it white,
I blocked out all of the colors of the paper Mache so that whatever coloring product
I choose, it would not be altered by the color of the paper Mache underneath.
Next, I
applied crumpled and torn tissue paper to all the surfaces of the shrine using
Mod Podge. Just as with the color, I
hadn’t decided what parts of the shrine would be covered with paper and what
parts wouldn't, so I textured all of the areas.
It’s so much harder to go back and texture something later if you change
your mind.
To
color the shrine, I first started with Patina Gilder’s Paste. Since I was covering such a large area I thinned
the paste with Mineral Spirits and then applied it to the shrine. I chose Patina Gilder’s Paste as opposed to
paint as it was the perfect color to complement the images.
Next,
while wearing a plastic glove, I used my fingers to apply Silver Gilder’s Paste
(without thinning) to the raised areas.
This gives the shrine metallic highlights.

Finally,
I repeated the process with Inca Gold Gilder’s Paste.
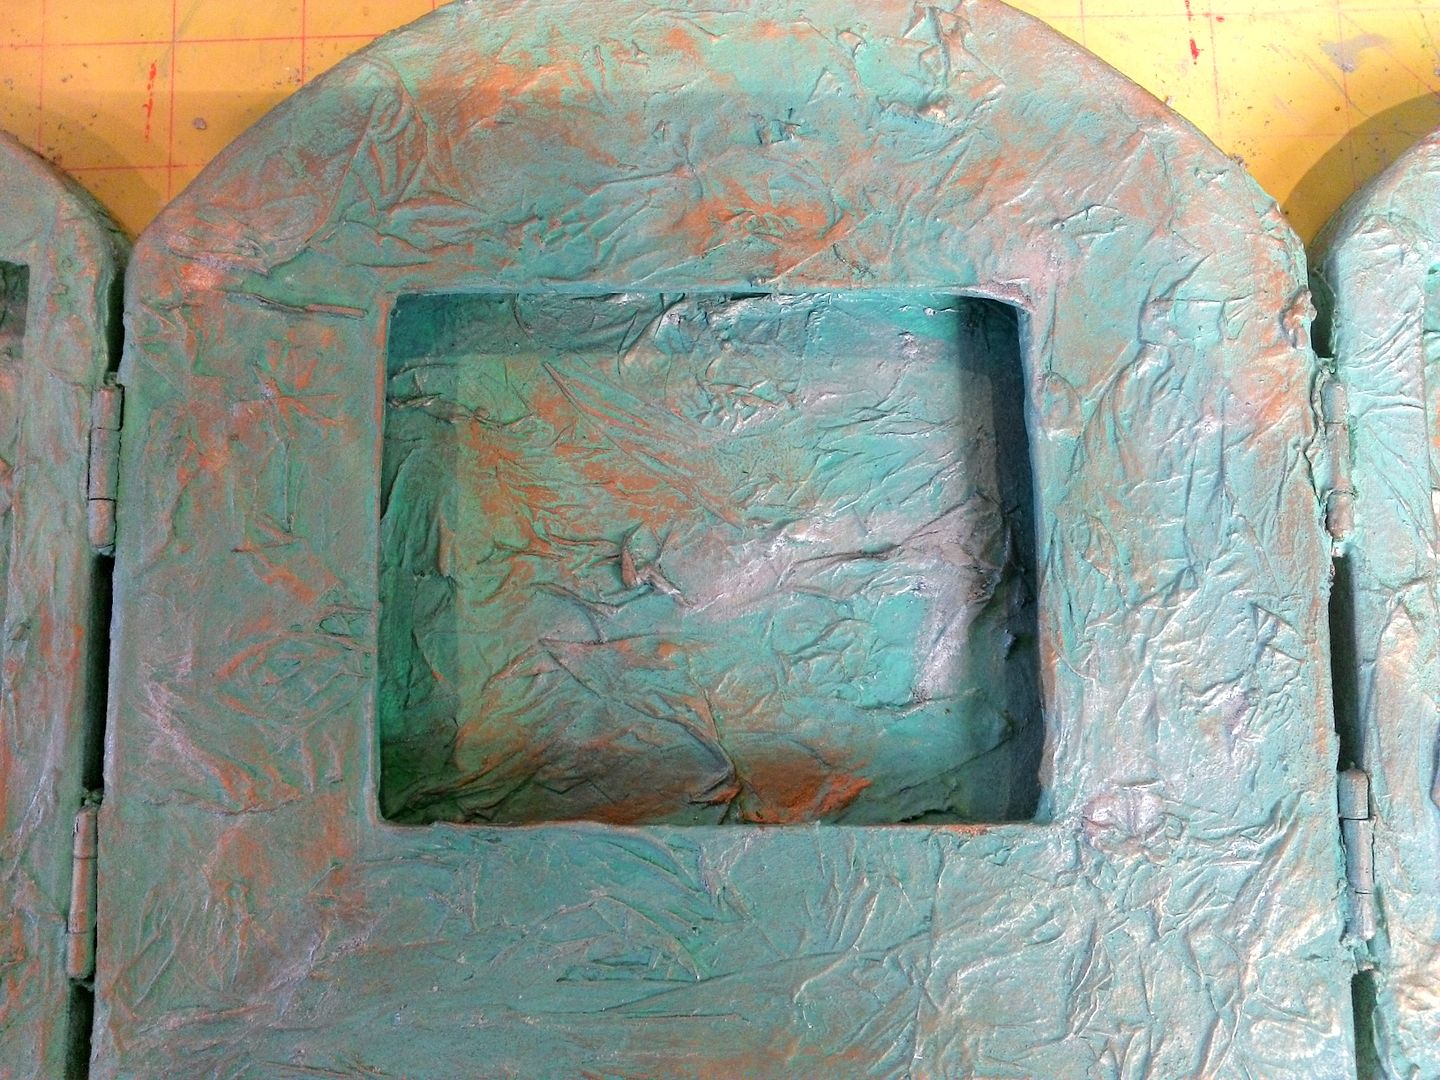
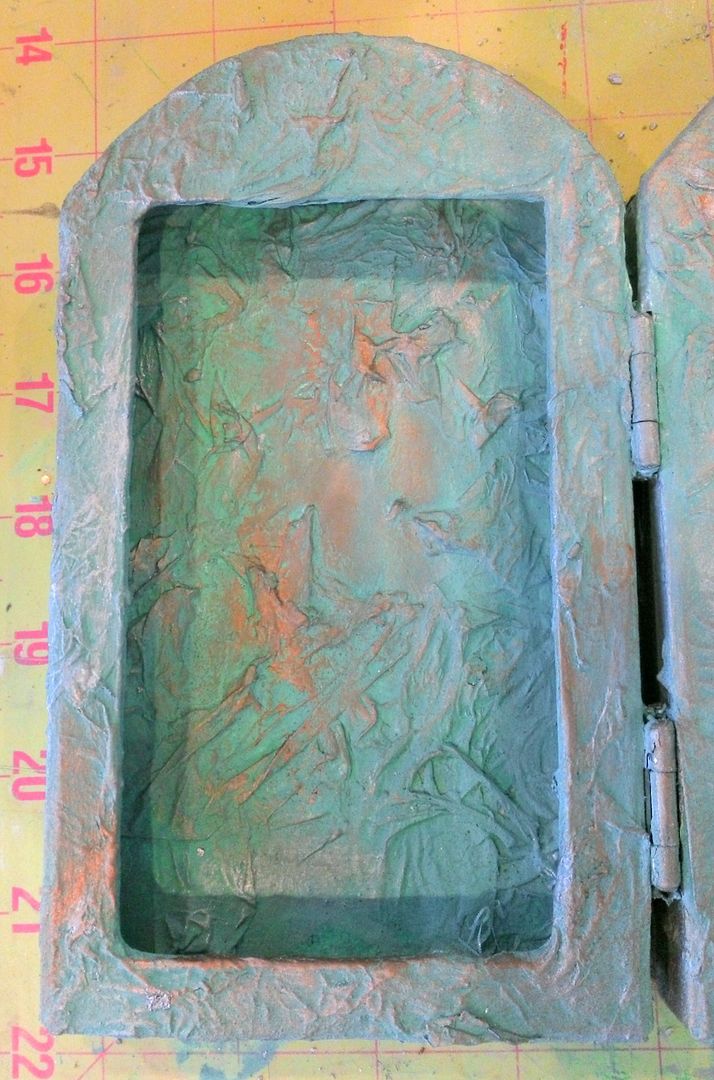
To add
more texture, color and to create a frame effect, I attached teal mica using Glossy Accents.
To
continue the frame effect, I added red microbeads and gold ribbon. I attached the images inside the niches with
foam core tape to pop up each image and create more dimension.
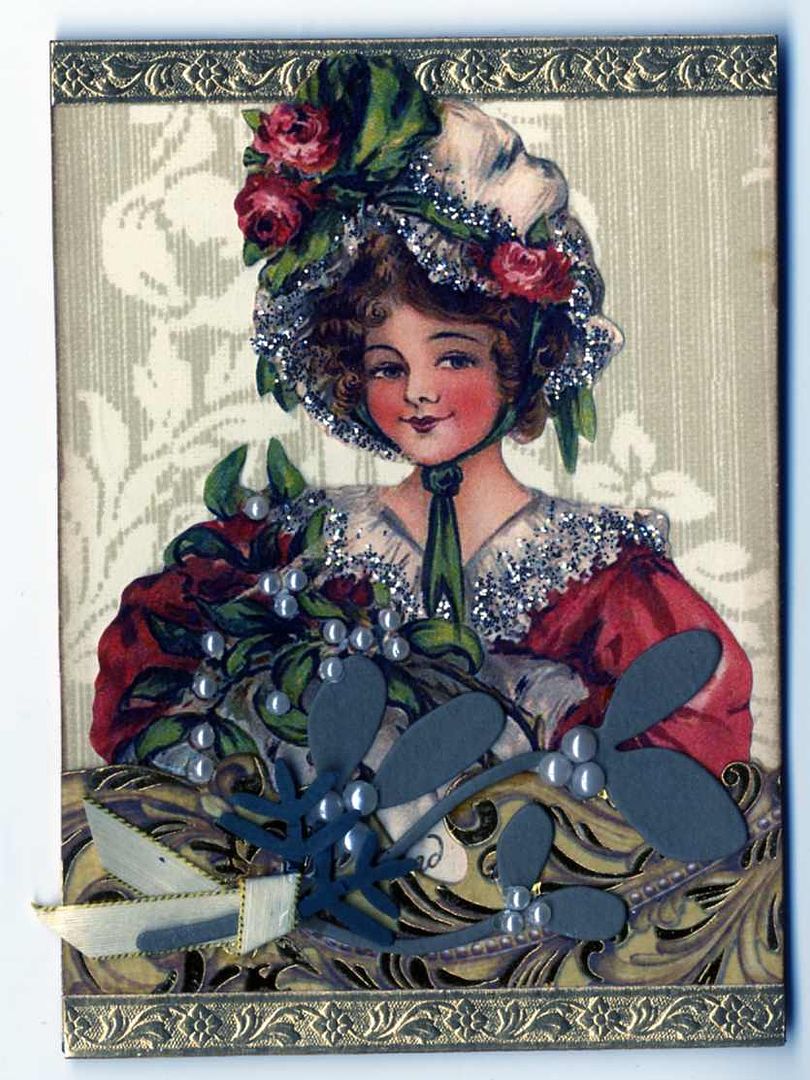
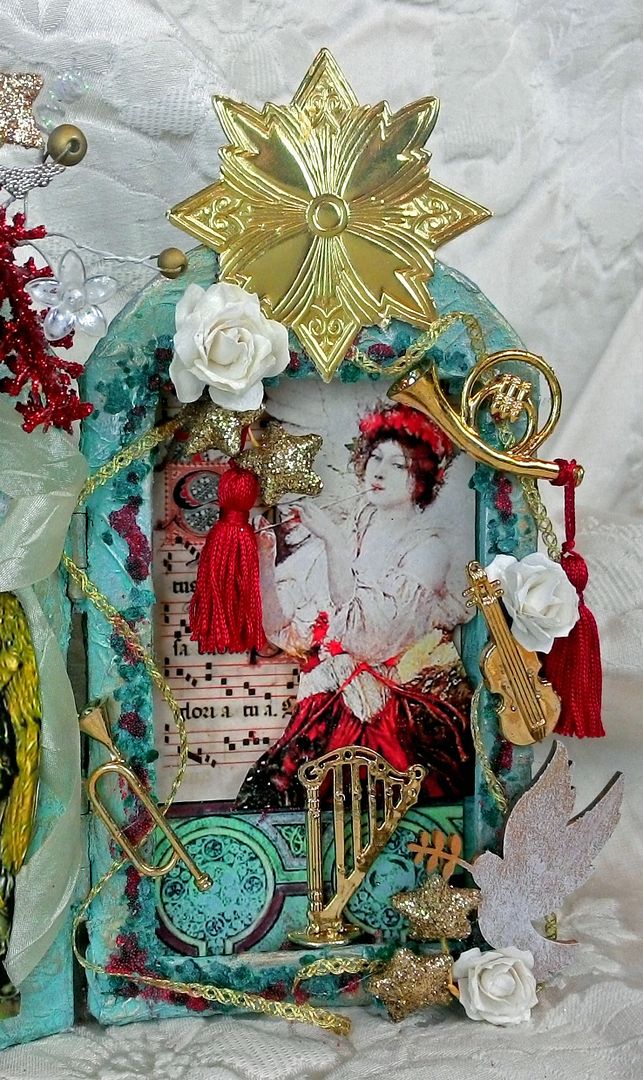
Each of
the side sections are decorated the same with instruments,
roses, tassels,
a die-cut
dove and gold
stars. The die-cut dove is painted
gold and then brushed with white Gilder’s Paste. I attached all of the embellishments using E6000 glue.
In the
center section, the images inside the niche are attached with foam core tape to
pop them up. I also attached the frame
with foam core tape to give it depth. At
the top are star
wired sprays and red
glittered sprays along with die-cut
angels and a bell. The angels and the bell were first painted
gold then silver microbeads were added.
I also added teal microbeads to the angels. I brushed white Gilders paste onto the bell just
as I did with the doves.
Wednesday, December 4, 2013
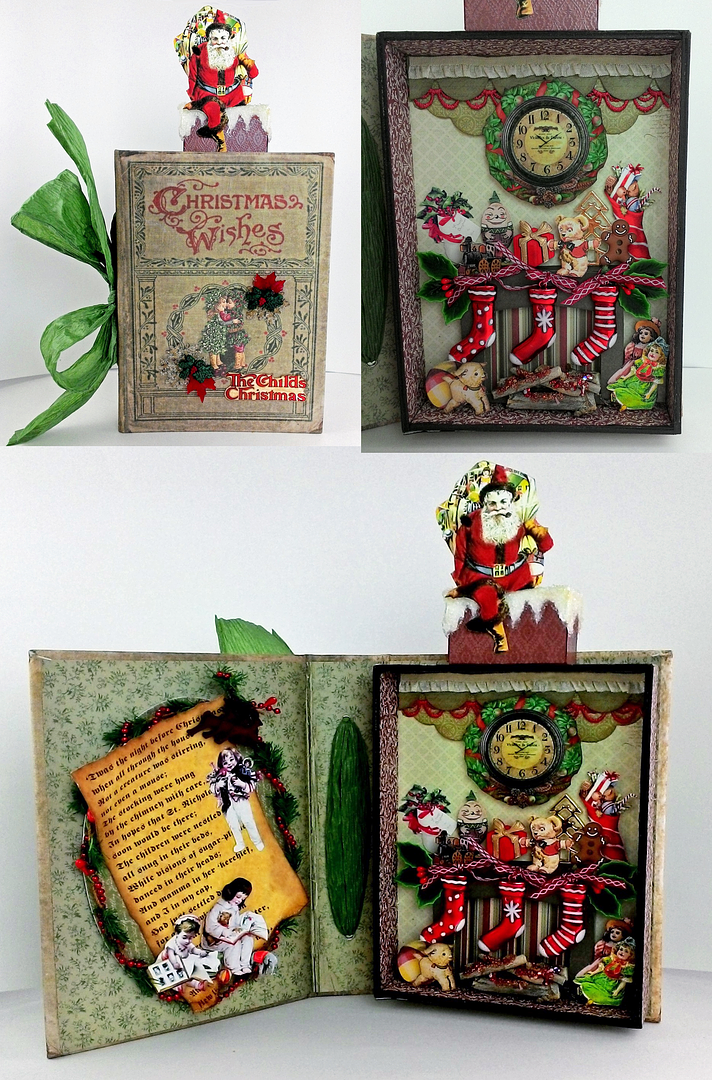
Christmas Wishes Shadow Box Book with Tutorial
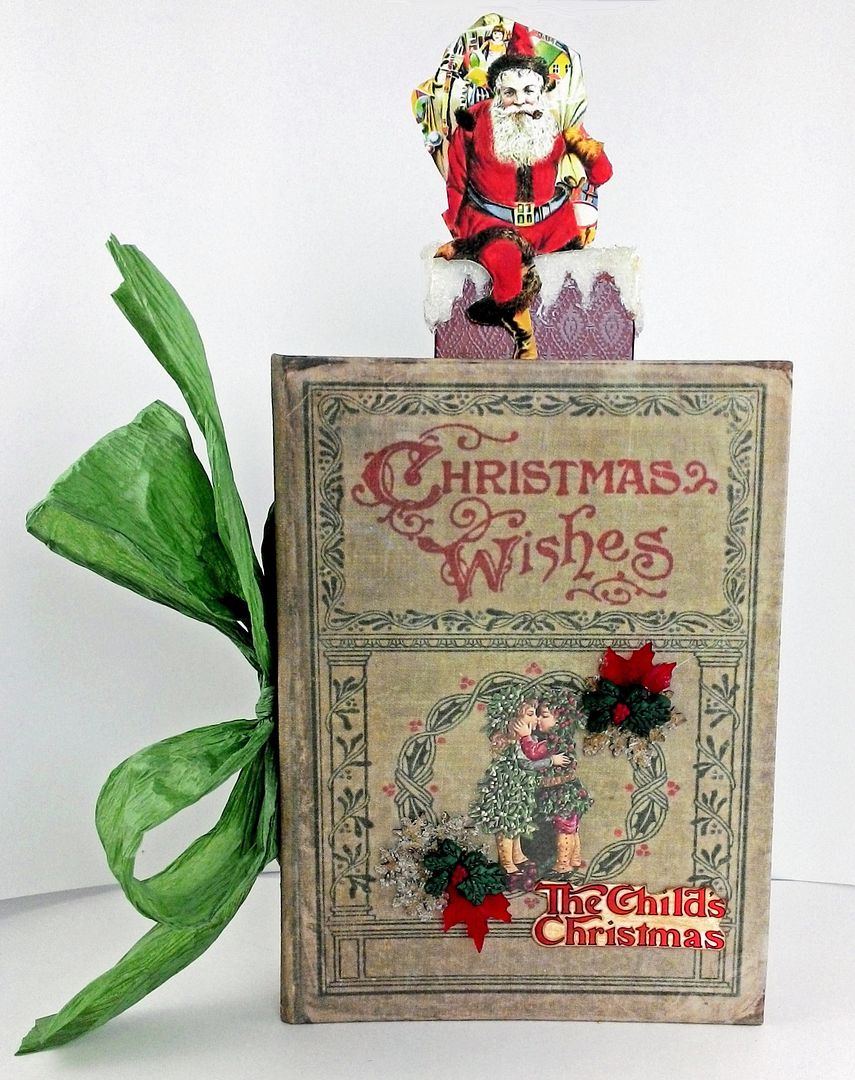
In this
piece, Santa’s just been down the chimney delivering toys to all the little
girls and boys. As soon as I saw the Tim Holtz Christmas
Wishes Worn Book Cover I knew exactly what I was going to do.
I
thought this book would make a great shadowbox book with a vintage fireplace
scene surrounded by toys from Santa.
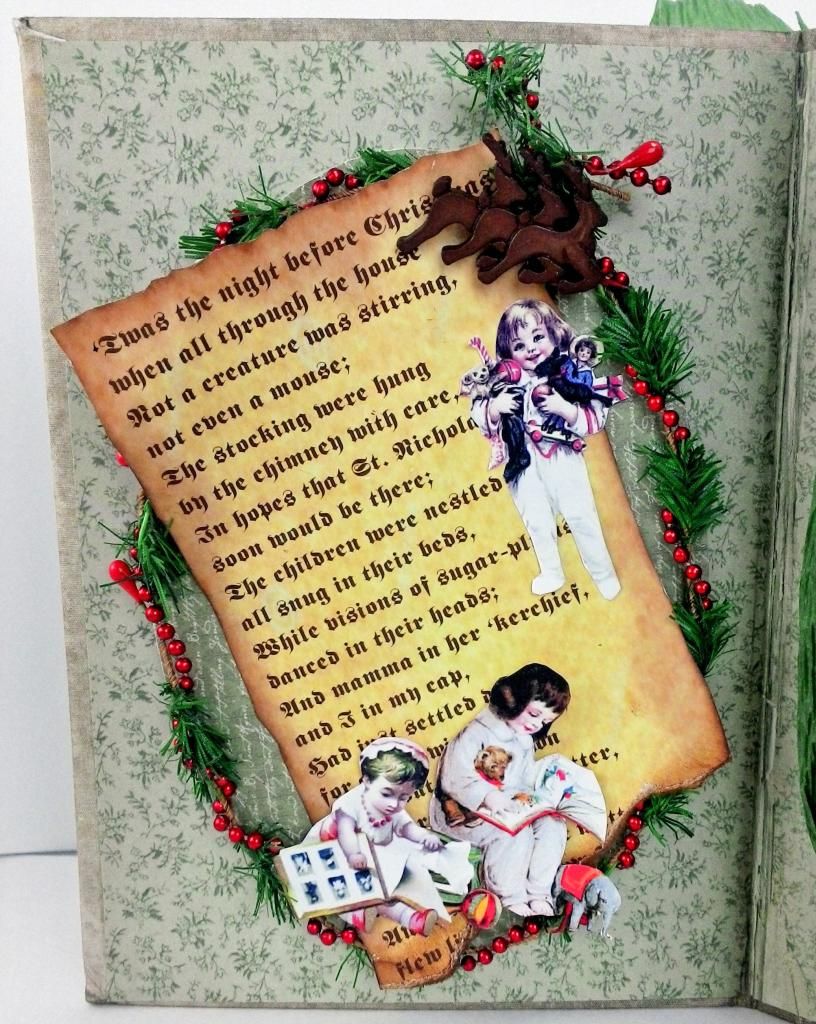
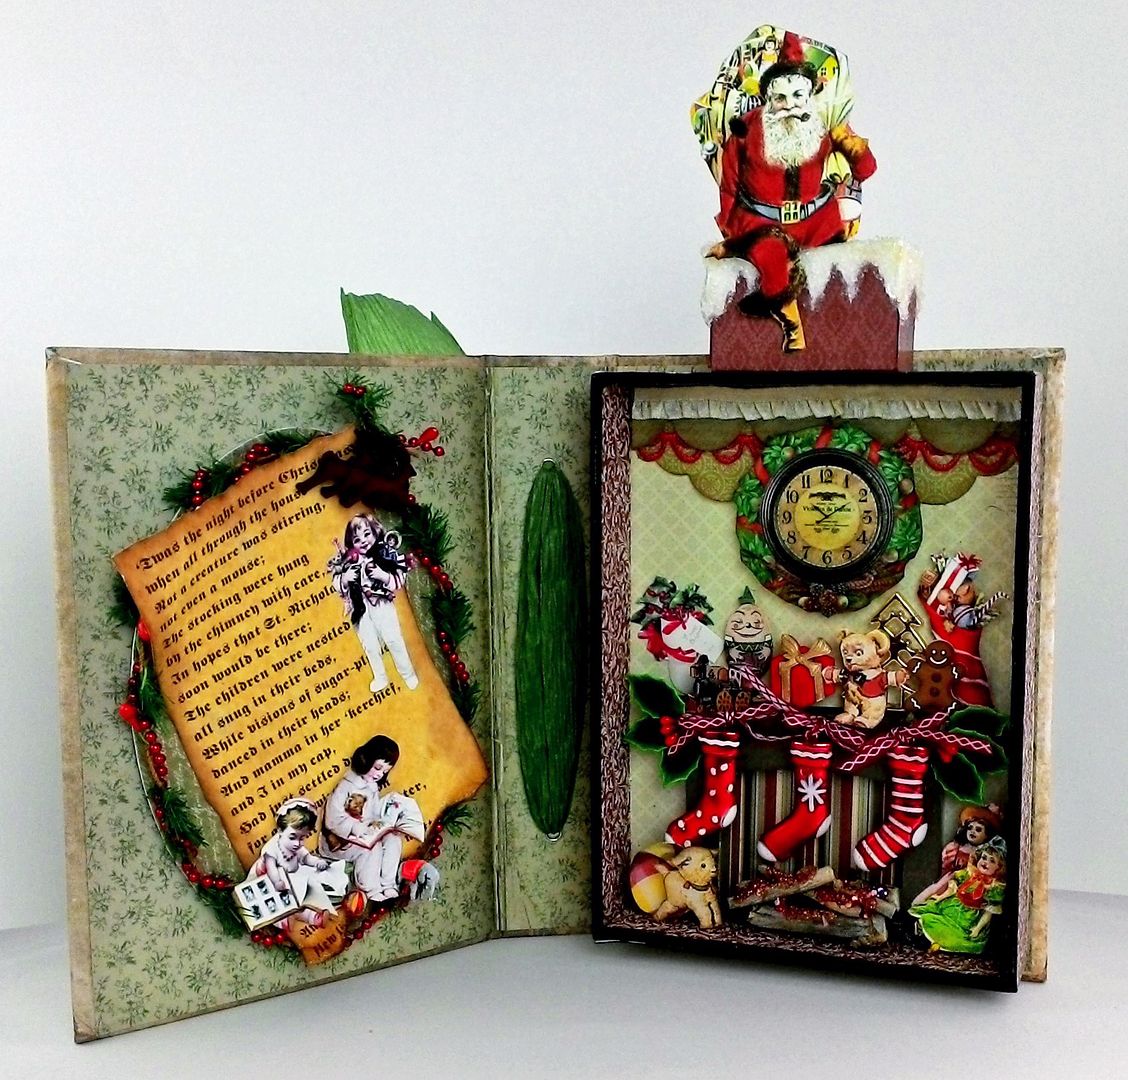
On the
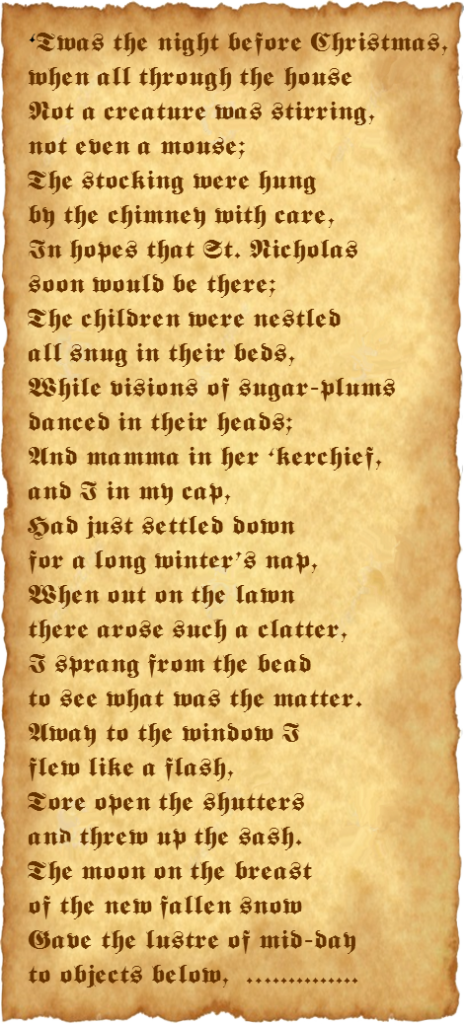
inside cover, I framed paper by braiding the mini pine and berry garland with the tiny red tree garland. The “Night Before Christmas” poem on
parchment is just something I cooked up for the project. Please feel free to download the image below
and use it in your artwork.
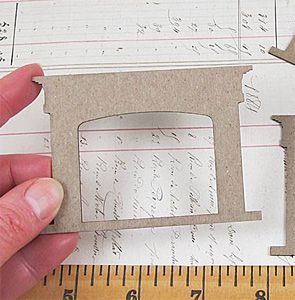
Making the Shadowbox
The
shadow box is made out of pieces of chipboard.
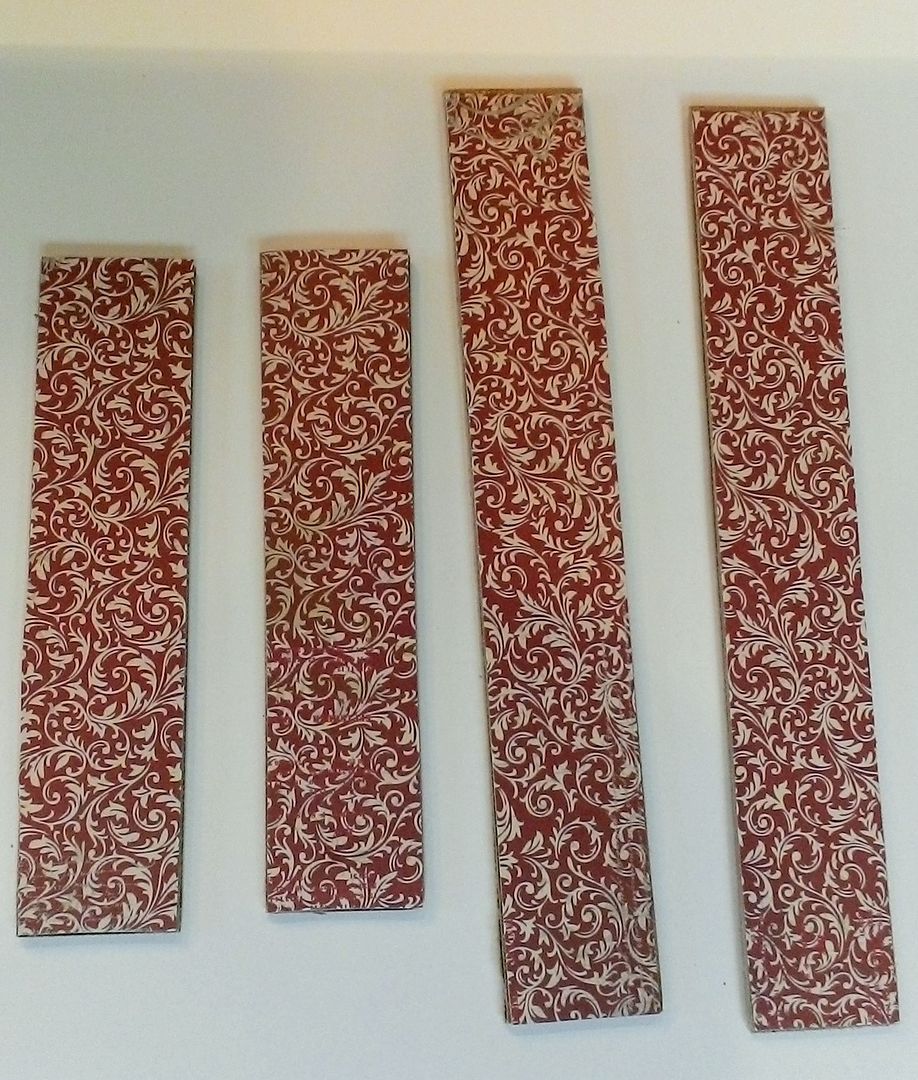
Two of the pieces measure 6 ½” by ¾” and two pieces measure 4 ¾” x
¾”. These measurements create a box that
just fits on the inside back cover of the book.
With the depth of the pieces being ¾”, it gives you room on the other
side of the cover (where the poem is) for bulkier embellishment and still
allows for closing the book. I painted
the edges of the chipboard then covered it in paper from the St. Nicholas paper pad.
Next, I
glued the pieces together and then backed the box with more paper from the
paper pad.
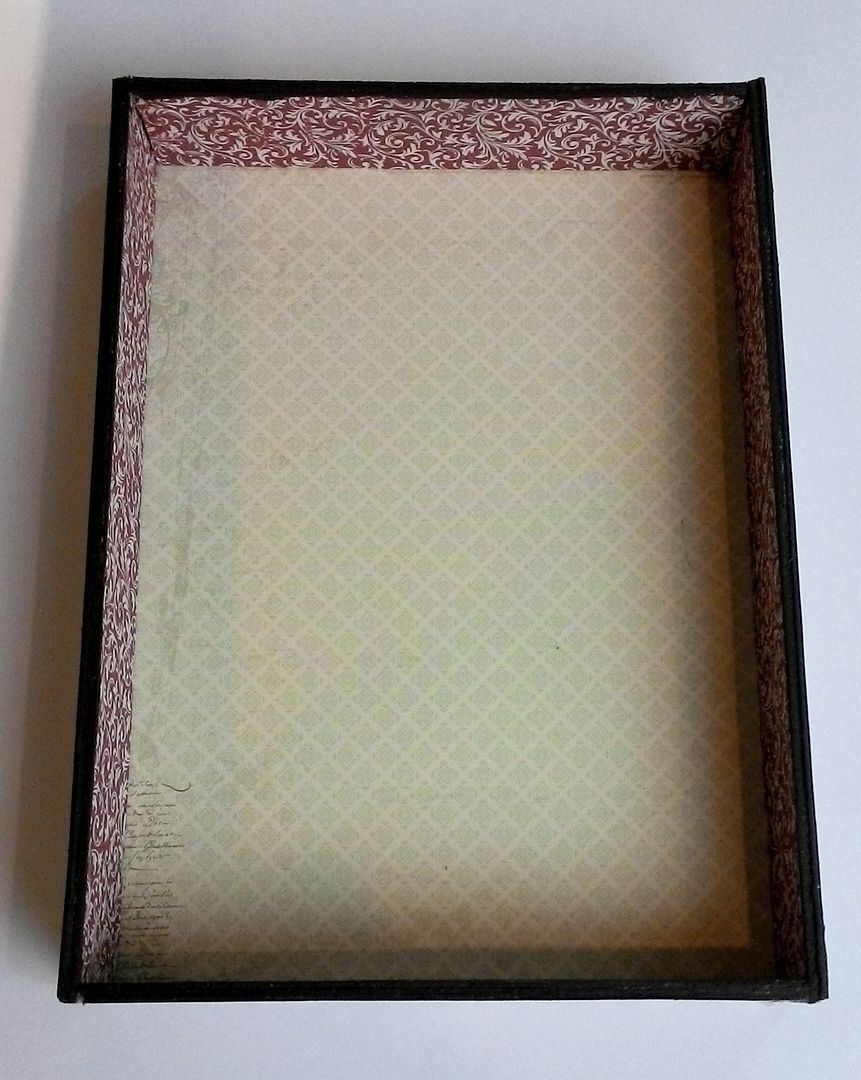
The
final step was to glue the box into the book.

The Chimney
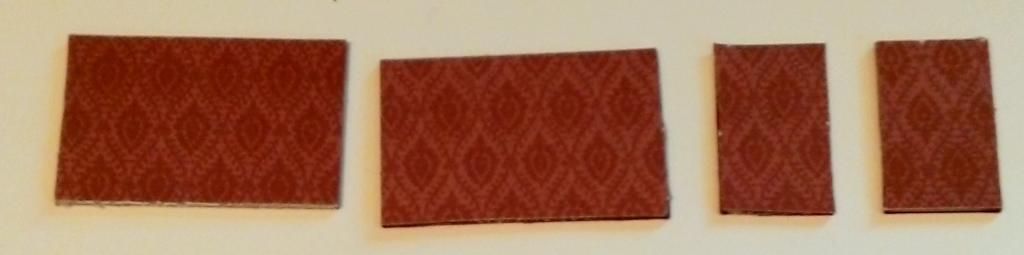
The
chimney is made from chipboard. Two of
the chipboard pieces measure 2” x 1 ¼” and two pieces measure ¾” x 1 ¼”. I inked the edges of the chipboard then
covered it with paper.
To
create the look of snow on the chimney, I first used white paint. The paint was almost dried out which made it
easier to apply it thickly.
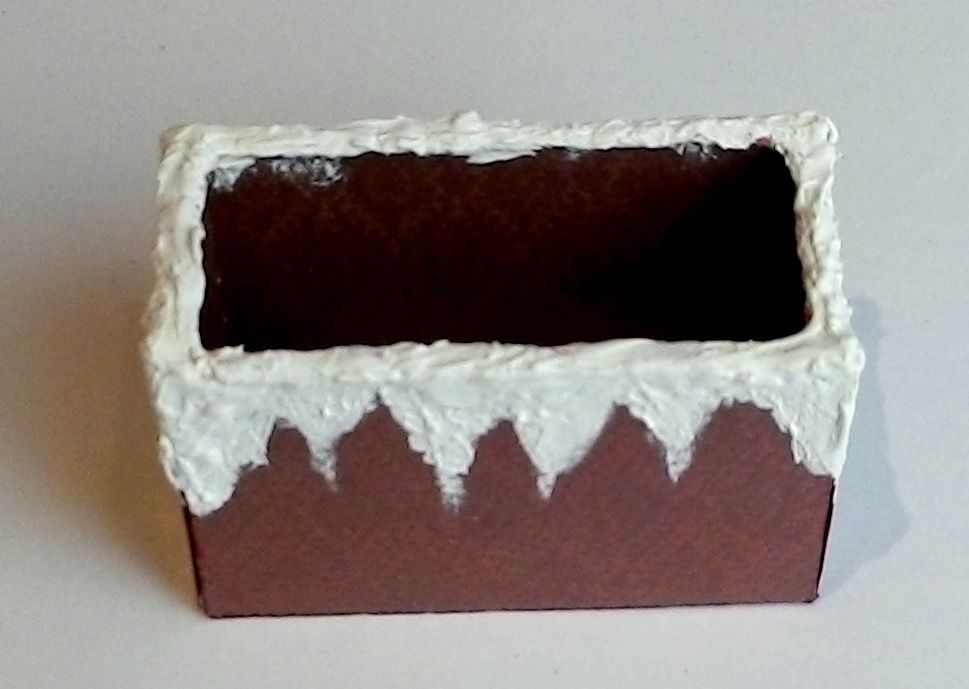
Once
the paint was dry I used Glossy Accents to add an icy look.

The
final step was to attach Santa to the chimney and to glue the chimney to the
top of the shadow box. I used color pencils to make his suit a darker red.
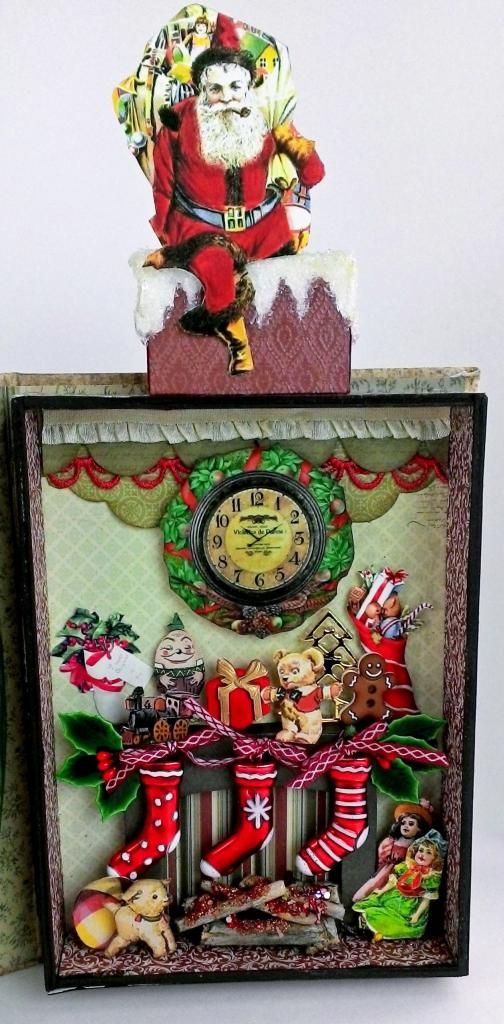
The Inside Details

At
inside top of the box, I used a combination of borders that were in the paper
pack and ribbon. I added toys, stocking
and the clock images that came from various collage sheets. Hanging from the fireplace are mini stocking ornaments. I also used various buttons
and holly picks.
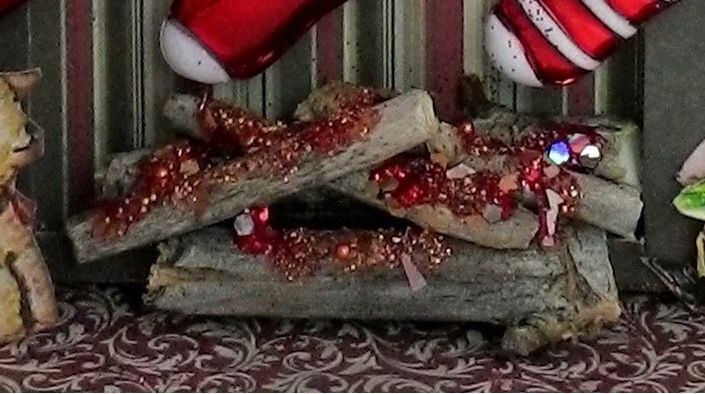
The
logs are made from sticks and topped with orange and red Dazzlers (from Glitter
Art Institute) to look like glowing embers.
The
fireplace mantle is a chipboard die cut that I covered with paper. I also cut an extra strip of chipboard to
create a top for the fireplace. This gave
me room to put items on the top. I used
3 layers of foam core tape to attach the fireplace to the back of the shadow
box and to make it pop off the back.
Monday, December 2, 2013
Edwardian Themed Christmas Ornaments
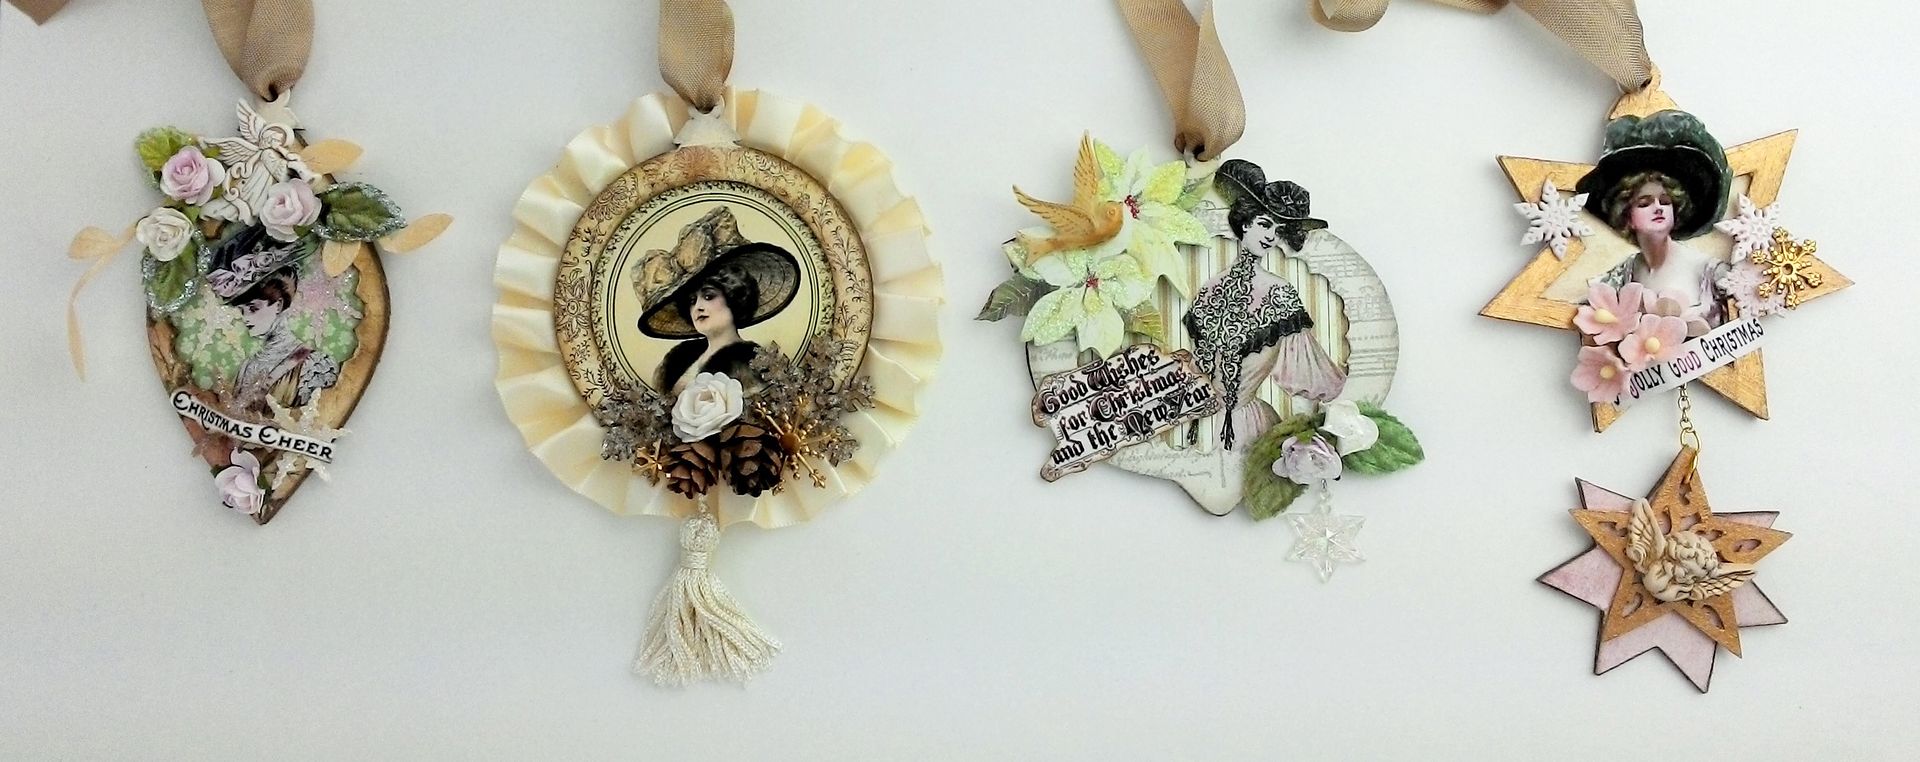
The
ladies from my Parfumerie Collage Sheets are on display in these
Edwardian Themed Christmas ornaments. I
love the non-traditional soft pastel colors from the Cherish 6x6 paper pad that
I chose for these ornaments.
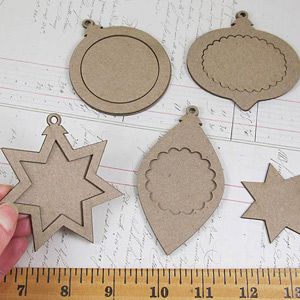
The
base comes from a set of layered chipboard ornaments.
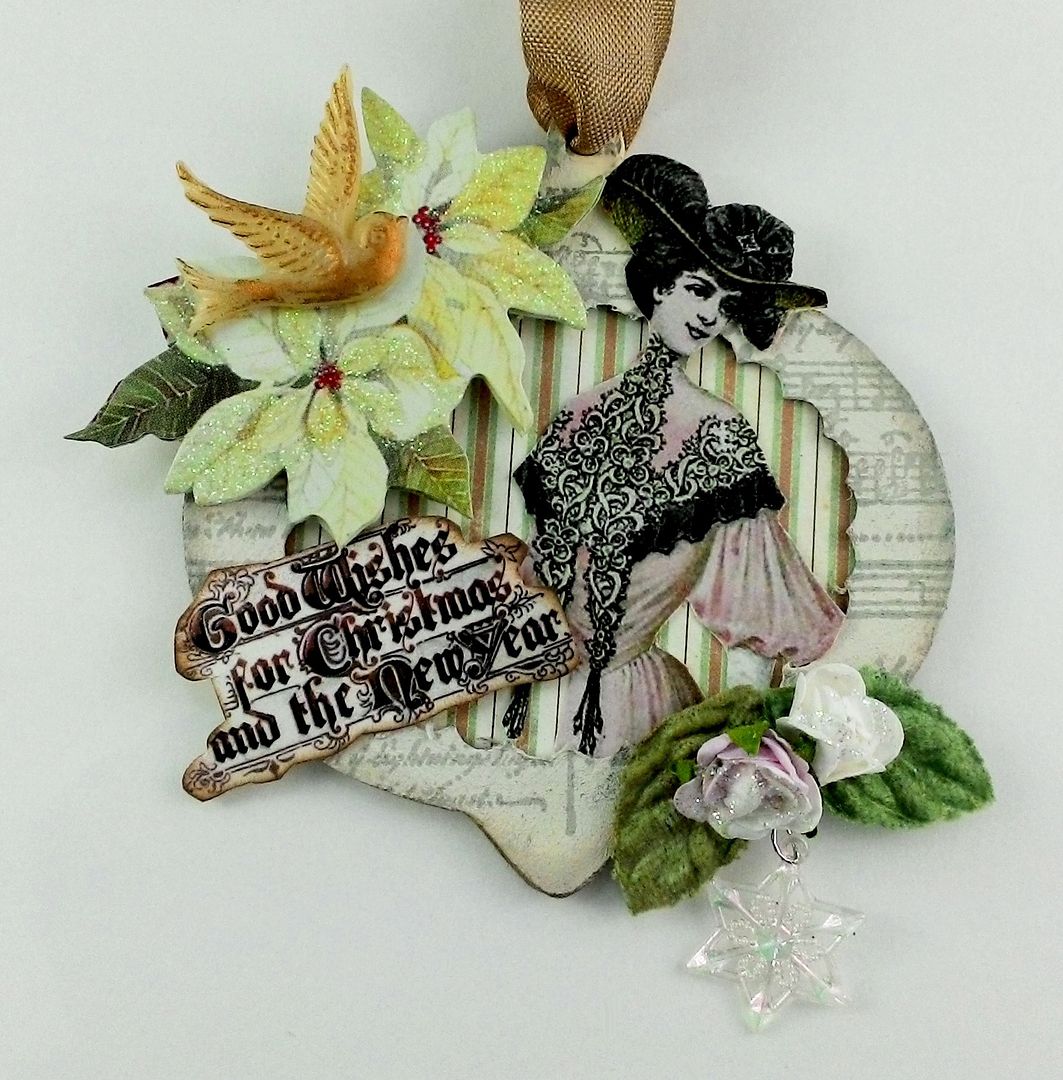
The
white poinsettias are from the Season’s Greetings Vintage
Dazzlers
(layered glitter stickers). The cream
resin sparrow is colored gold using Gilder’s Paste.
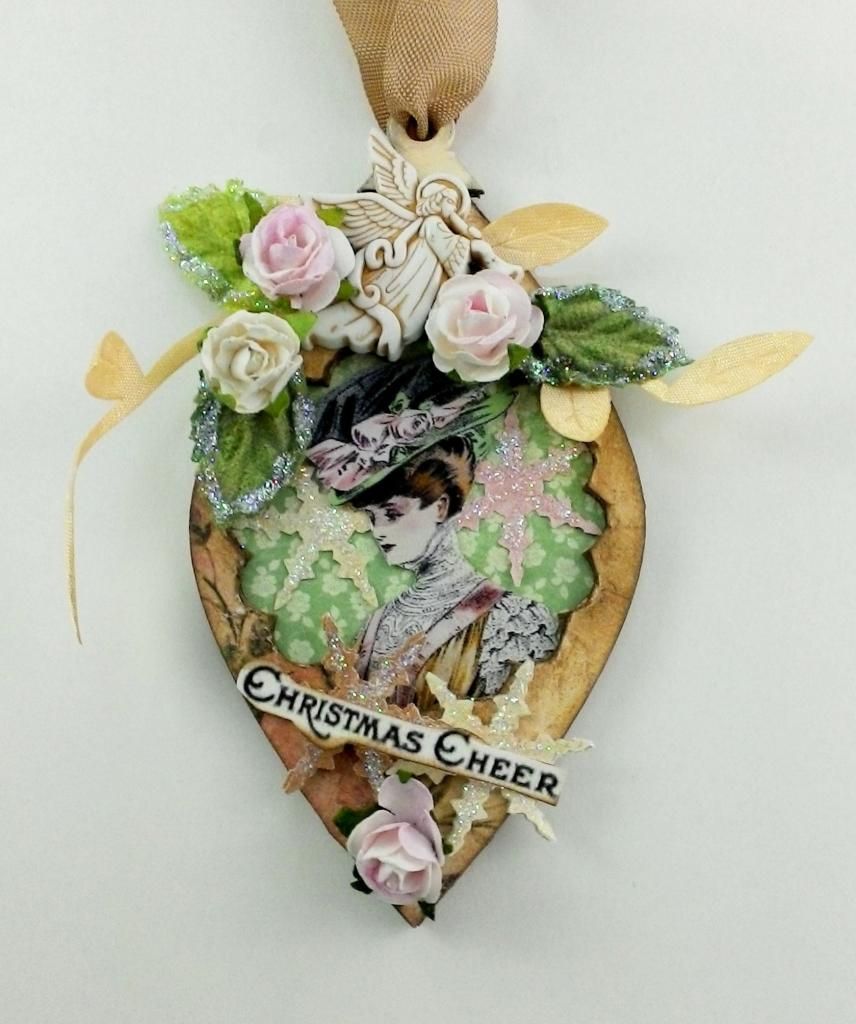
The
sparkle on the snowflakes (cut out of the Cherish papers using a snowflake
punch) and the leaves come from Diamond Stickles. To give the snowflakes more support I glued
together 3 layers.
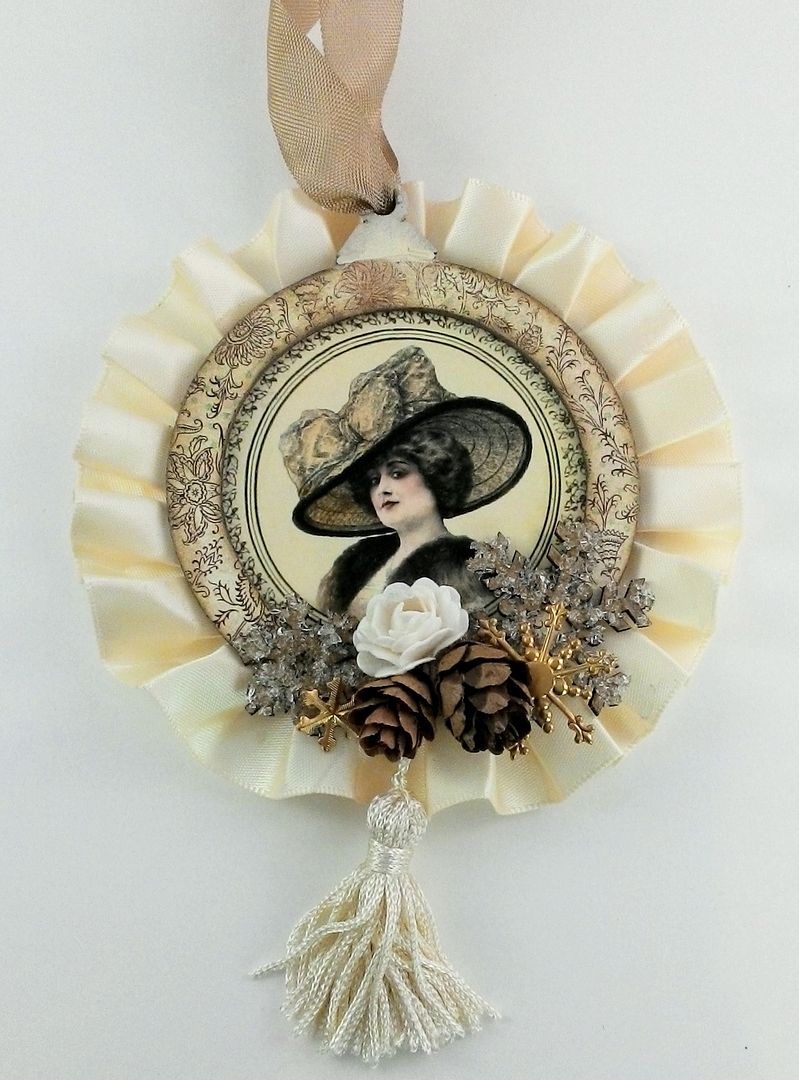
I
thought the pleated ribbon was a perfect accent to the round ornament. Just as in the “Baby It’s Cold Outside” door book, I added sparkle to the chipboard snowflakes with Diamond Dust.
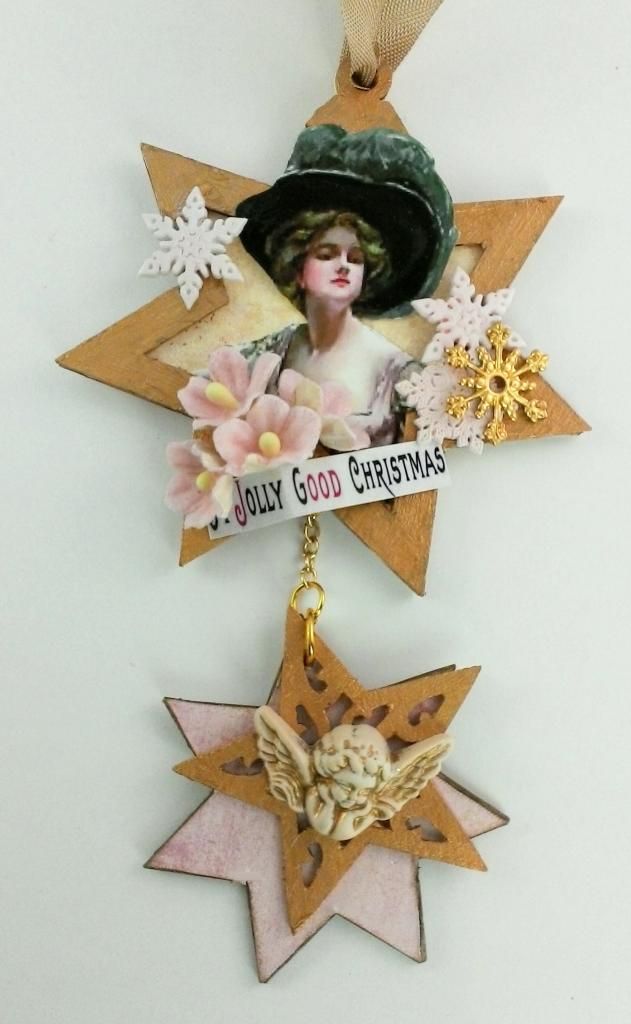
I
attached the smaller punch out star to the larger star using a chain and added
a Fancy Chipboard Star
Cut-out
for more detail.
Subscribe to:
Posts (Atom)