The first thing I want you to know is
that no cigar boxes were harmed in making these purses. They might look like cigar boxes but they are
not. For those residing outside of the US who
tell me it is so hard for you to find cigar boxes for projects, there are no
worries with this one.
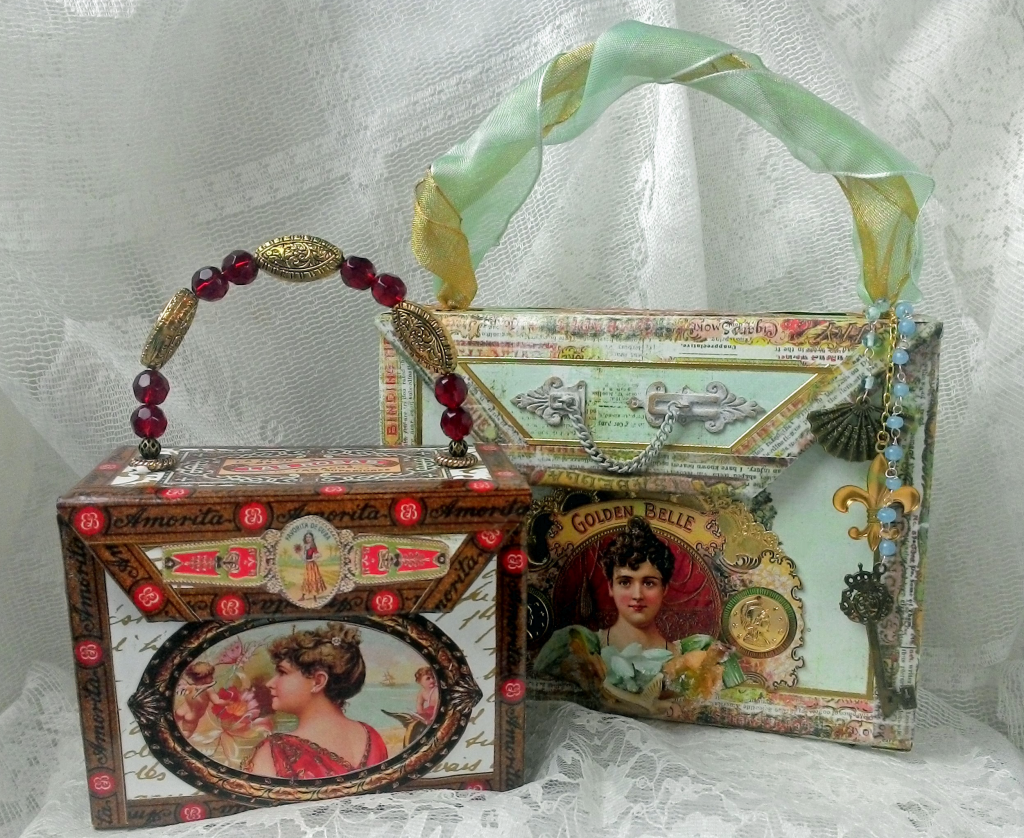
Outside of creating art pieces, I think
the next best thing is projects to create ways to store and display them and this is what
these purses are all about.
In the tutorial below, I’ll show you
how to make a cigar box purse out of chipboard.
I’ll also give you some ideas on how to create a book inside the purse such as using envelopes
accordion folded so that you can actually store art or memorabilia in the
envelopes.
Another option is to use accordion
folded cardstock to display art, memorabilia or for journaling. For those of you who participate in art
journal swaps wouldn’t it be cool to create your own purse to house your
swapped journal pages. You can make the purse any size you like so it can be customized to your needs.
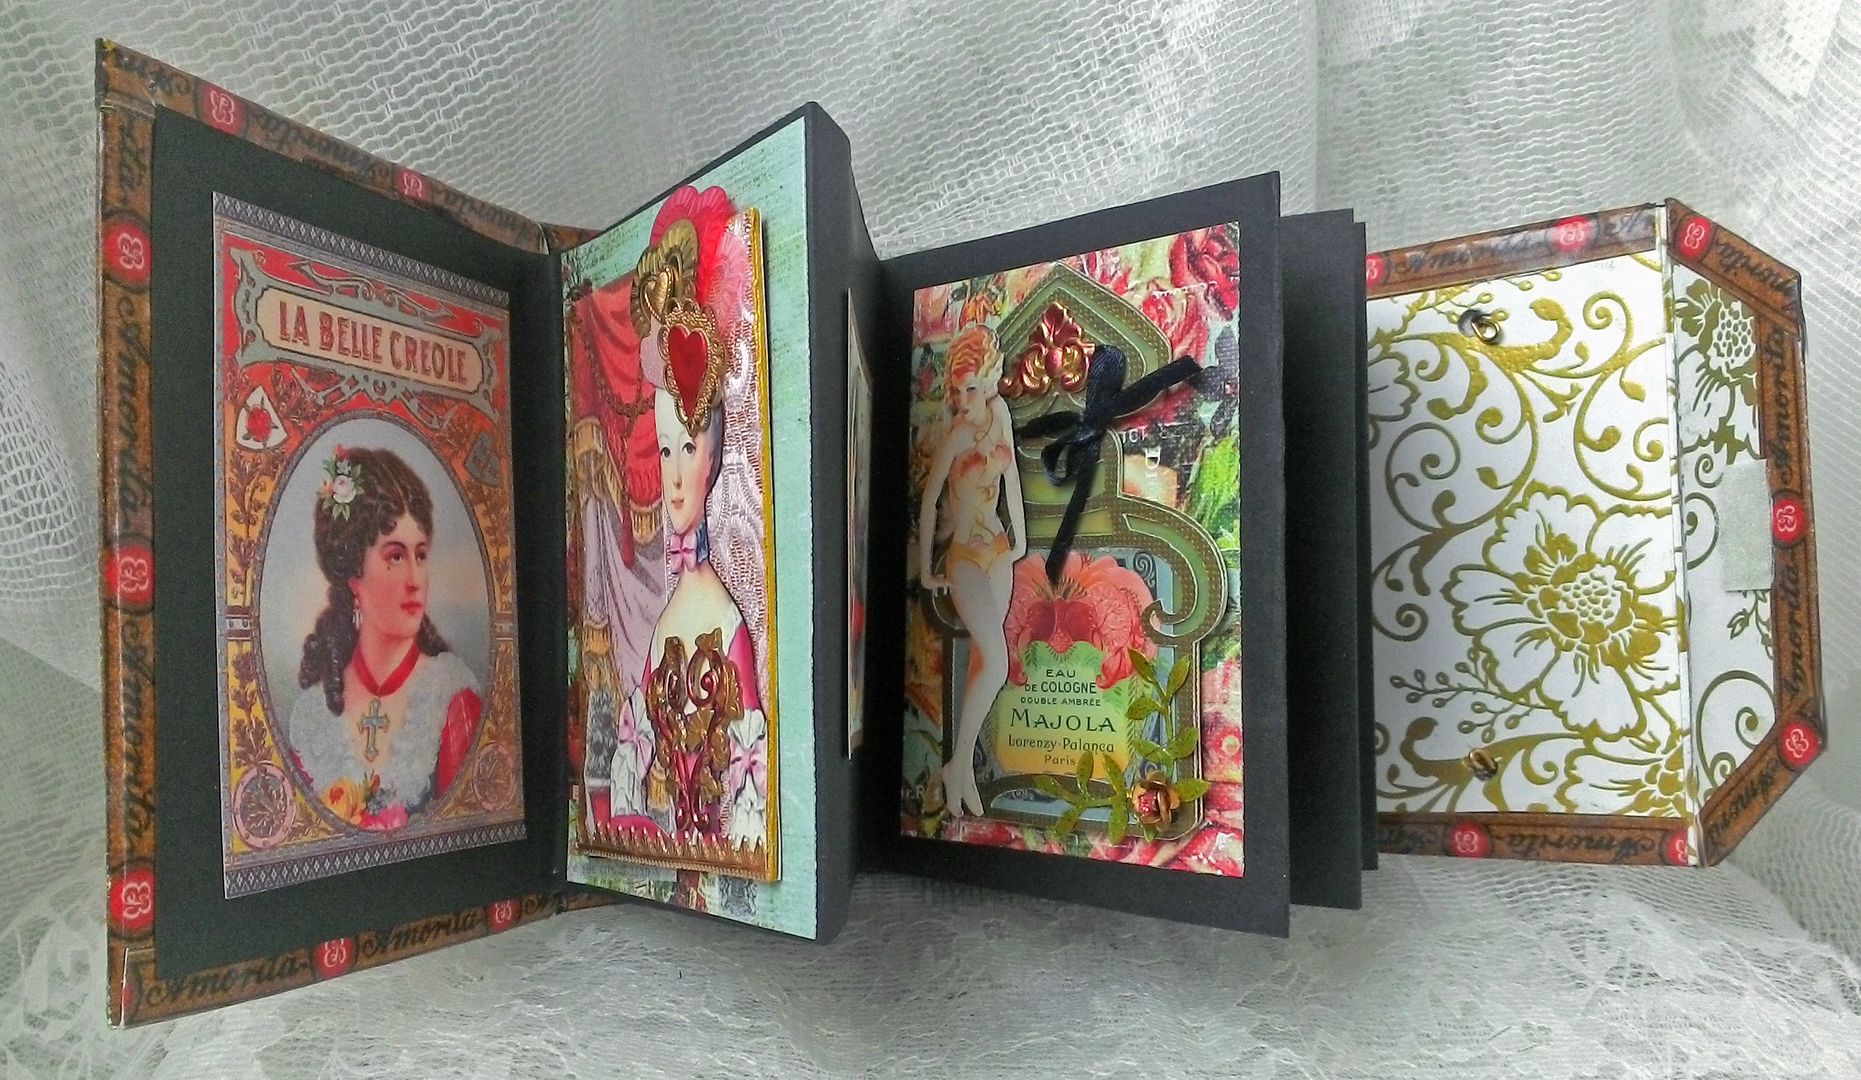
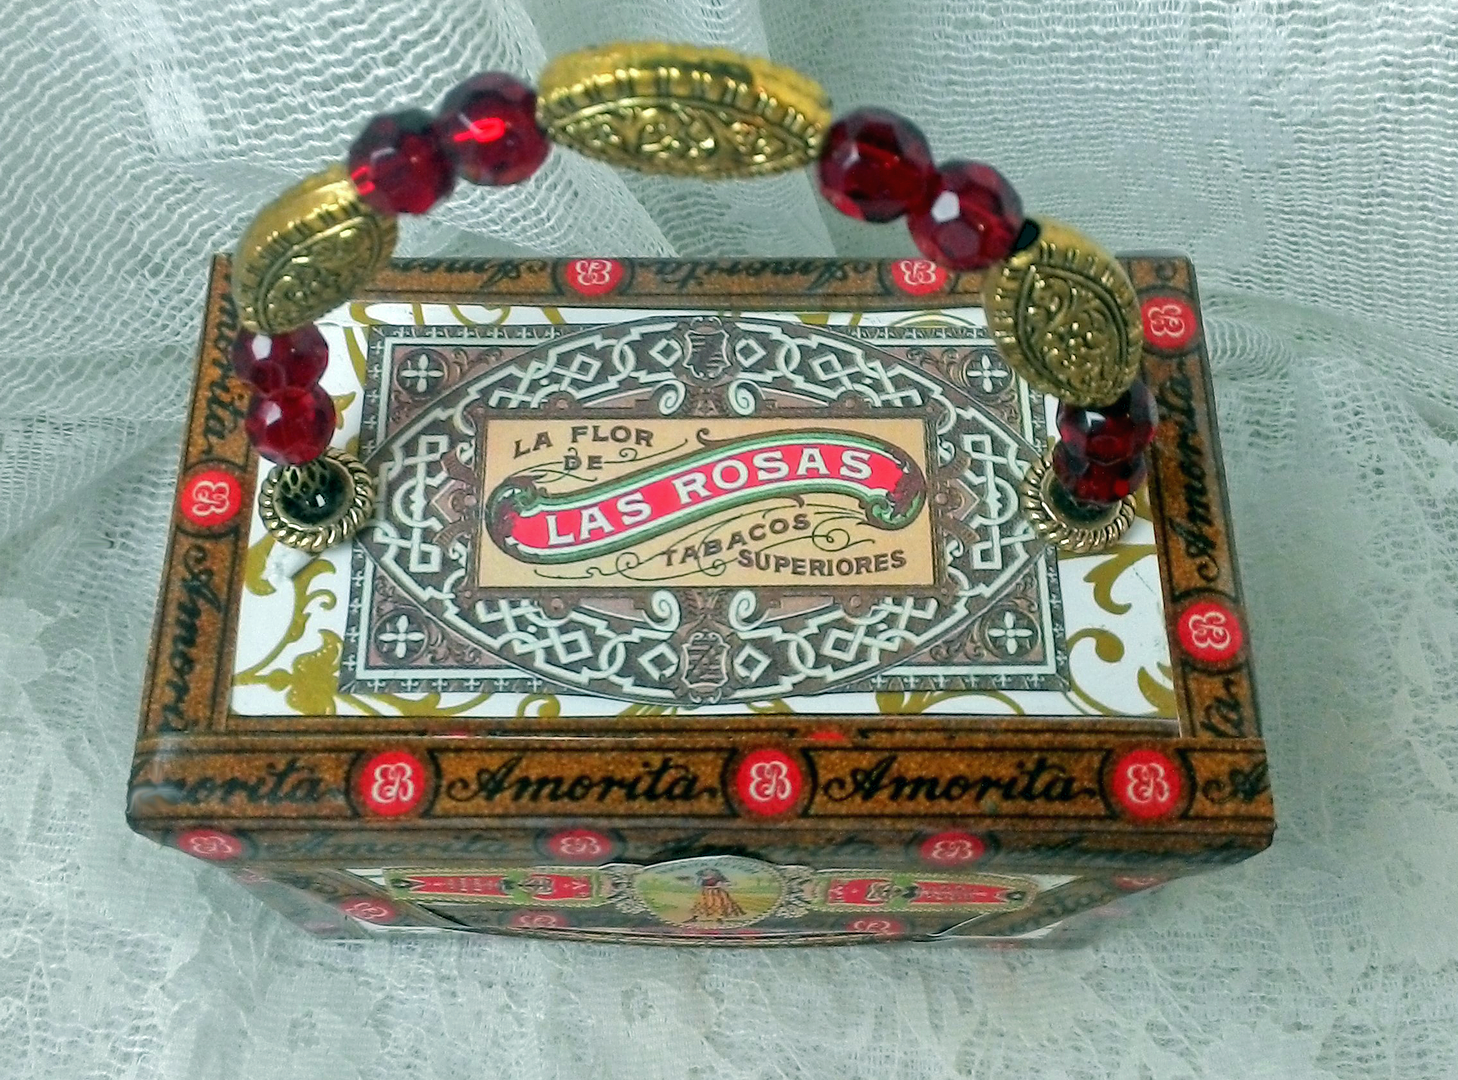
You’ll note that I used cigar box
themed papers and images to make the purses look as much like a cigar box as possible. Velcro is used to keep the purse closed.
Of course, you could just close up the
sides and make it a real purse as no one will ever know that it is not a cigar
box. If cigar boxes aren’t your thing, you can make the purse in any style or theme you choose.
TUTORIAL
LARGER TEAL PURSE
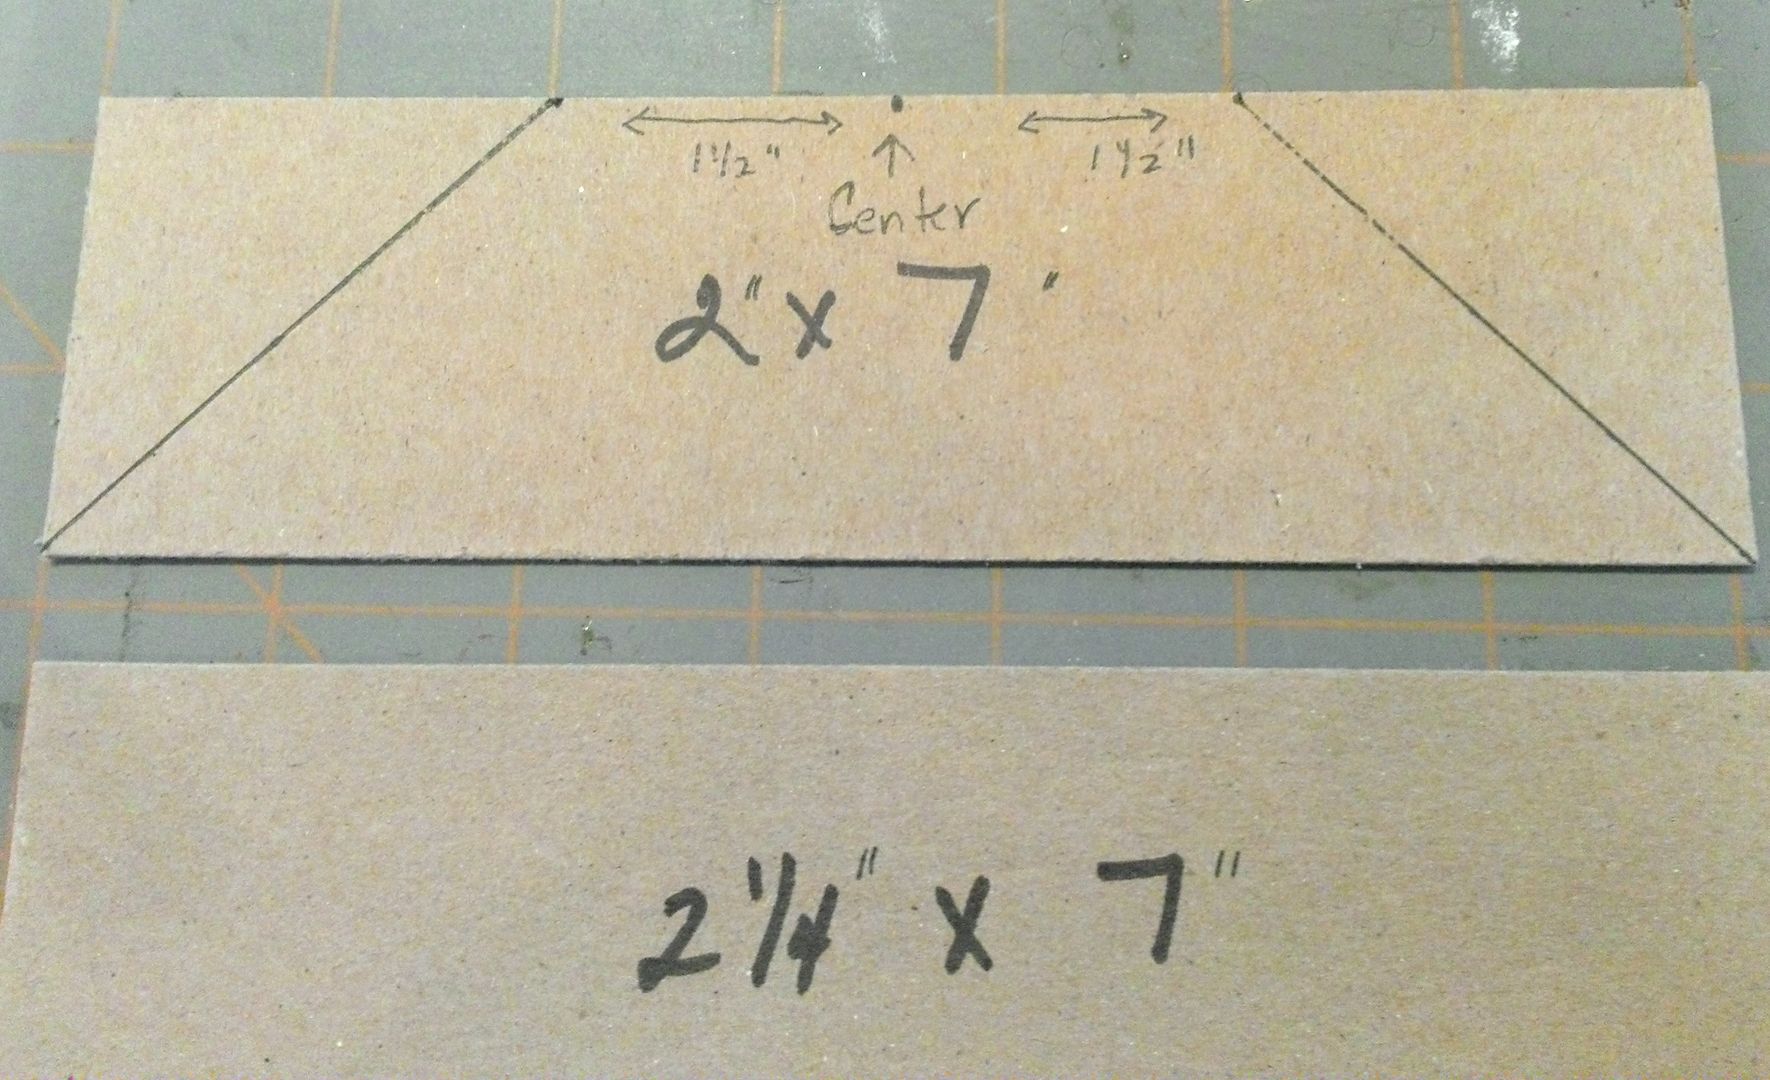
For this purse, I decided on a 5” x 7”
front and back and a 2” x 7” base. You
can make your purse any size you like.
You should consider what you are going to use it for and how much stuff
you are going to put in it to determine the size. The only requirements are that you make the
width the same on all the pieces you cut and that you cut the top piece ¼” taller
than the bottom piece. As you walk
through the tutorial, the measurement requirements will make more sense.
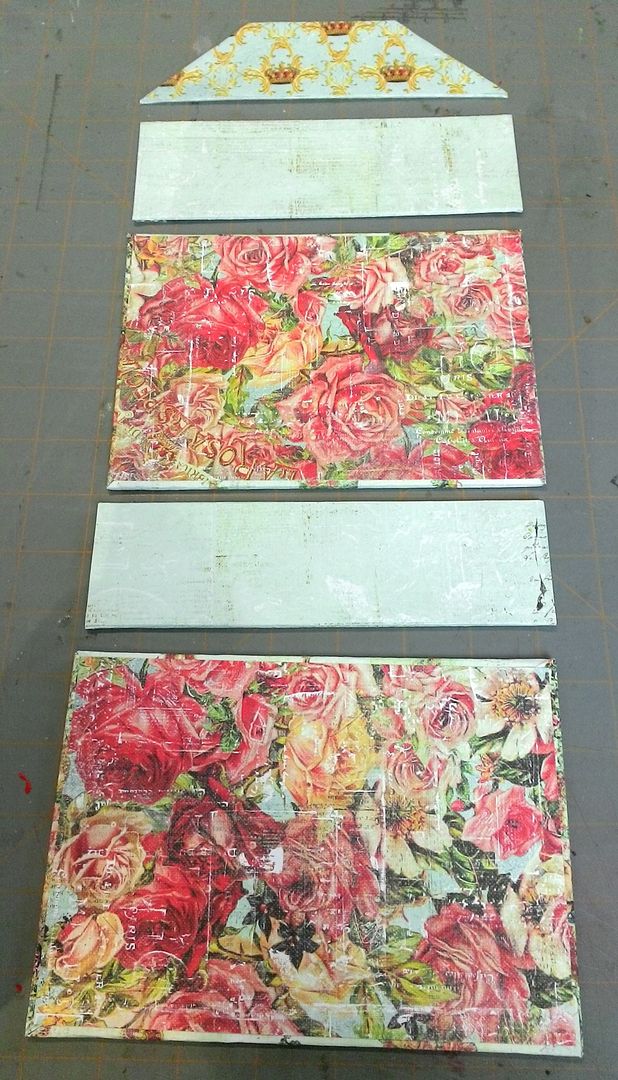
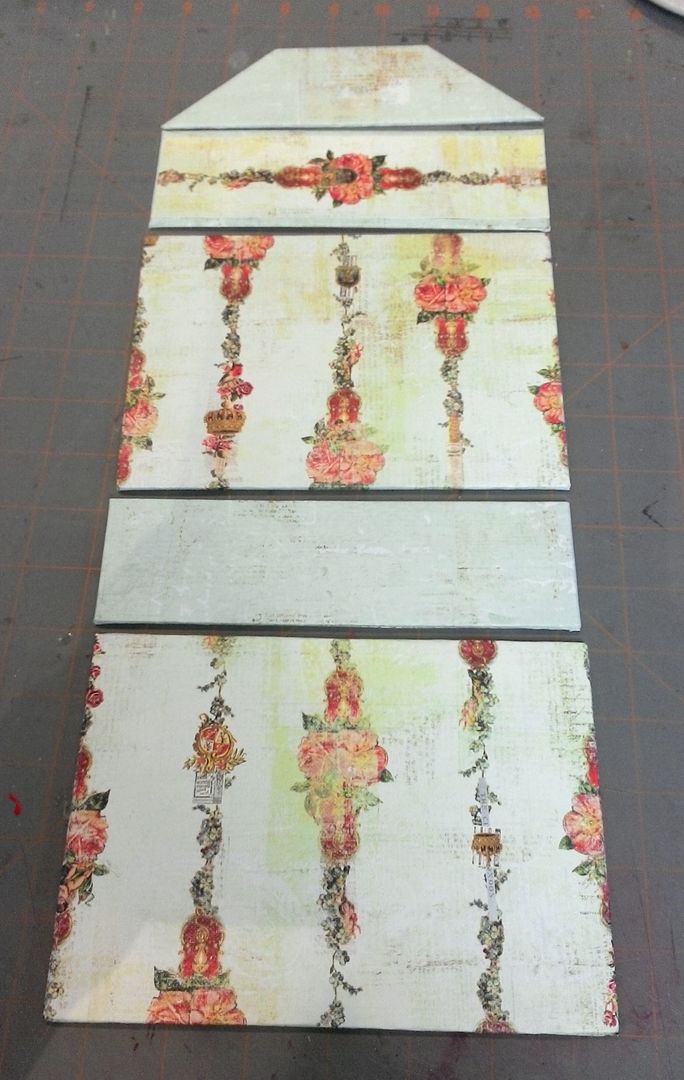
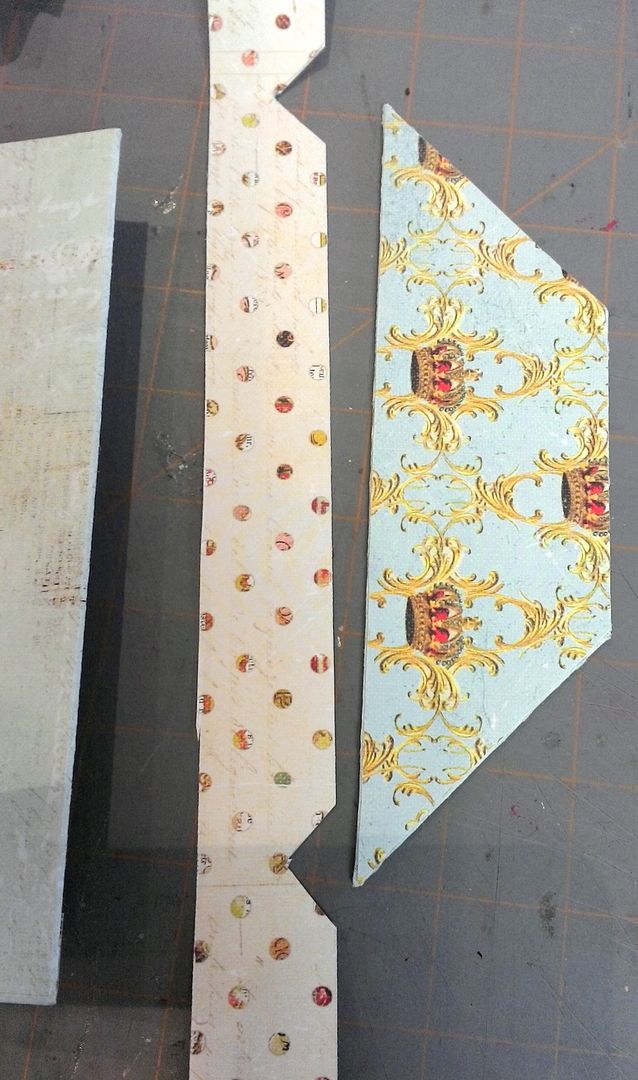
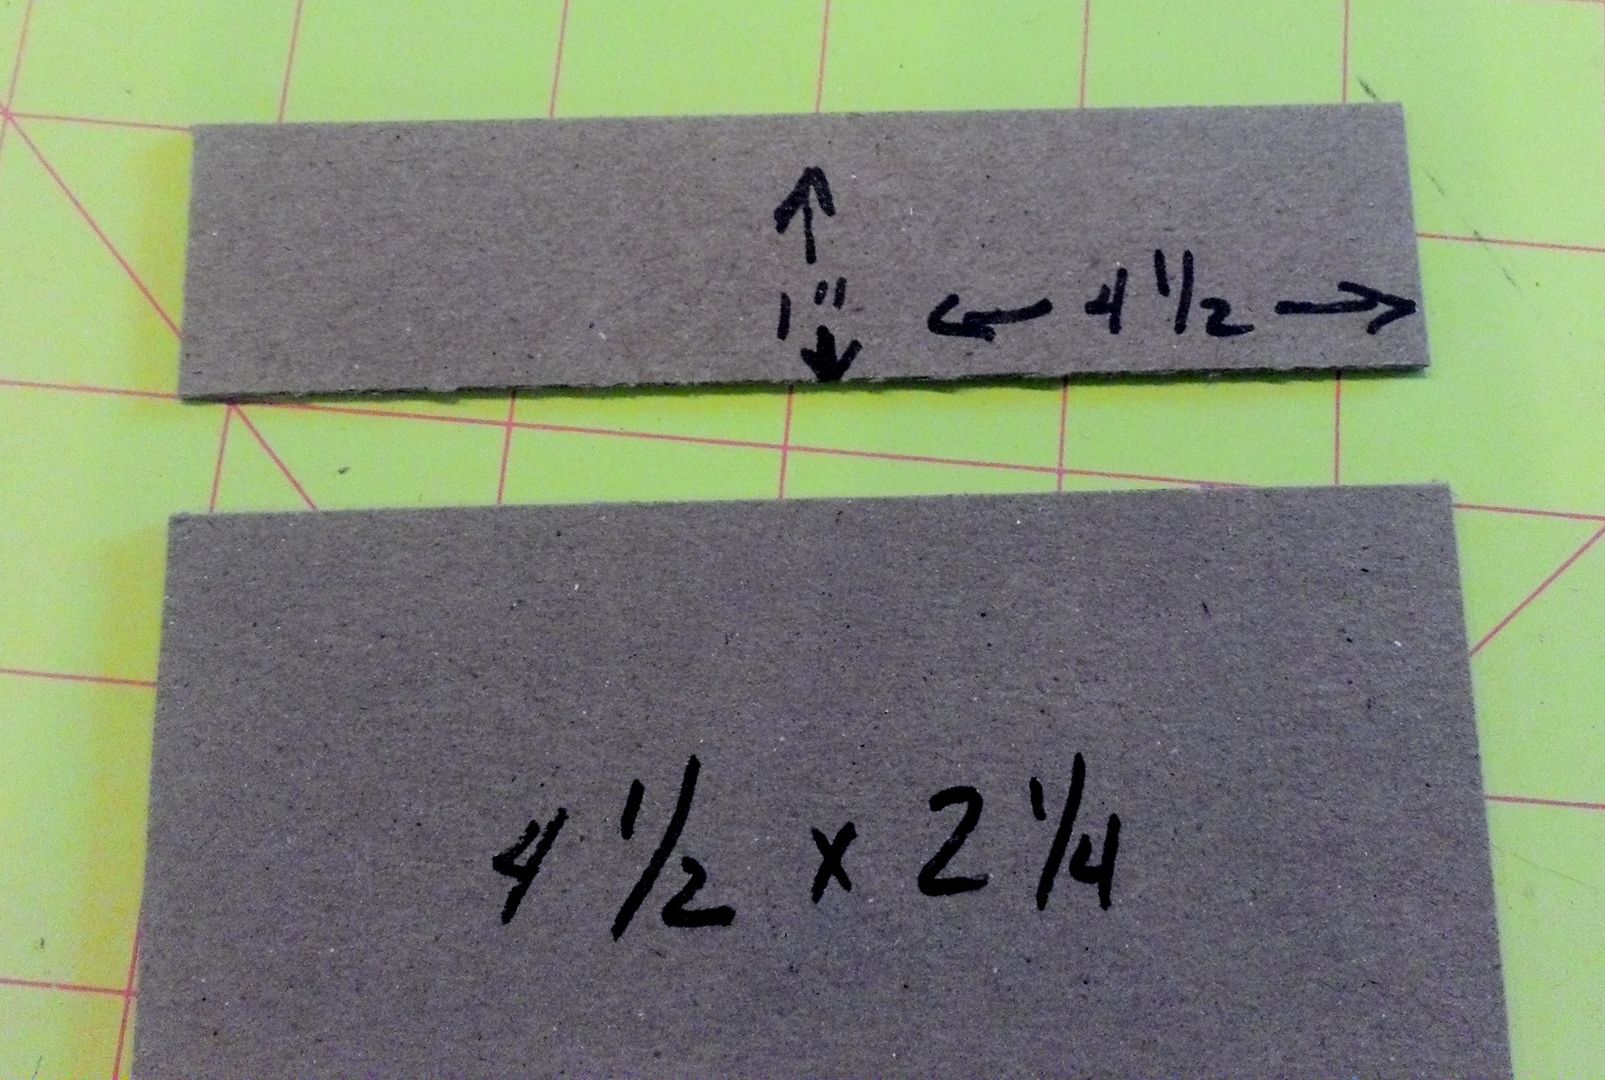
Start by cutting out 5 pieces of
medium to heavyweight chipboard. Below
is a picture of the pieces I cut for the teal purse laid out in the order of assembly. You can see that each piece is 7” long. The first and third piece from the bottom is
the front and back of the purse and they are the same size at 5” tall. The second piece from the bottom is 2”
tall and it will become the base of the purse.
The fourth piece from the bottom (which will be the top
of the purse) is 2 1/”4 tall. The extra ¼”
on the top piece (as opposed to the base piece) is to accommodate closing the flap of the purse.
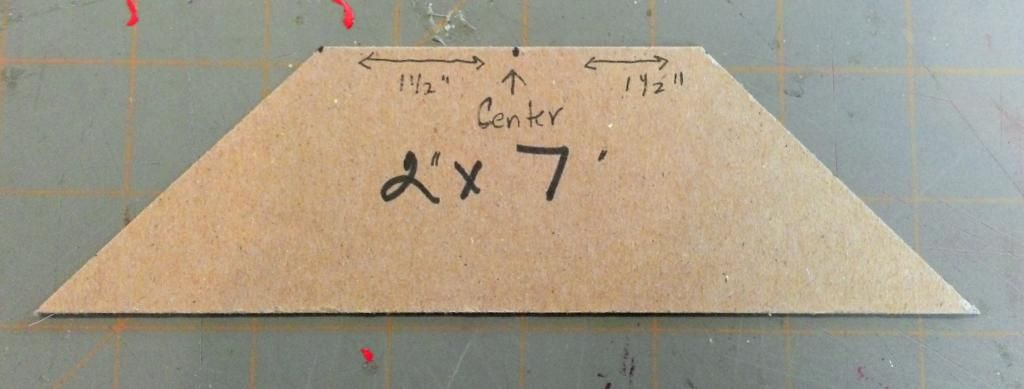
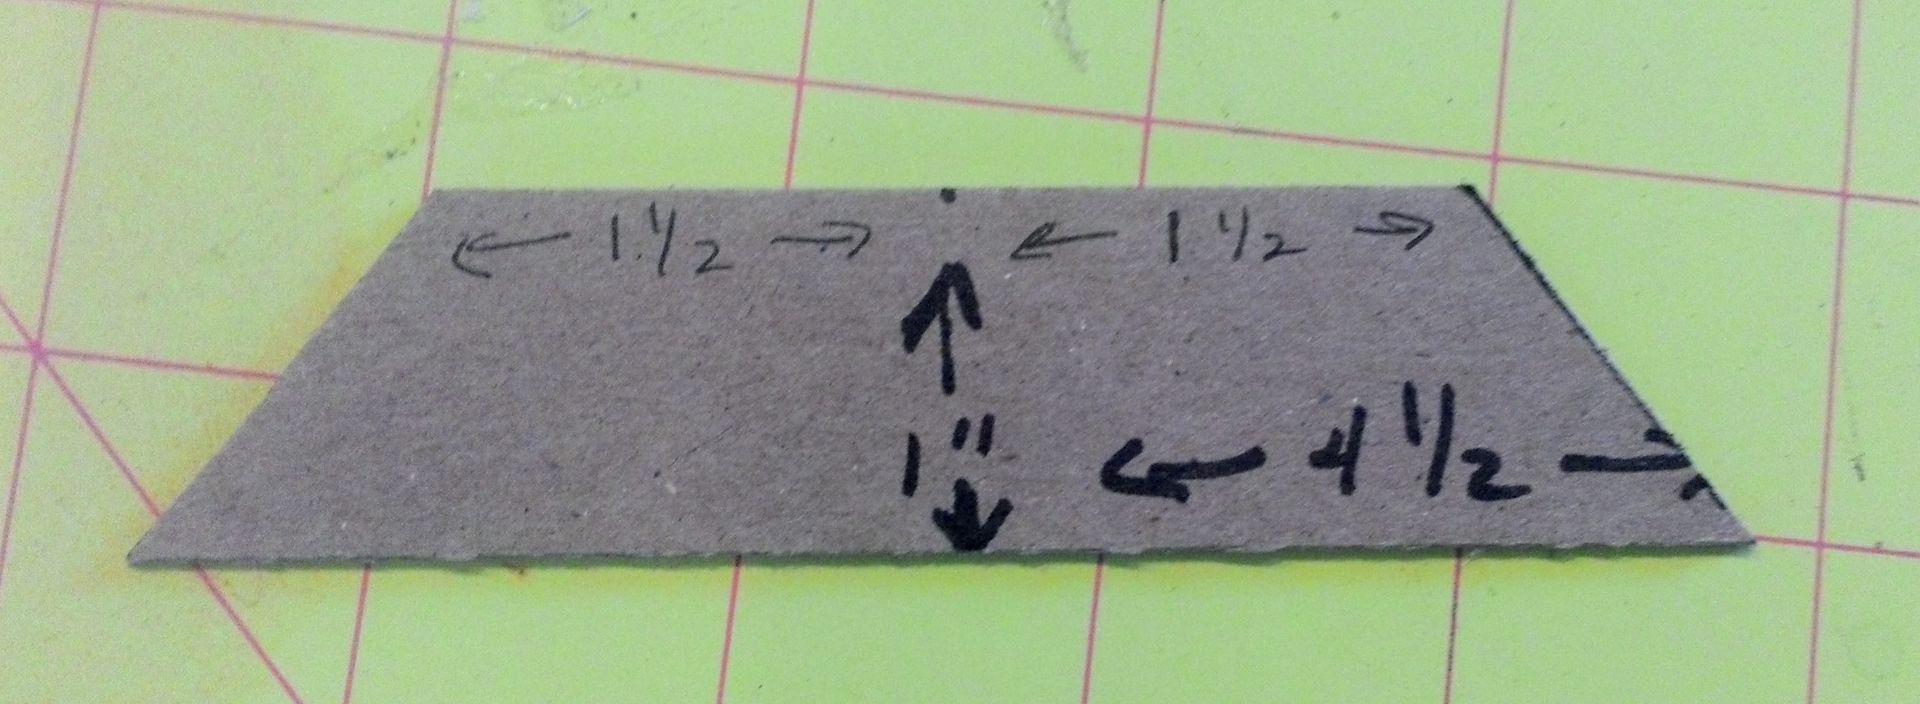
I decided to make the flap (the top piece
in the picture) 2” tall. I also wanted
to make the flap envelope like, so I cut away the sides at an angle.
NOTE:
You can make the flap any size or shape you want. Things to consider when deciding the size and
shape of the flap are having enough height to attach the closure. In the case of this sample, I used Velcro. Another thing to consider is if you are
adding artwork to the front of the purse you don’t want the flap hanging over the art. If you like, you can keep
the rectangular shape of the flap.
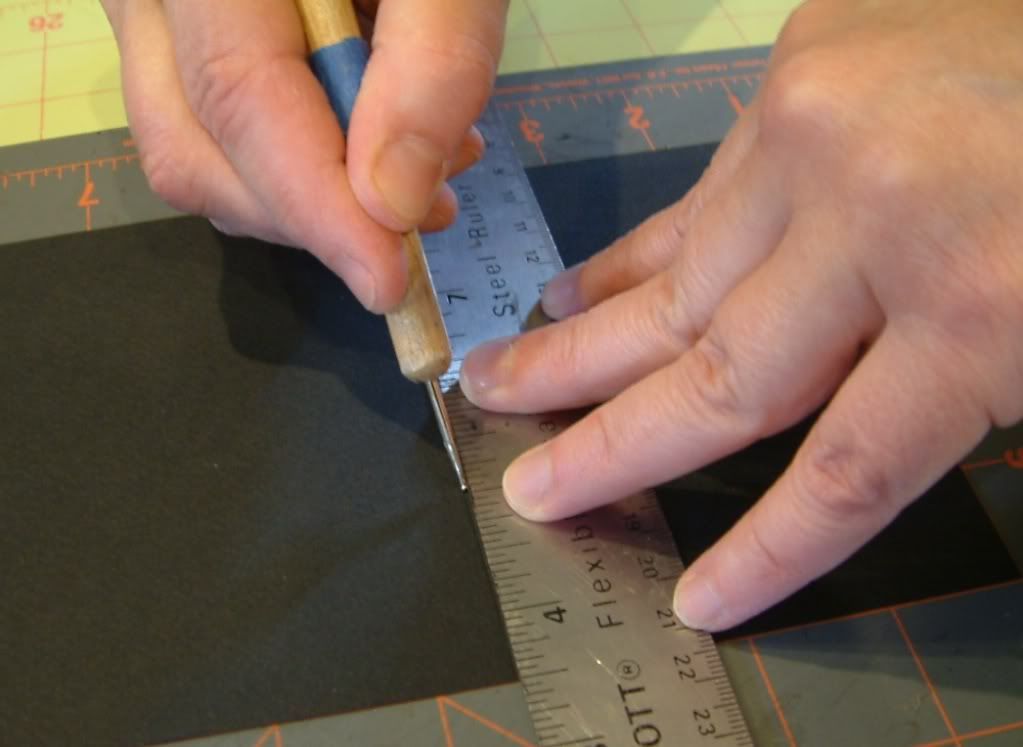
To cut the angles on the flap I first
found the center of the flap. I then
measured 1 ½” from the center in both directions and marked the spot. I then drew lines from the marks to the
corners of the other end of the flap creating the cut lines.
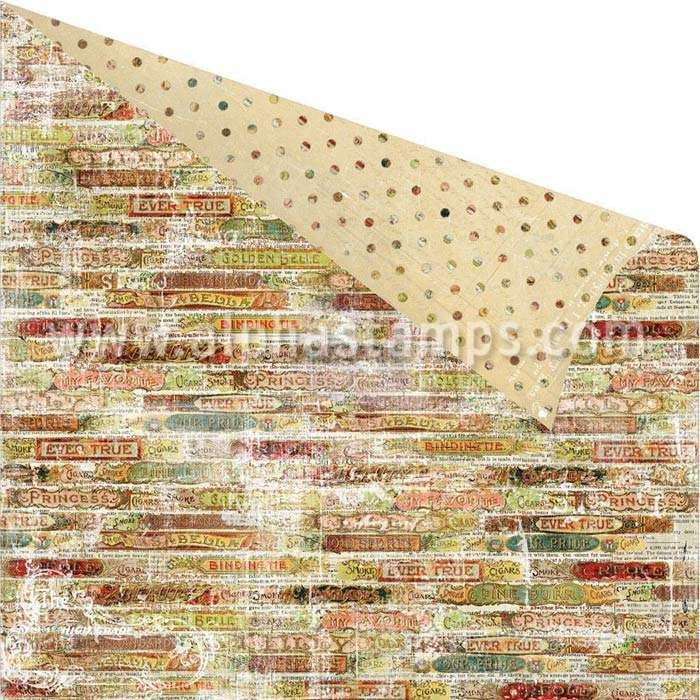
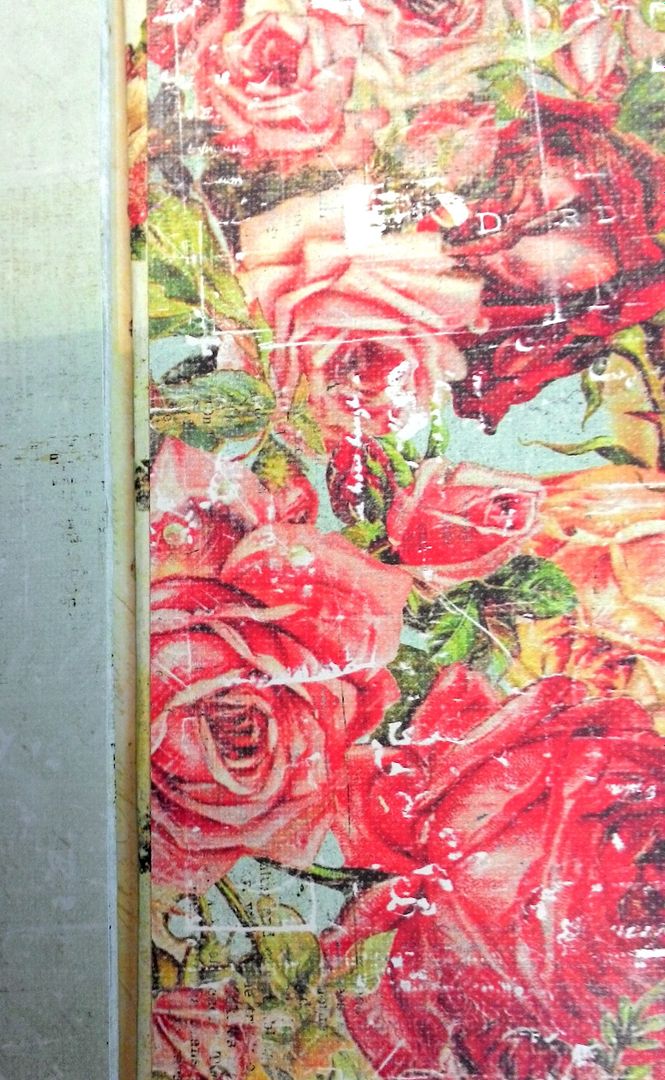
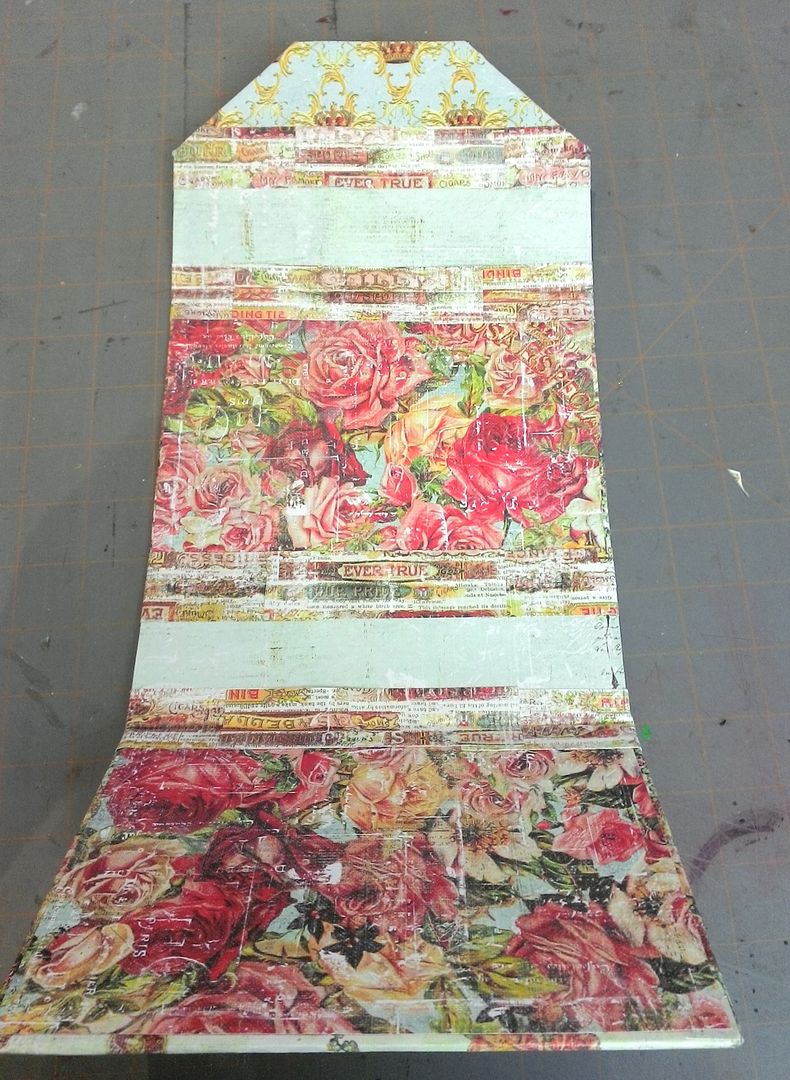
Next, cover the chipboard pieces
front and back with decorative paper. I
used a line of paper called Cigar
Box Secrets. In the picture below
you are seeing what will become the inside of the purse.
As you are working with the chipboard
pieces, I suggest keeping them in order so that you won’t mix up; remember how the base and top piece are a ¼” different in size.
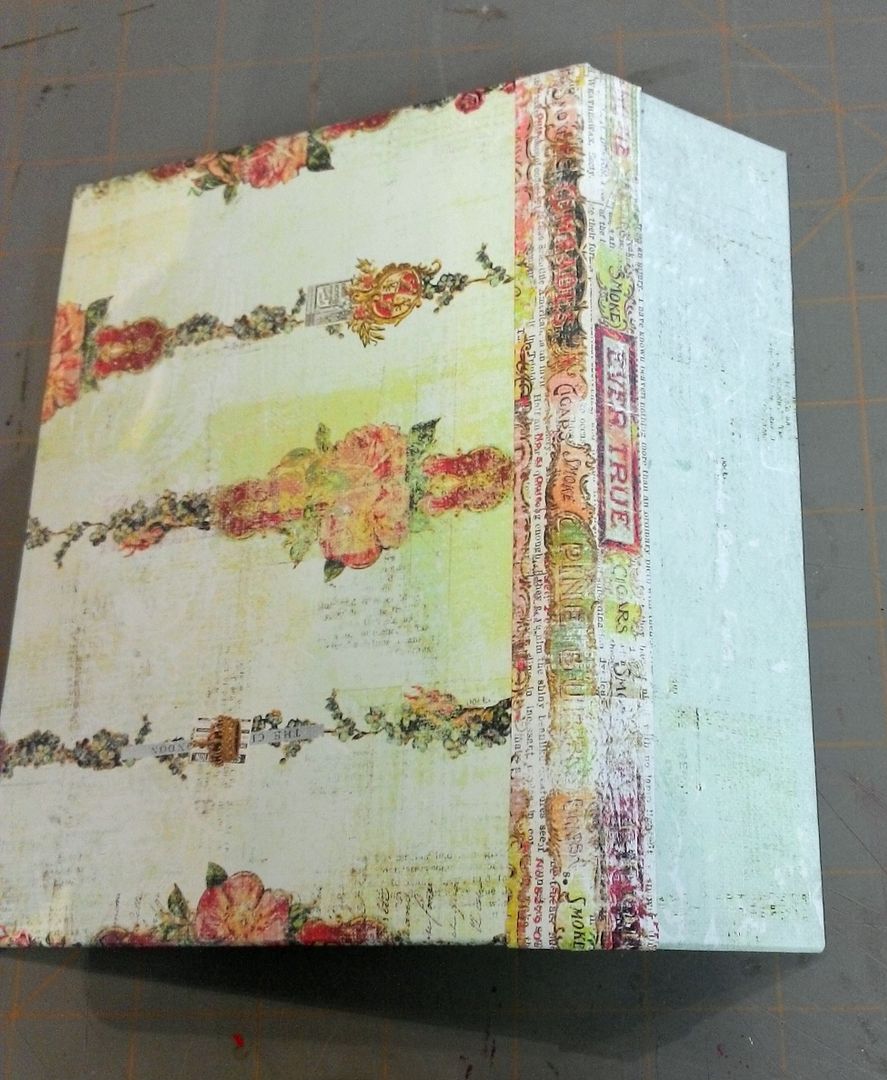
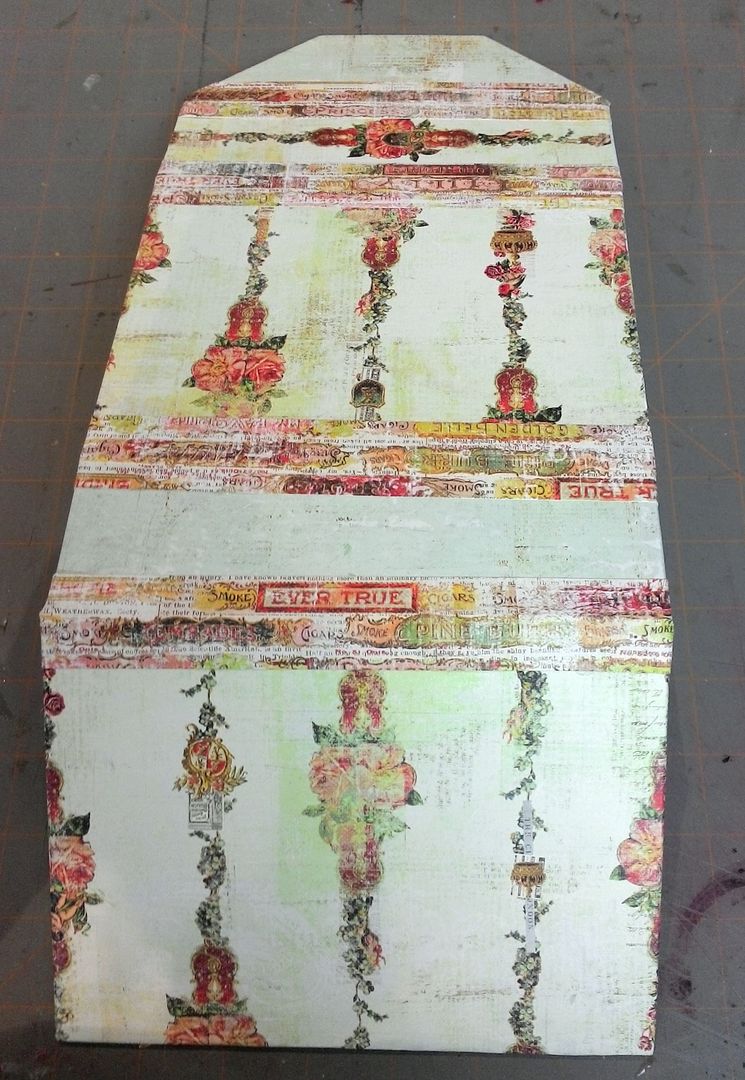
In the picture below you are seeing what will be the outside of the
purse.
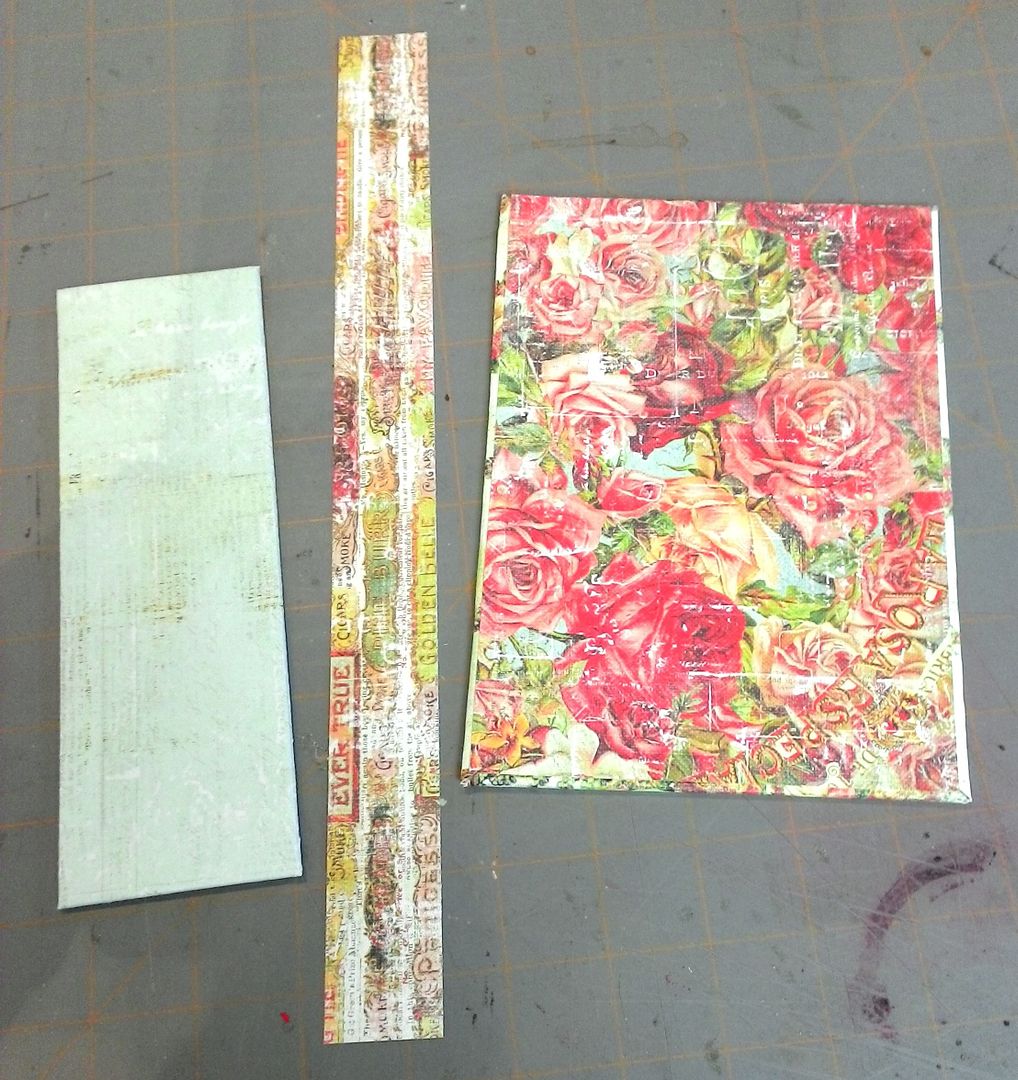
The next step involves joining all of
the chipboard pieces together. I started
by cutting six 12” x 1” strips of paper.
I chose the Cigar
Box Secrets Figurados Scrapbook Paper as it looks like a cigar box
edging. If you are making a purse the
same size as this sample or larger, and you want to apply the edging the way I
have, you will need 2 sheets of this paper.
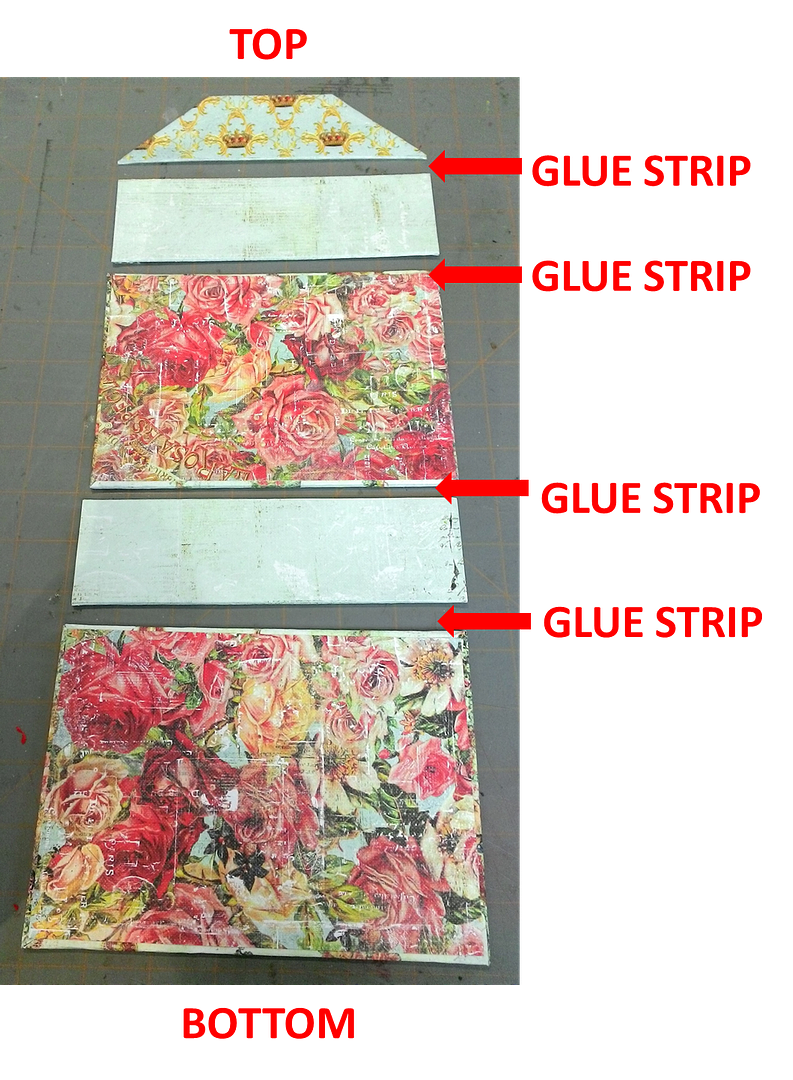
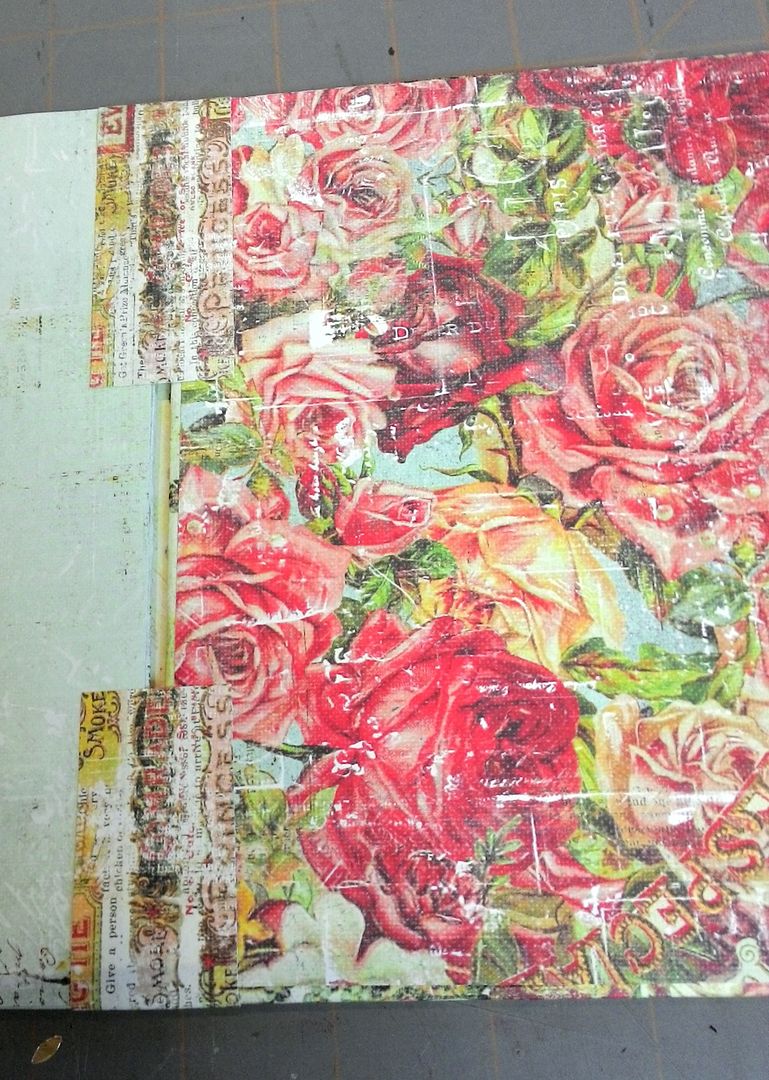
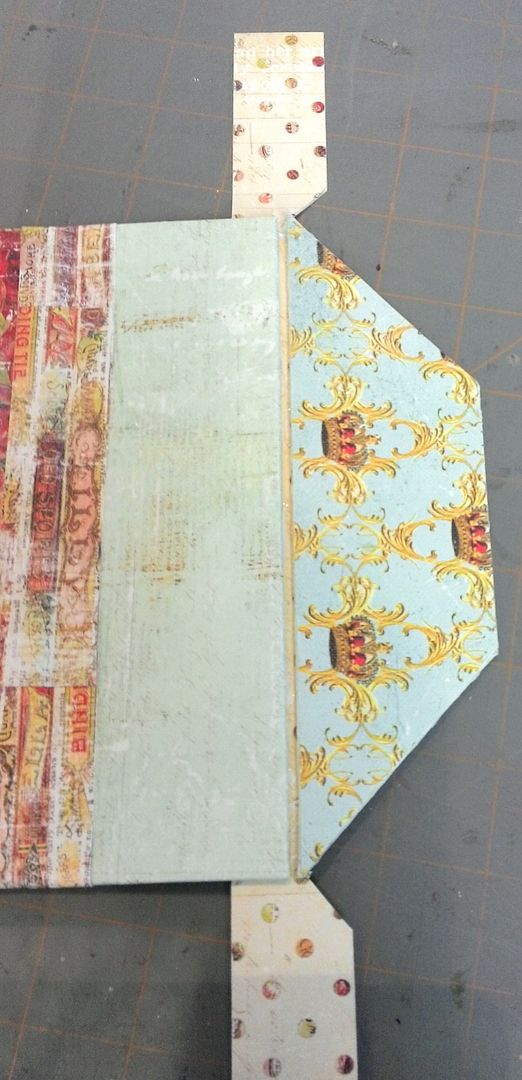
Next, use the strips of paper to
attach the chipboard pieces together. You
can go in wherever order you like. Use the image below as a guide for where to glue the strips.
IMPORTANT:
Make sure to coat one side of the strip of paper completely with an
even coat of glue. Do not use a Xyron
machine for this as the adhesive won’t hold.
You will be folding the chipboard pieces into the shape of a purse (which
causes a lot of stress on the paper) and you don’t want the paper strips
lifting from the chipboard because the glue is not strong enough or there are
areas that are missing glue.
Glue the strips to what will be the
outside of the purse placing the chipboard pieces equally spaced on the strip and
leaving a 1/8” gap between the chipboard pieces. This gap will give you the room to fold the
pieces of the purse in place.
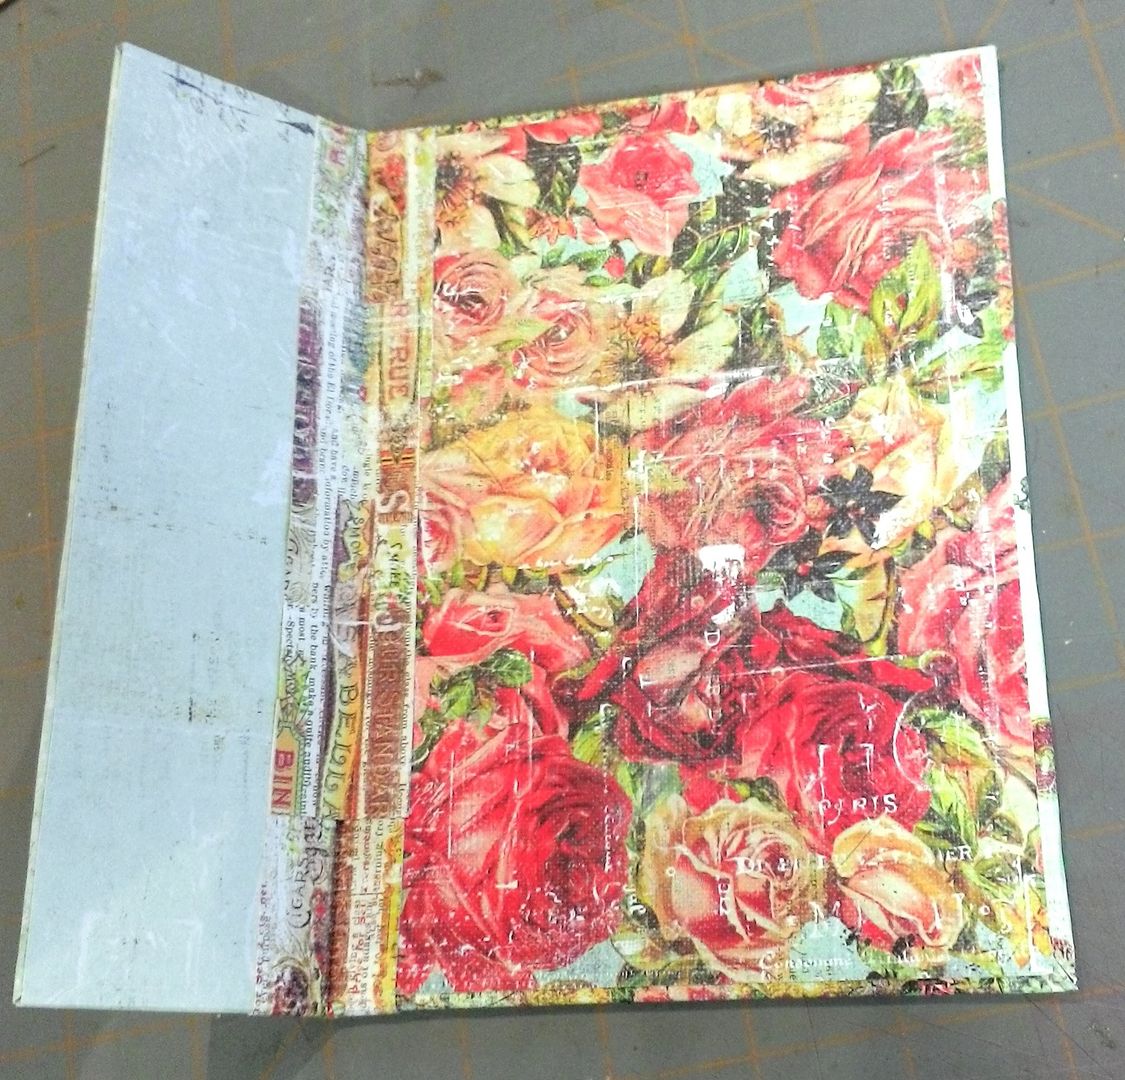
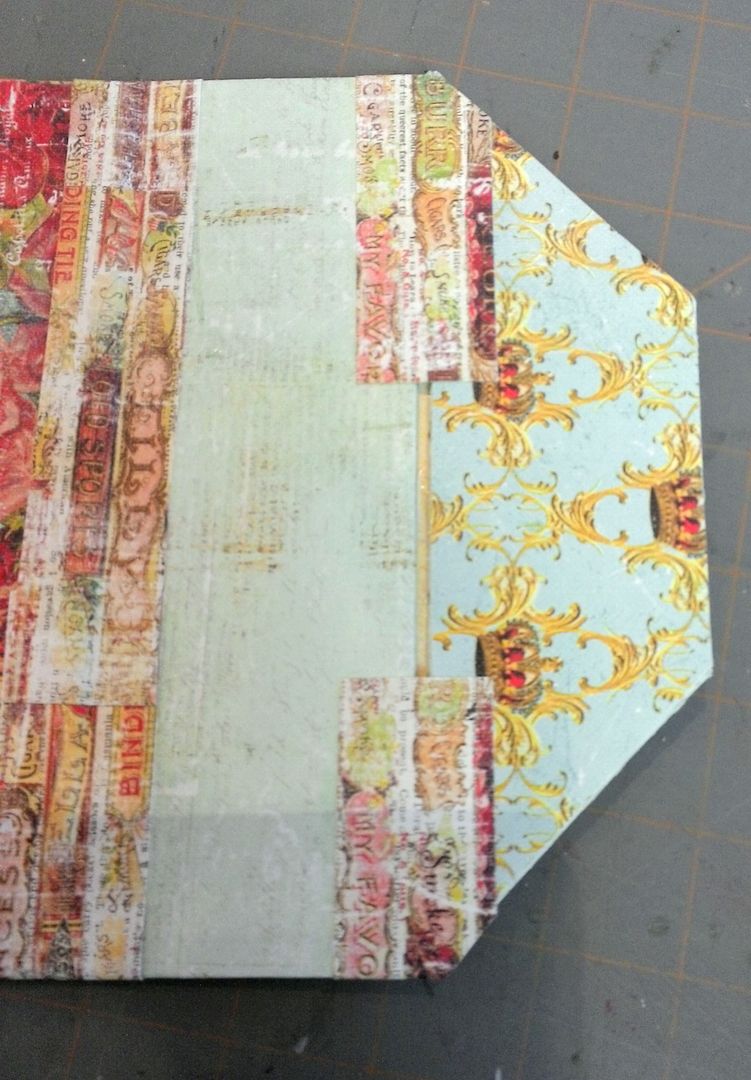
Fold and glue the strips to the
inside of the purse. Note that with a
purse this size and using 12” x 12” paper for strips, there is a
gap. Use a piece of one of the strips to
fill the gap. Now you can see why you cut
6 strips instead of just 4 as you need to fill all of the gaps.
Continue in the same manner
connecting all of the chipboard pieces.
The purse flap piece is a little trickier
to attach because of the angle of the piece.
I laid the flap piece on the strip and marked lines where the piece
lined up with the strip. I folded the
strip over the flap and pressed the paper against the flap which left a mark
that I filled in with a pencil.
The two marks gave me my cut lines.
Next, I glued the strip in place in
the same manner as the other strips.
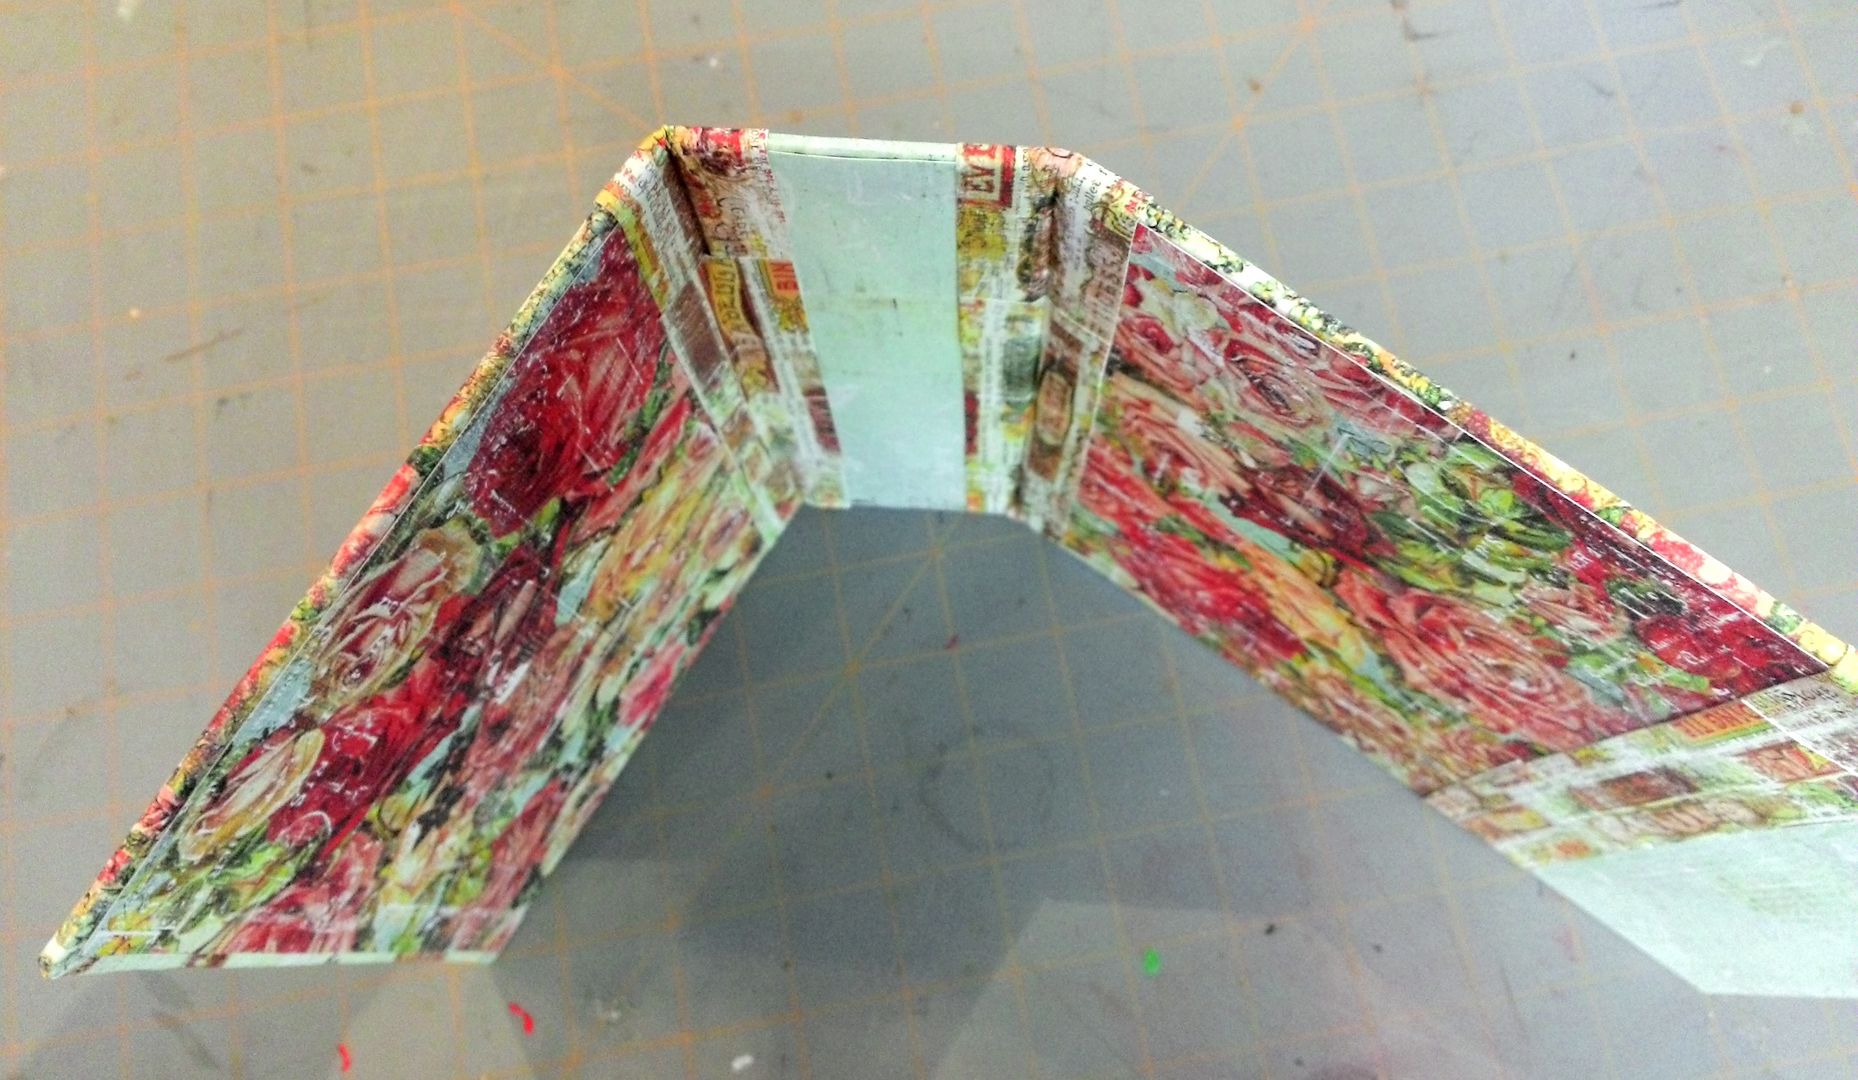
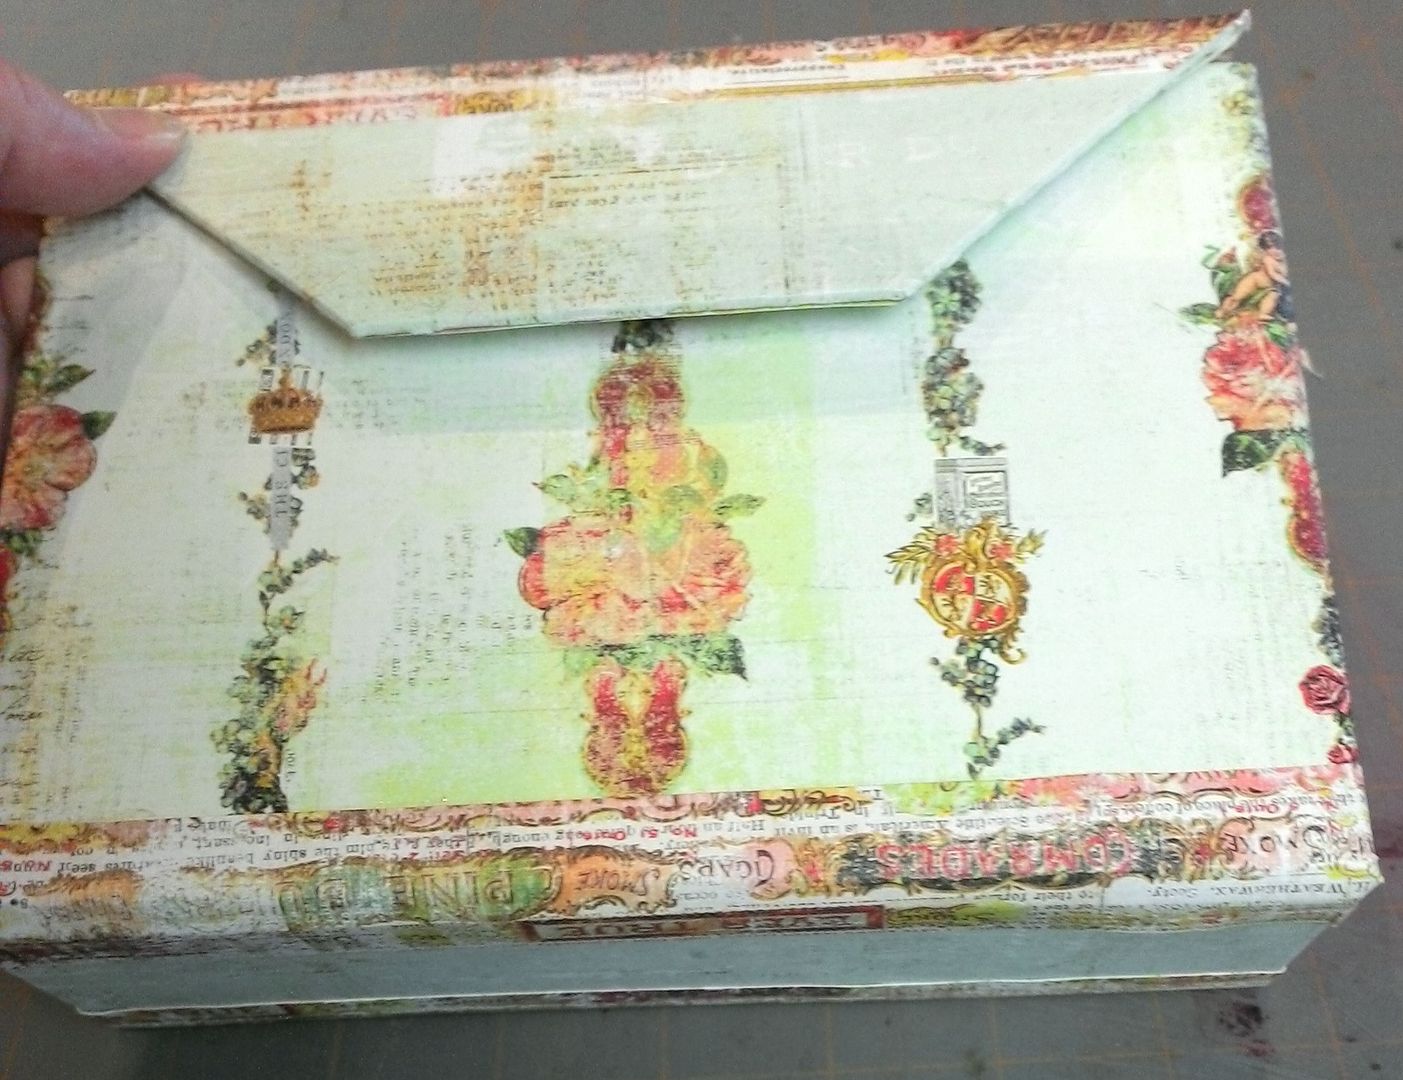
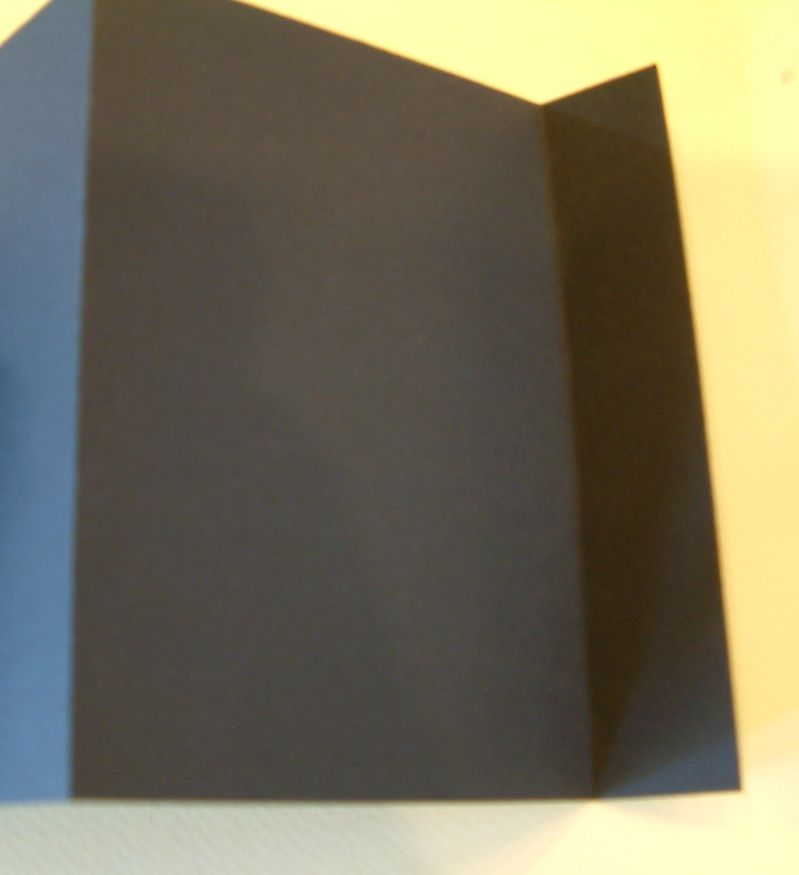
In the pictures below you can see the pieces assembled.
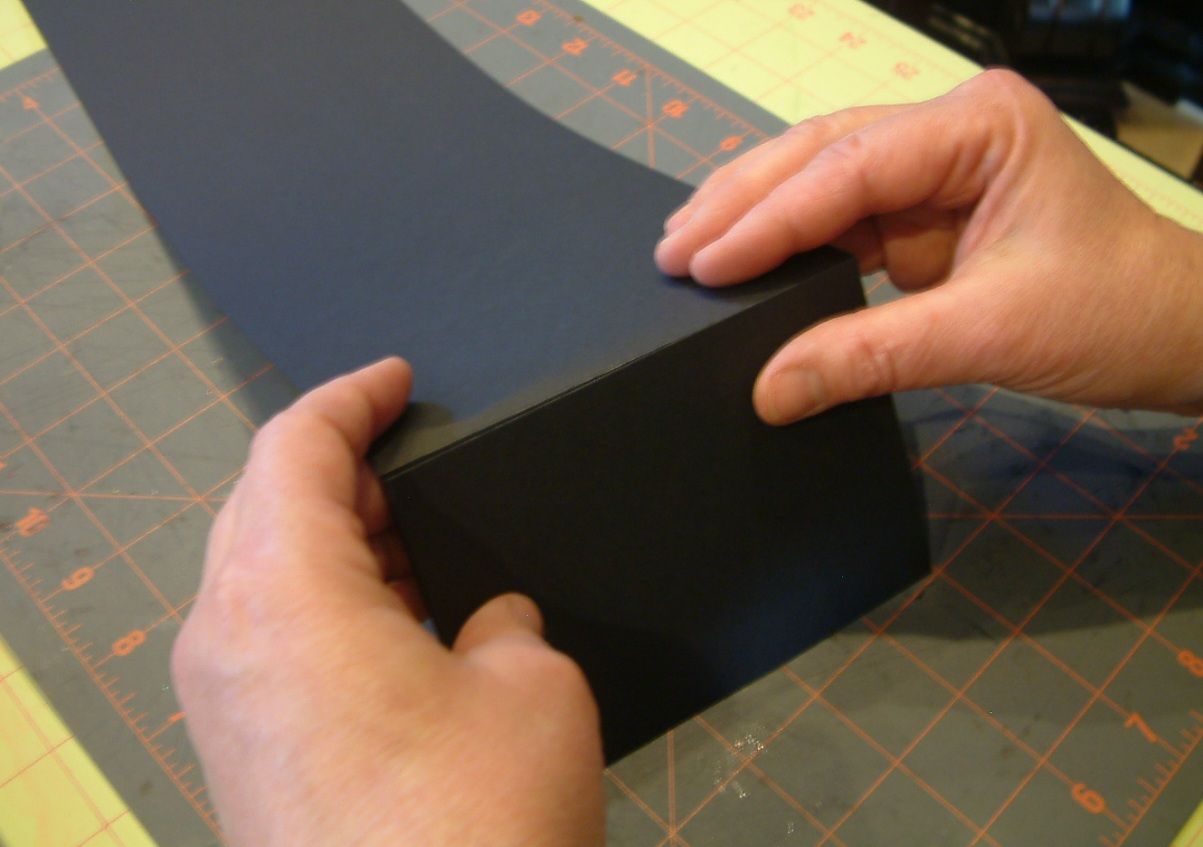
Once you are sure the glue is dry,
carefully fold the chipboard pieces into the shape of the purse (box shape).
In order to complete the cigar box
edging look, I added pieces of the same paper I used for the strips to the
edges of each of the chipboard pieces.
When adding paper to the edges, don’t glue the paper strips into
the folds between the chipboard pieces, as it will cause extra bulk and make it
hard to fold the chipboard.
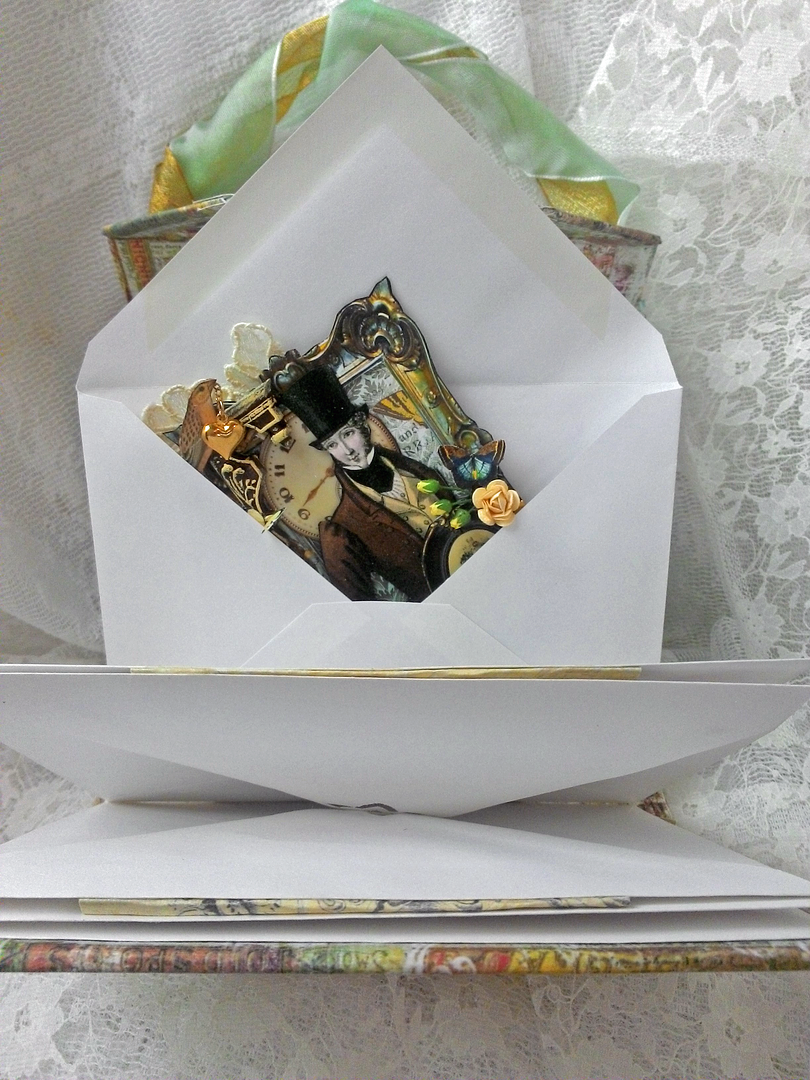
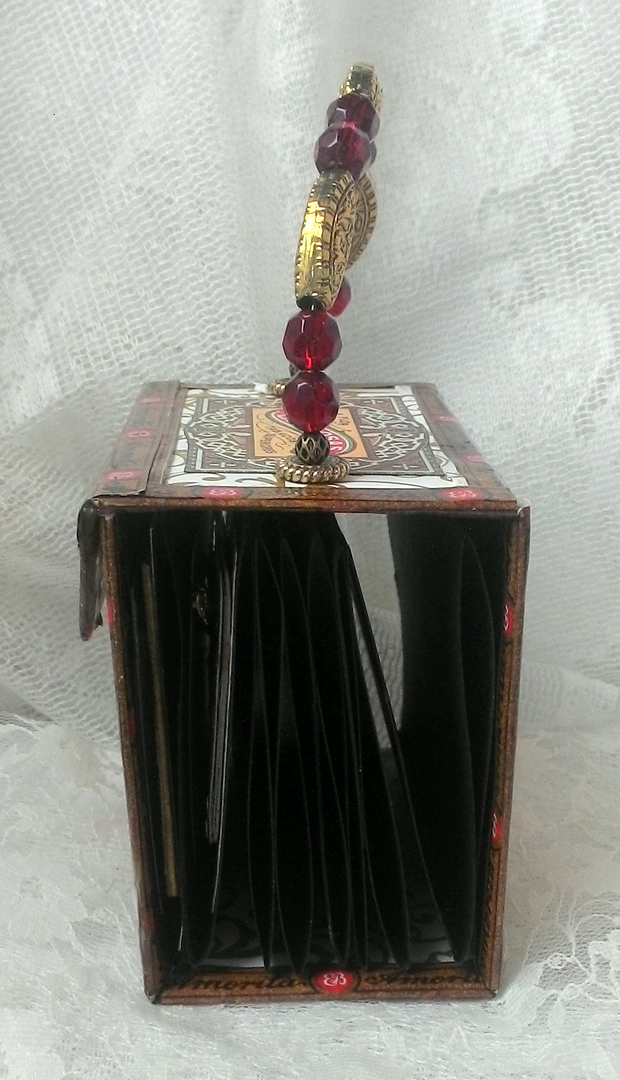
ACCORDION FOLDED
ENVELOPES
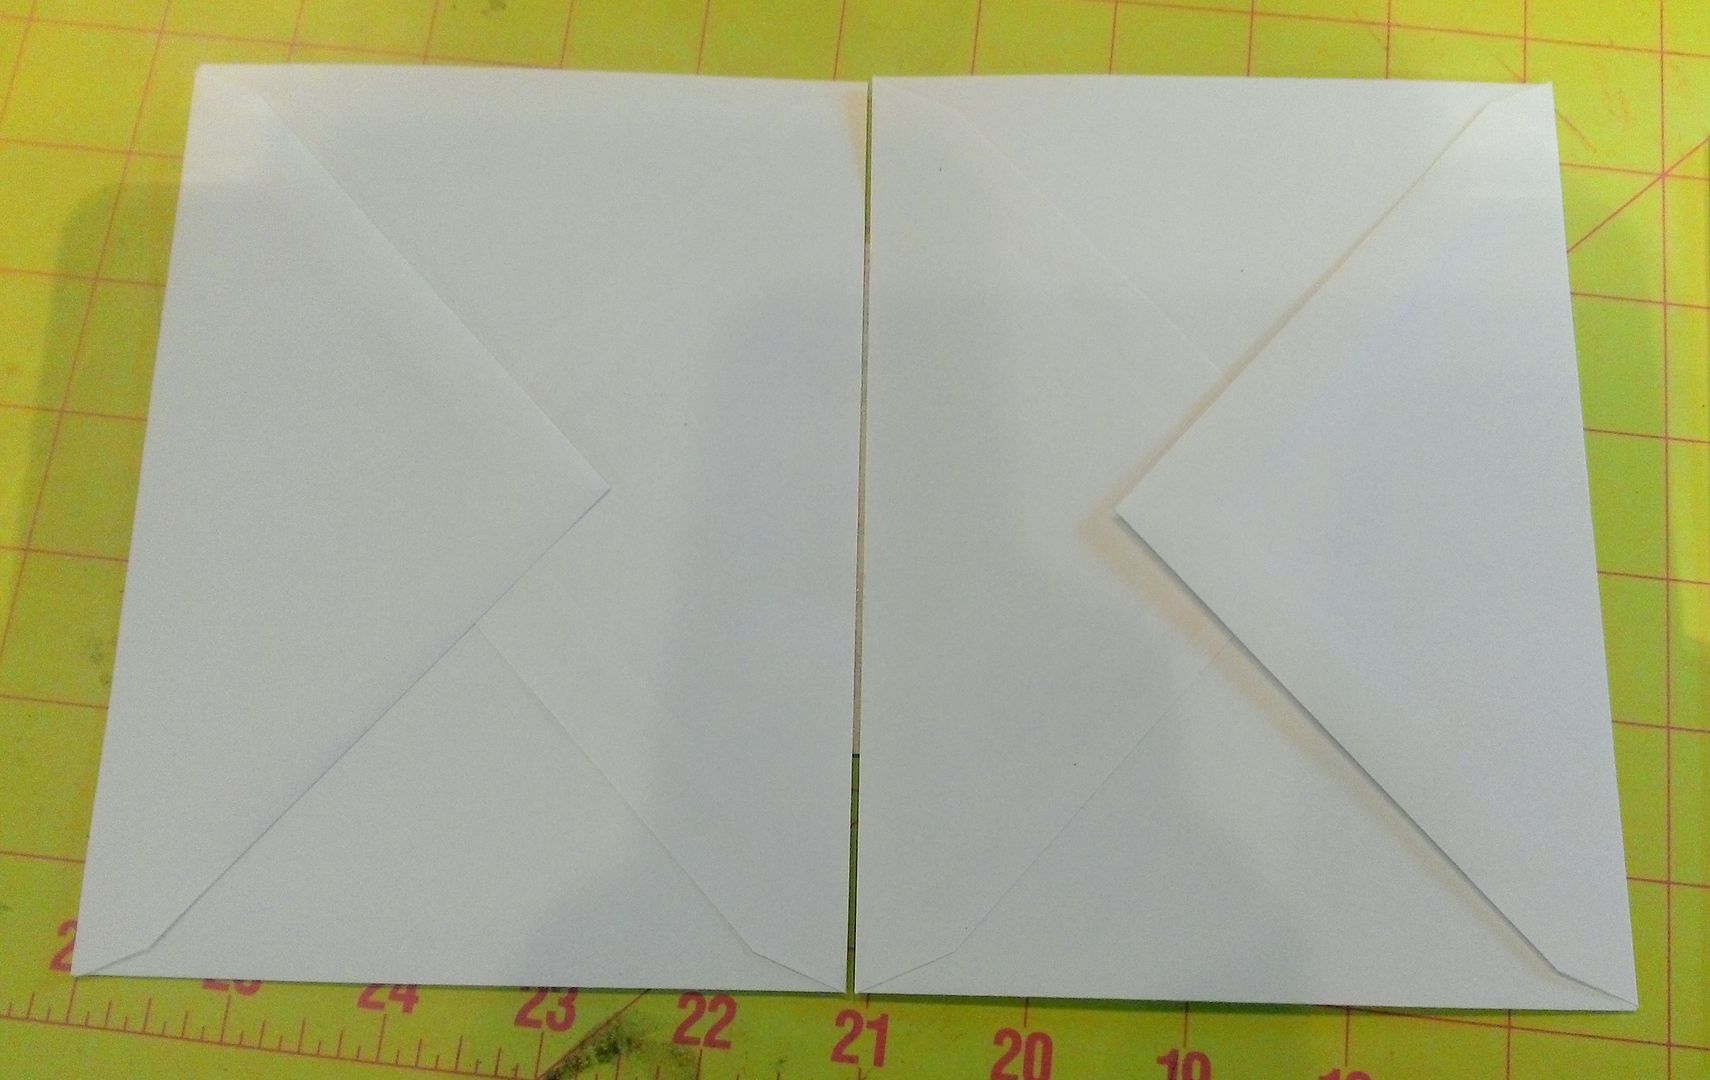
One book option is to use envelopes inside
the purse. The diagram below indicates the
order for assembling the envelopes which ensures that all of the openings of the envelopes face up. You can have as many envelopes as you want, as long as
there is an even number. Choose envelopes
that are smaller in dimension than the front and back covers of the purse.
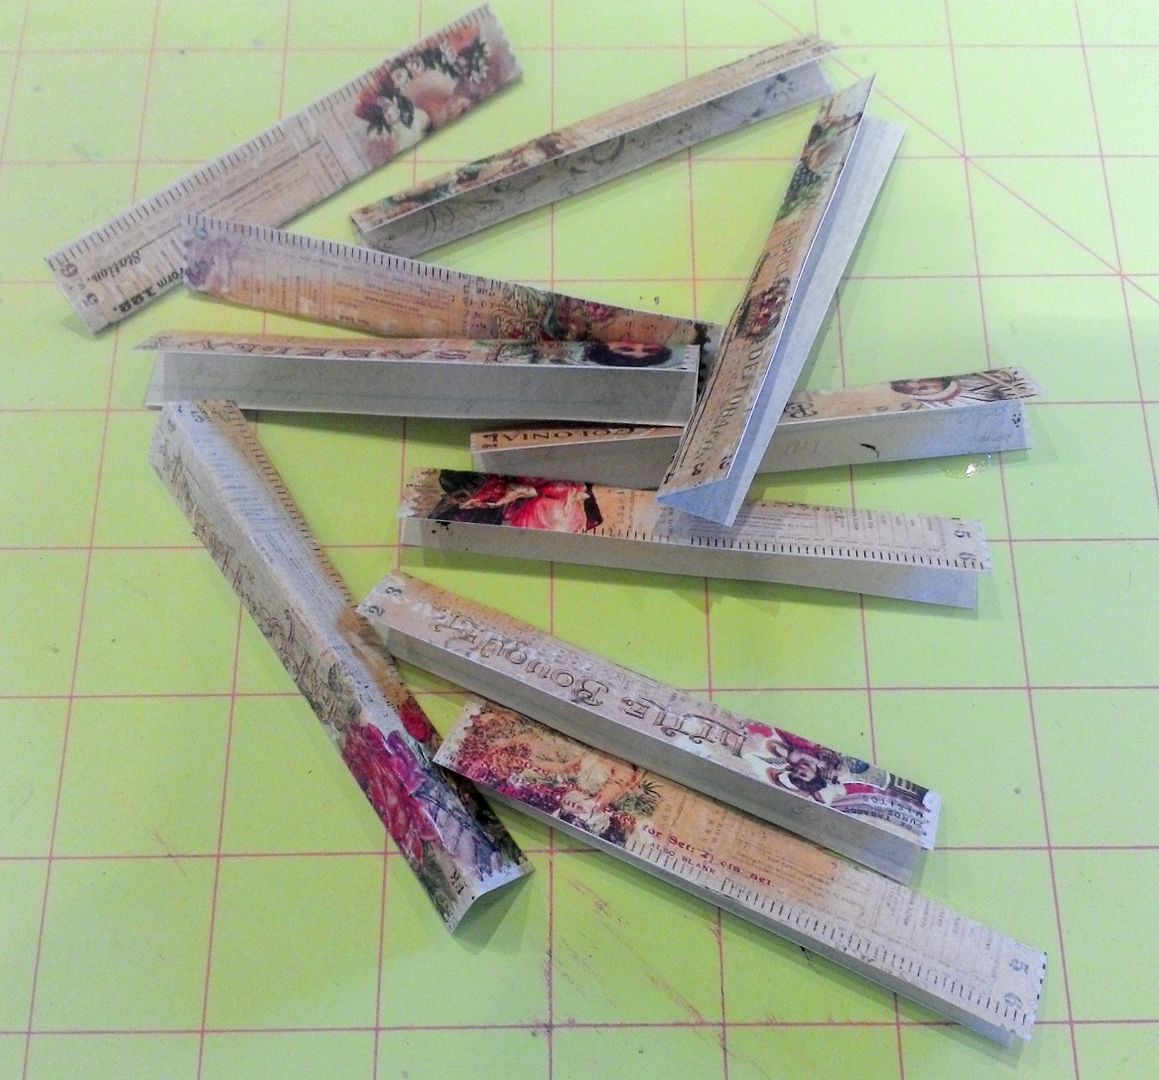
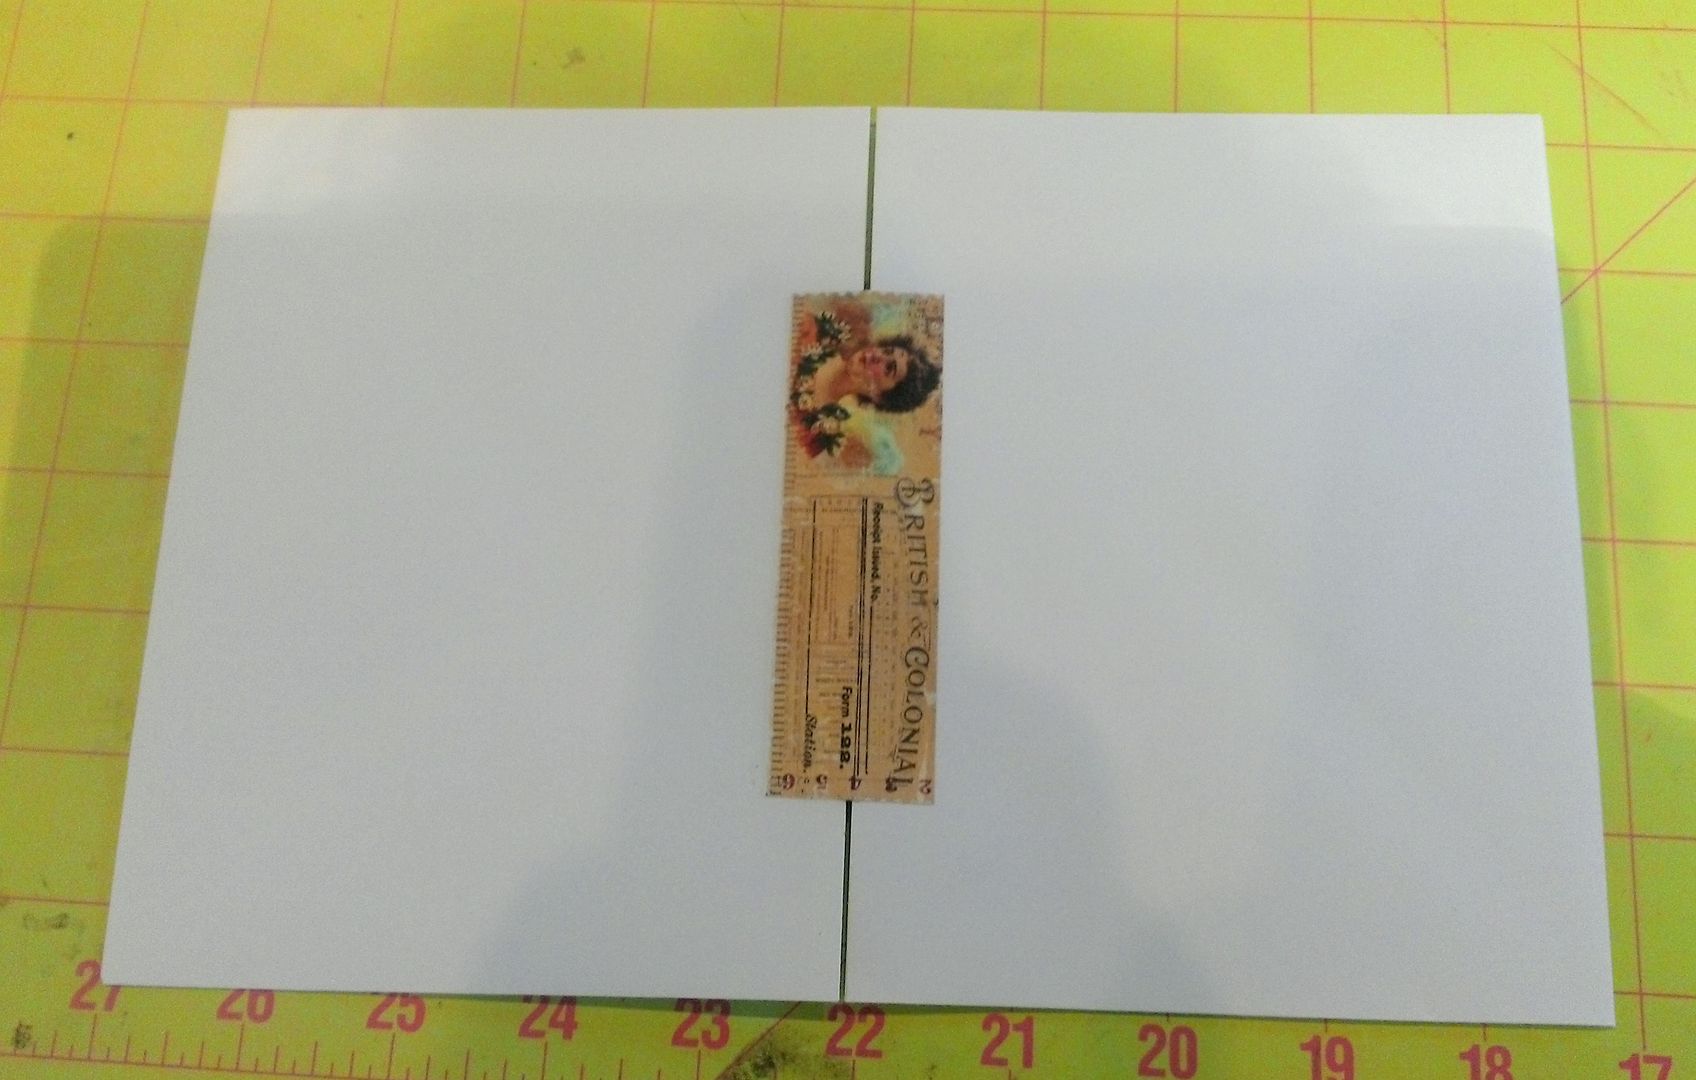
Cut strips of paper to use to connect
the envelopes. For this sample, I cut
the strips ¾” x 3 ½”. The number of
strips you cut depends on the number of envelopes you want to connect. Notice I pre-folded them to facilitate accordion folding the envelopes.
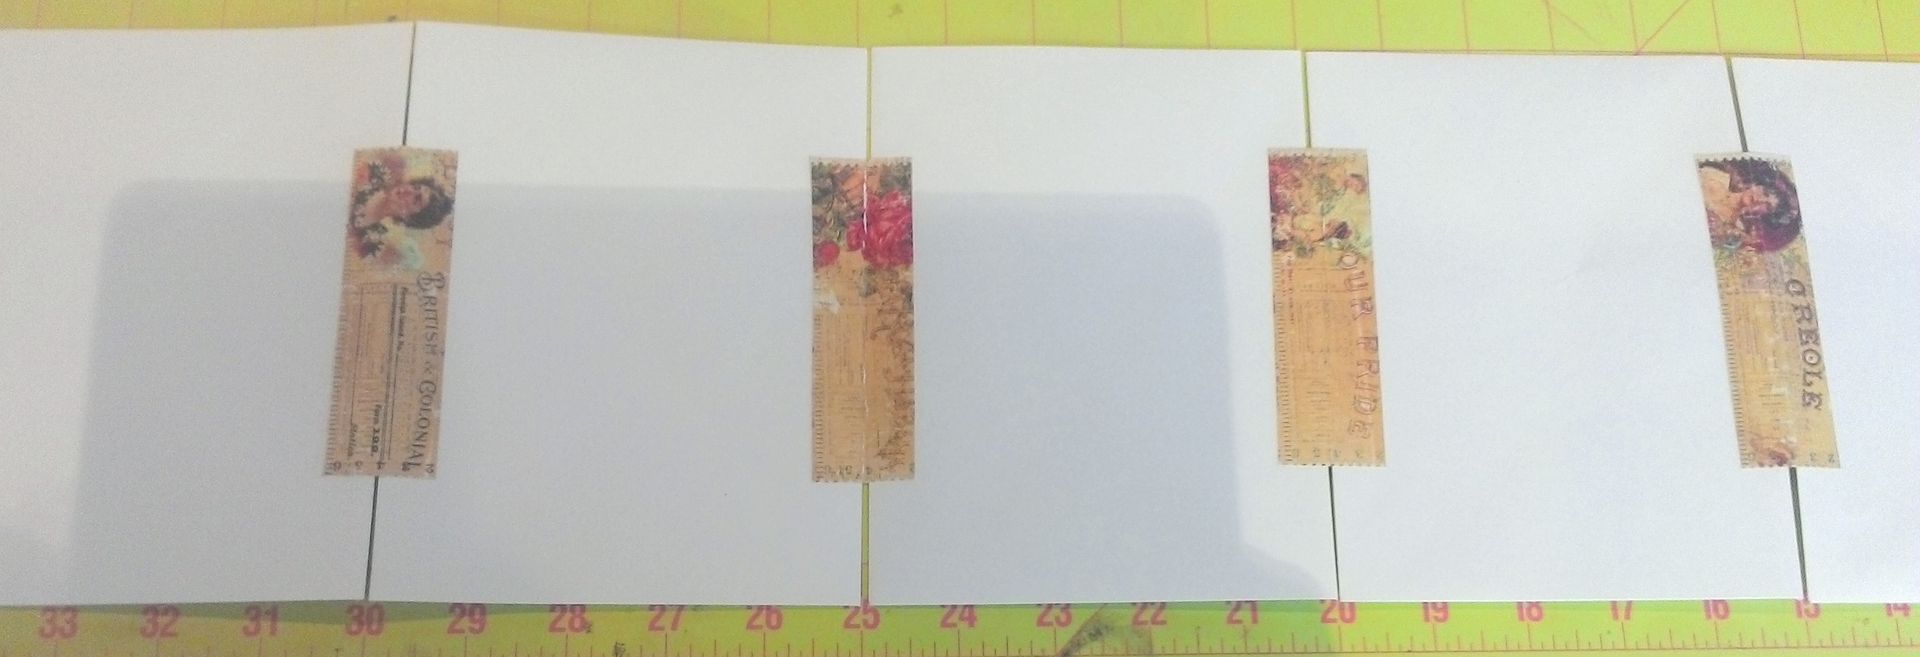
Start gluing the envelopes together
using the strips of paper. Leave a
slight gap (1/16”) between the envelopes to make it easy to fold the envelopes
together. Use the diagram below for the
order and direction of the envelopes.
You can have more envelopes than in the diagram just make sure you use
an even number.
Note that the strip of paper is glued
to the front side of the envelopes.
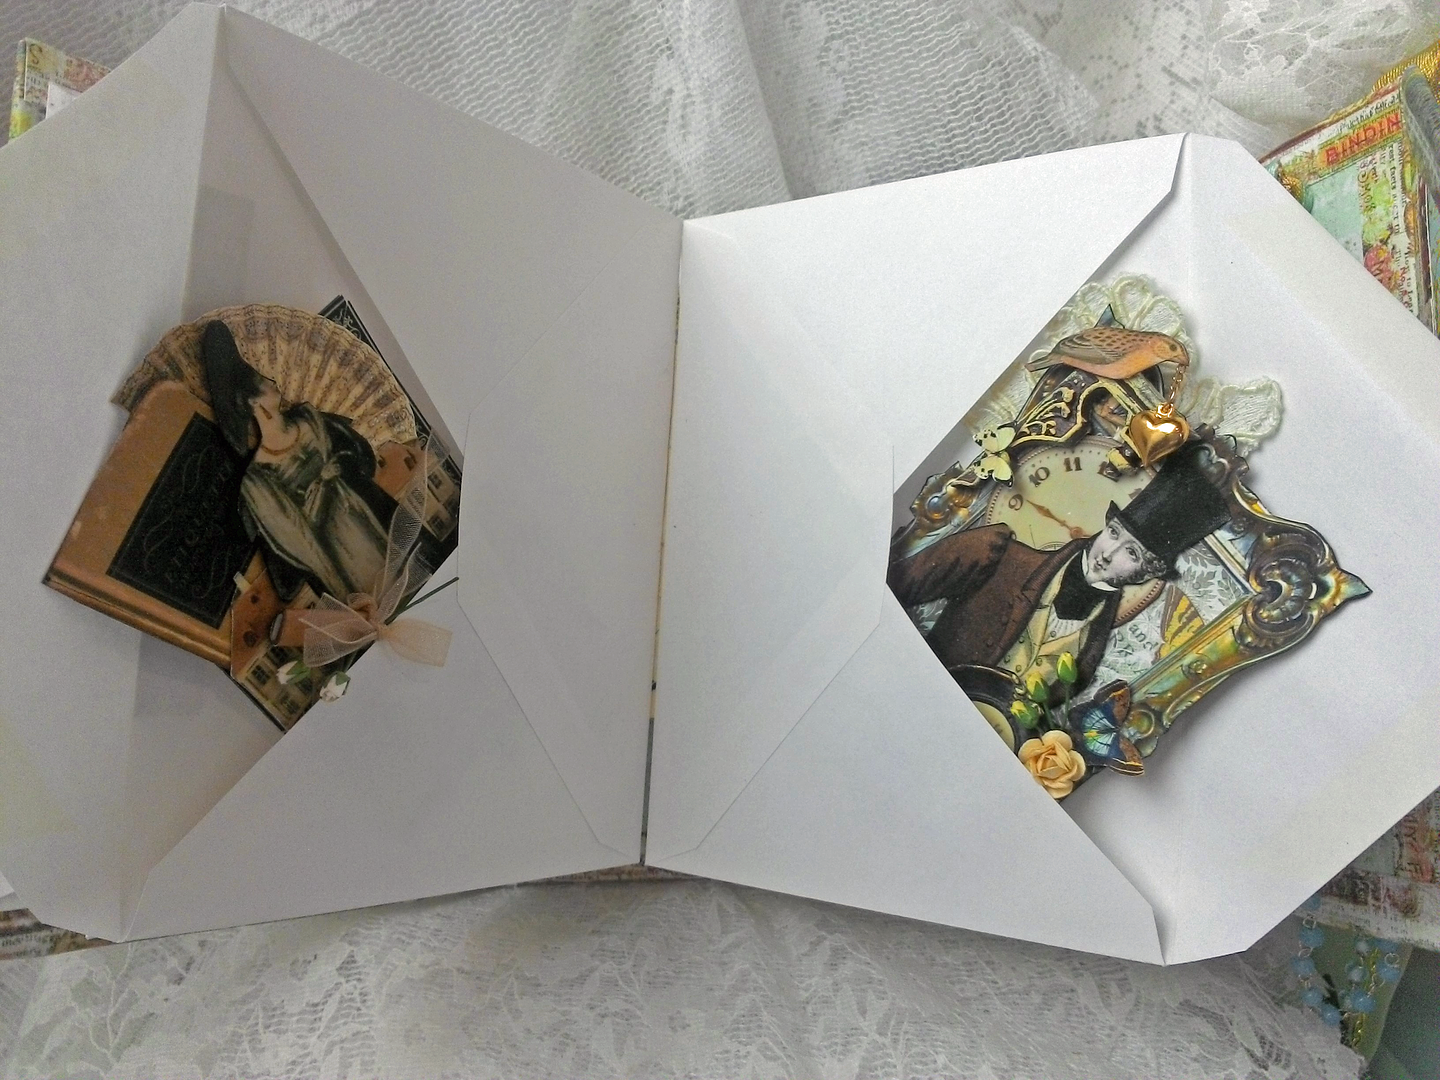
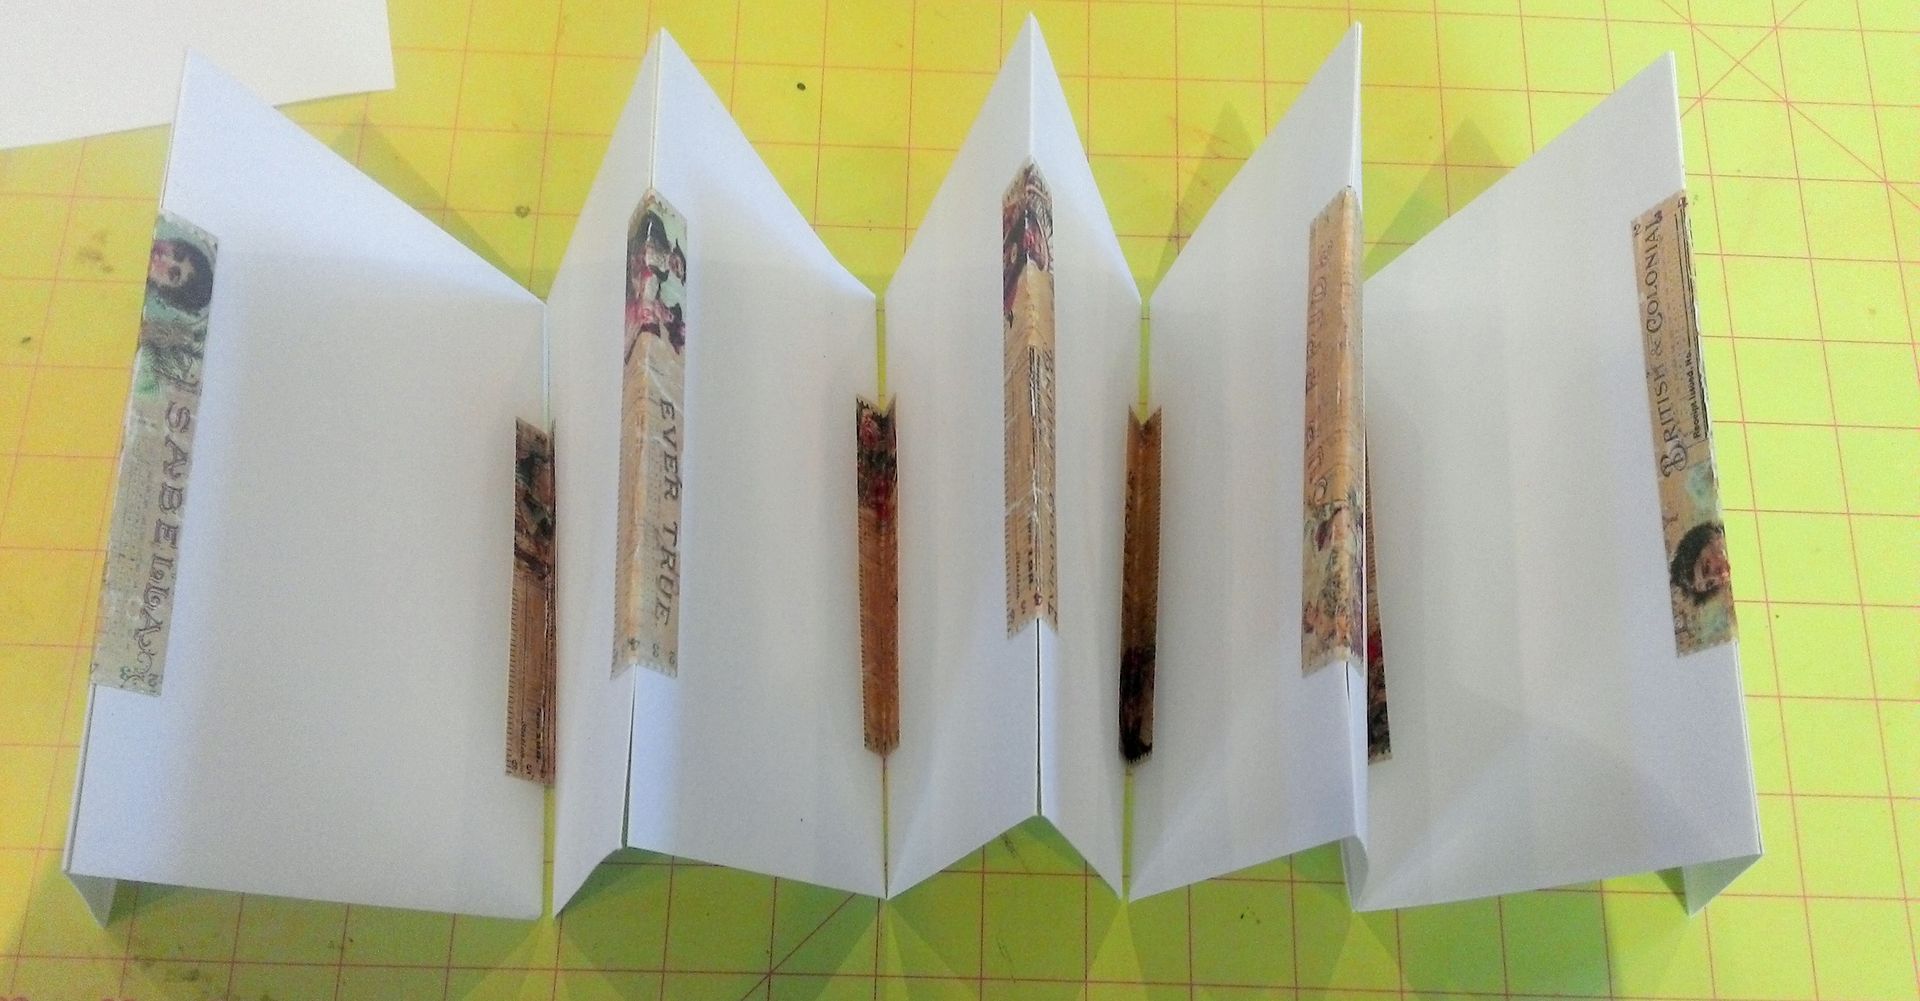
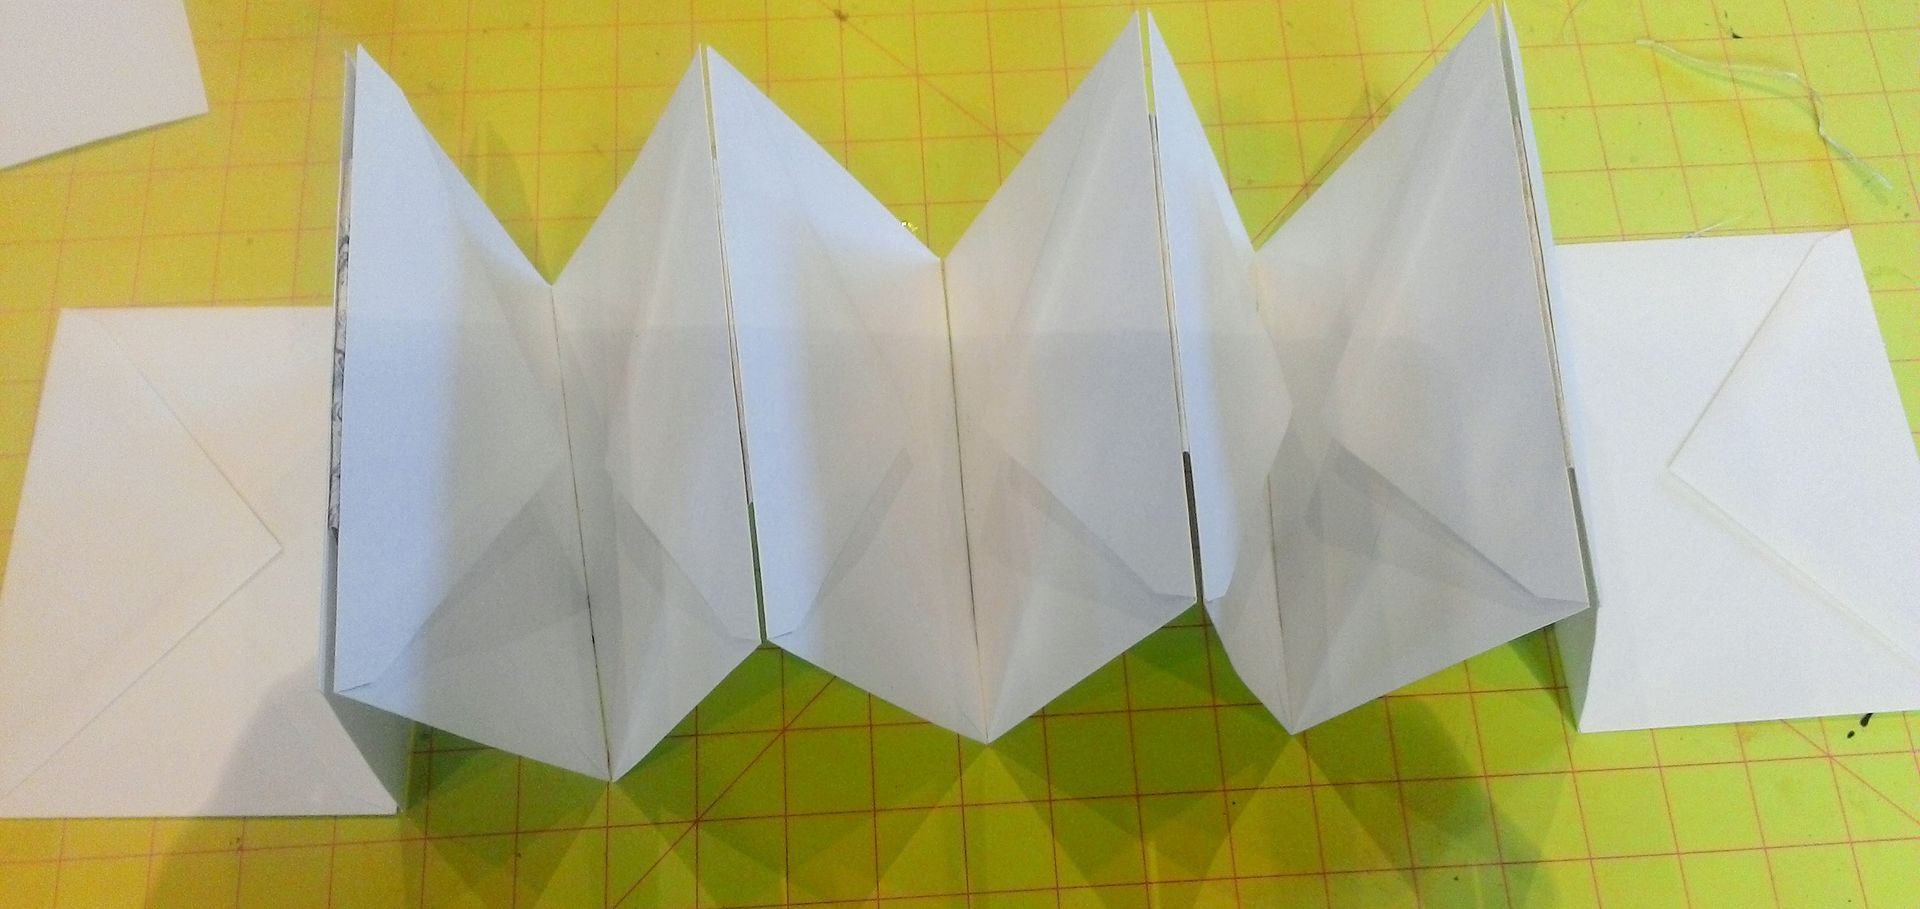
Once you have finished gluing all of
your envelopes together, accordion fold the envelopes; one side should have the paper
strips visible and on the other side, they should not be visible.
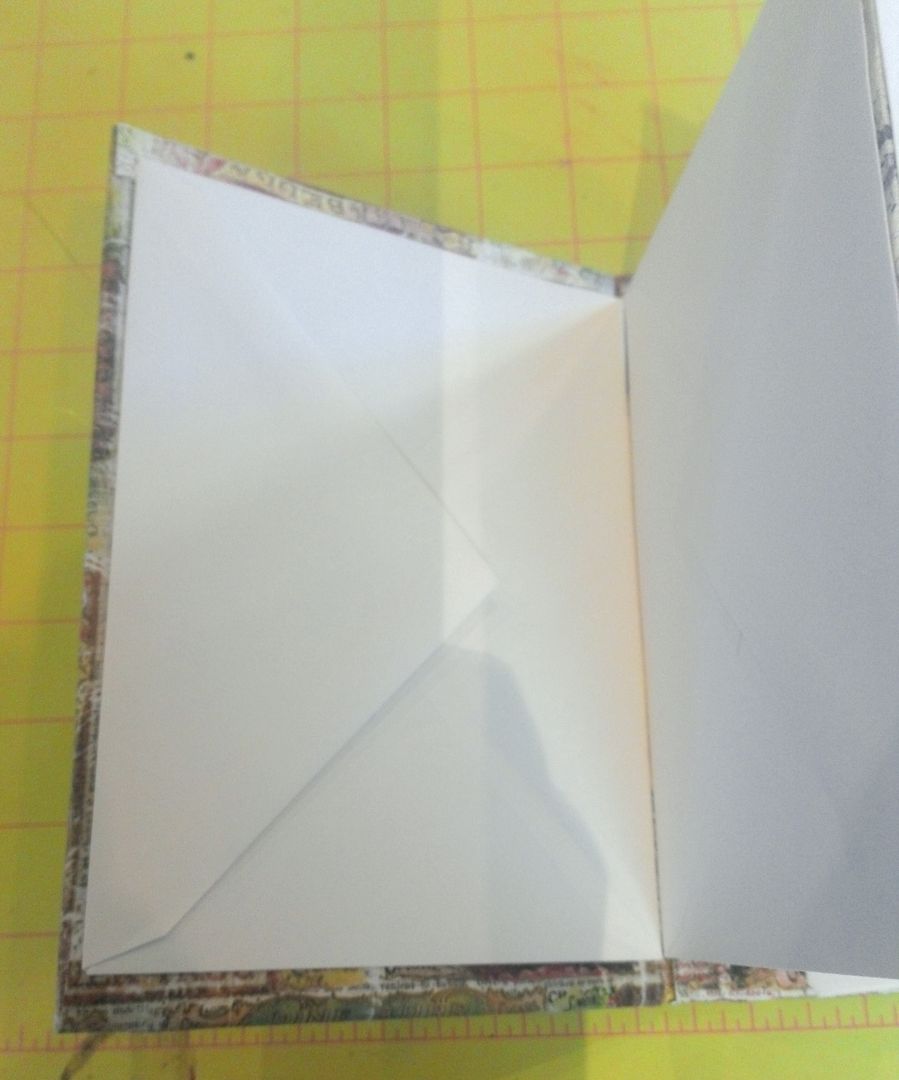
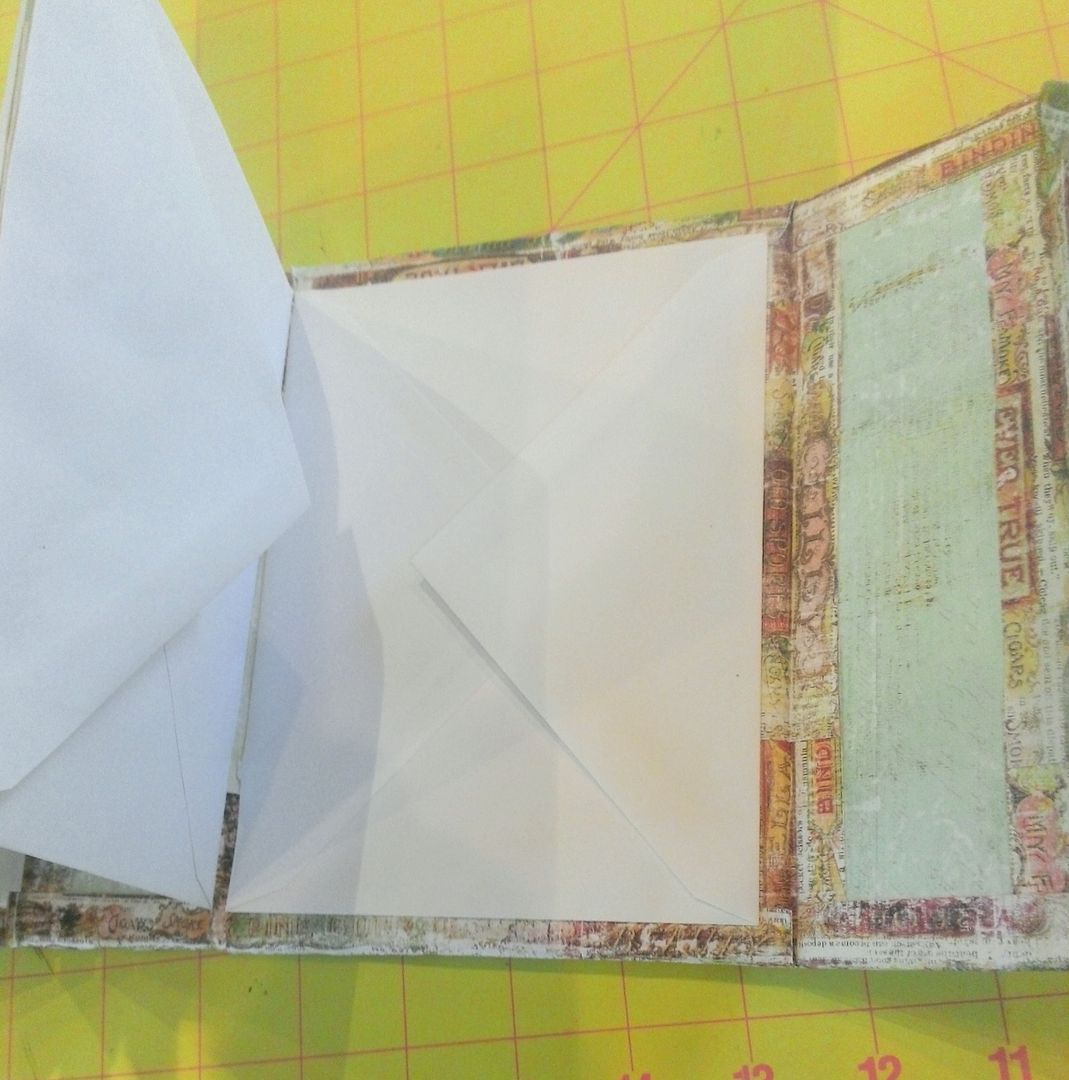
Glue one end of the accordion-folded
envelopes to the inside front of the purse and the other into the inside back
of the purse.
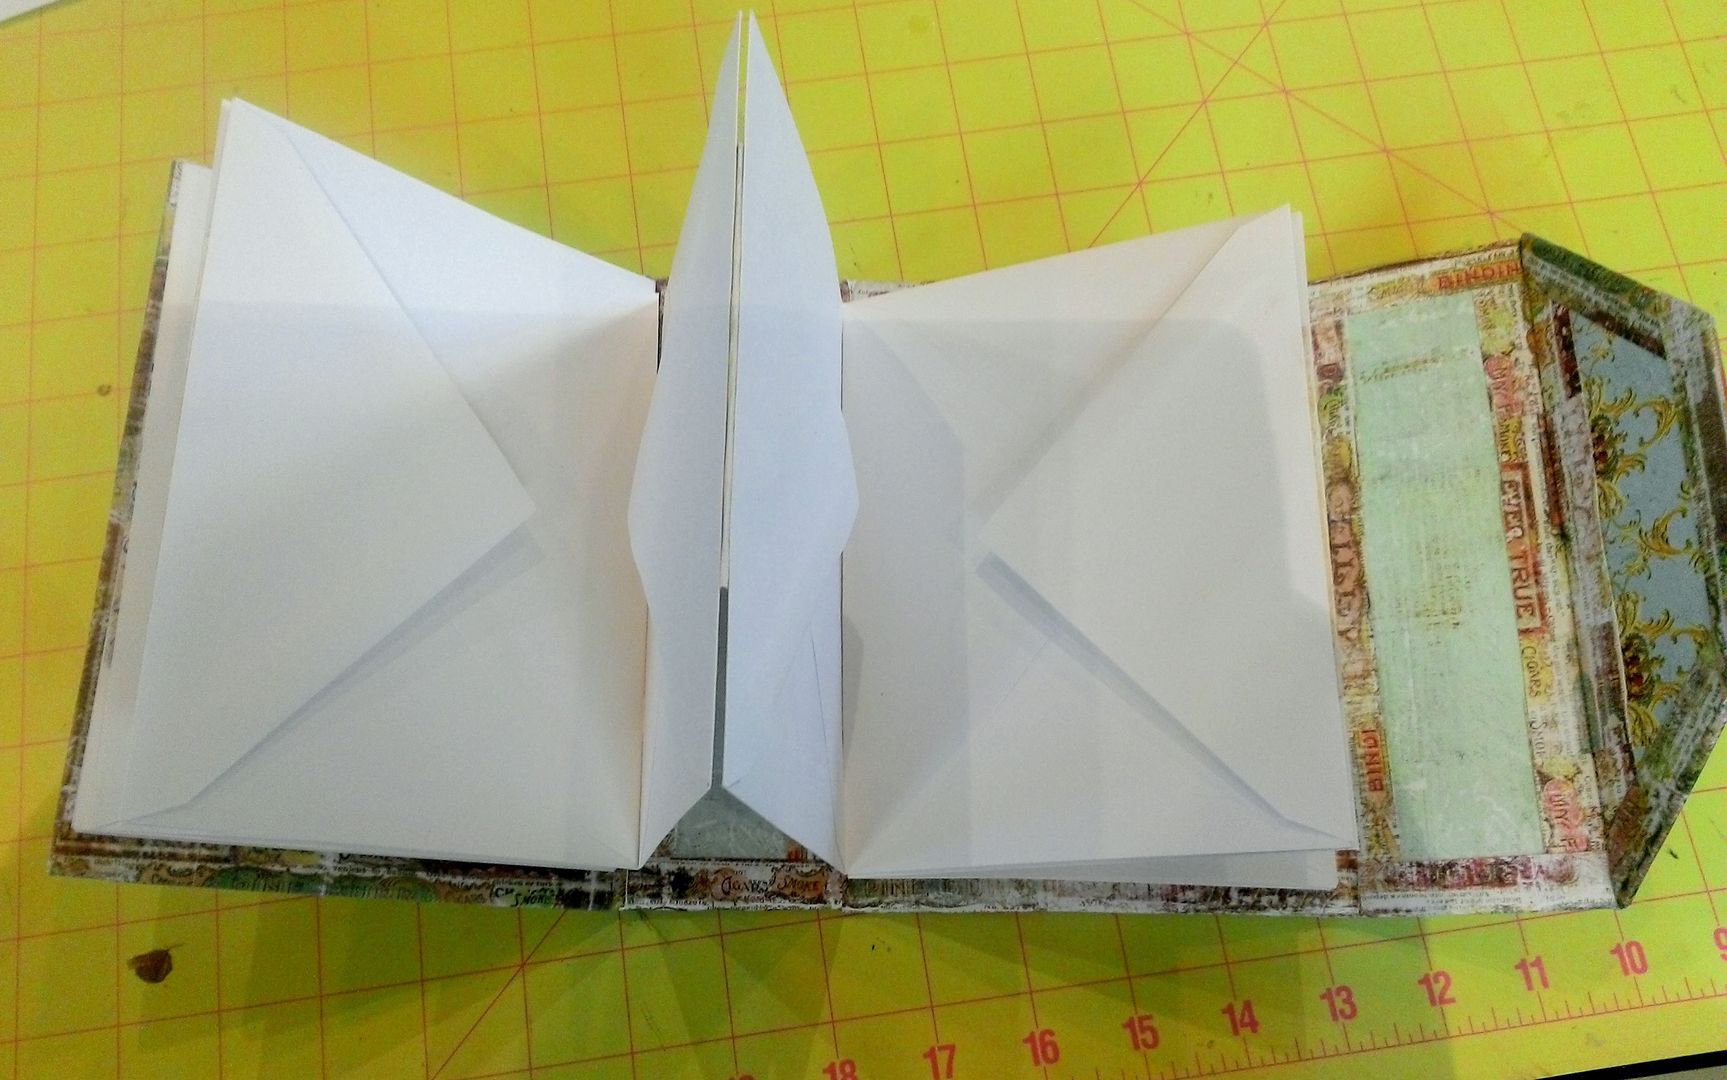
For the sample, I kept the envelopes
intact. You could cut away the flap of
the envelopes, stuff the flap inside and or decorate the outside of the
envelopes.
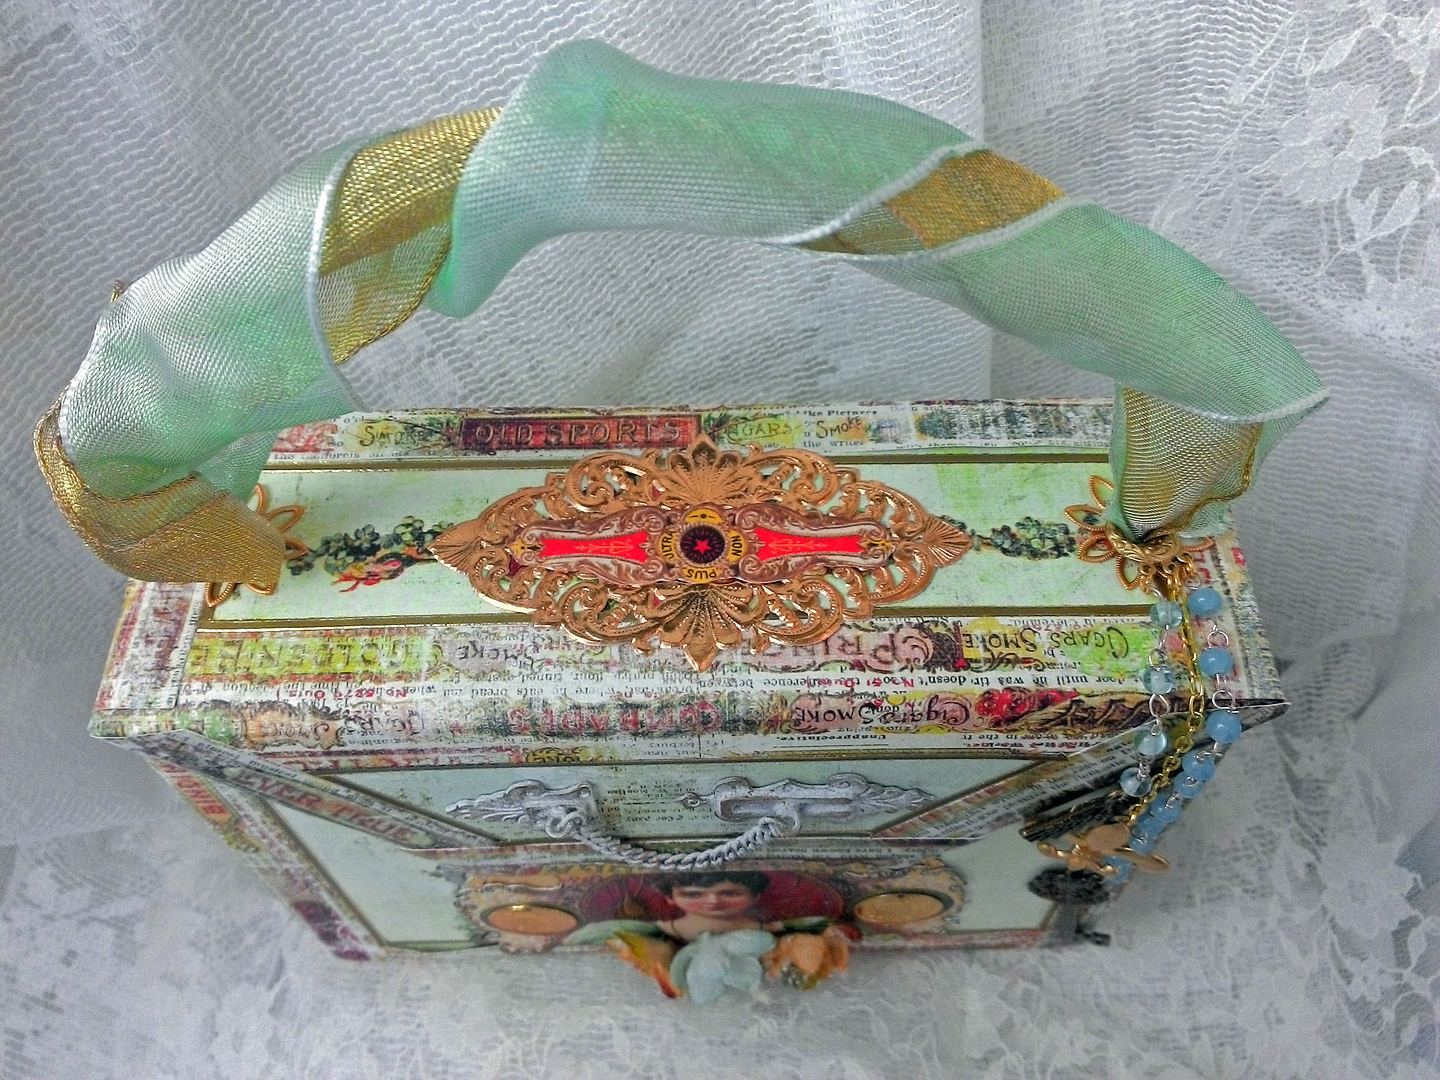
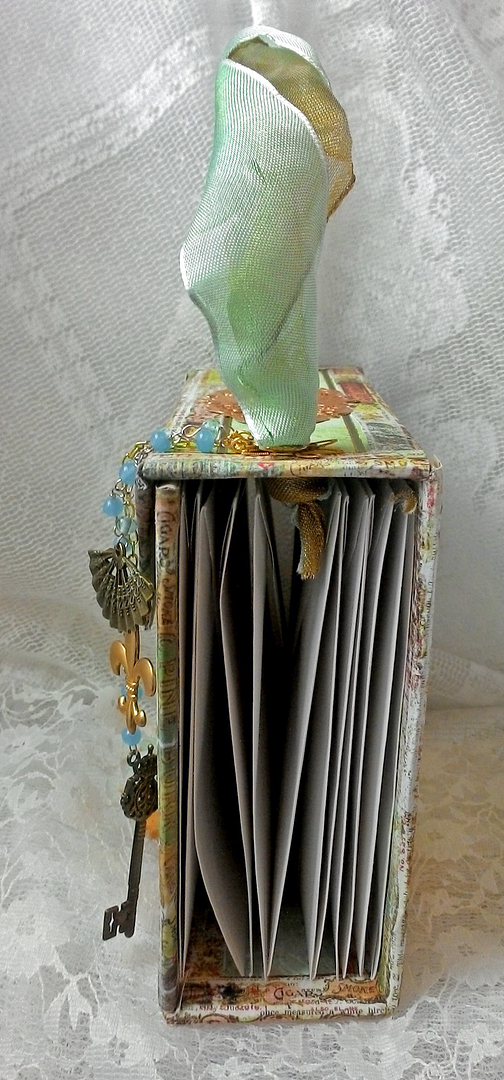
ATTACHING THE HANDLE
For the handle I used two pieces of
wire ribbon twisted together. I chose
wire ribbon as it holds its shape making the handle stand up. Also, note all the charms hanging from the handle.
To attach the handle, I punched two
holes in the top of the purse and added pieces of filigree which I also punched
(so that it would be the same size as the holes in the top).
I poked the ribbon through each of
the holes and tied it on the backside of the top. The knot in the ribbon keeps it from pulling
through the top when lifting the purse by the handle. Make sure you have extra ribbon to make it
easy to tie and then snip off the excess. Note at the top of the picture you see a piece of white Velcro which is what I used to keep the purse closed. One side of the Velcro goes on the inside of the flap and the other goes on the front of the purse (make sure they line up).
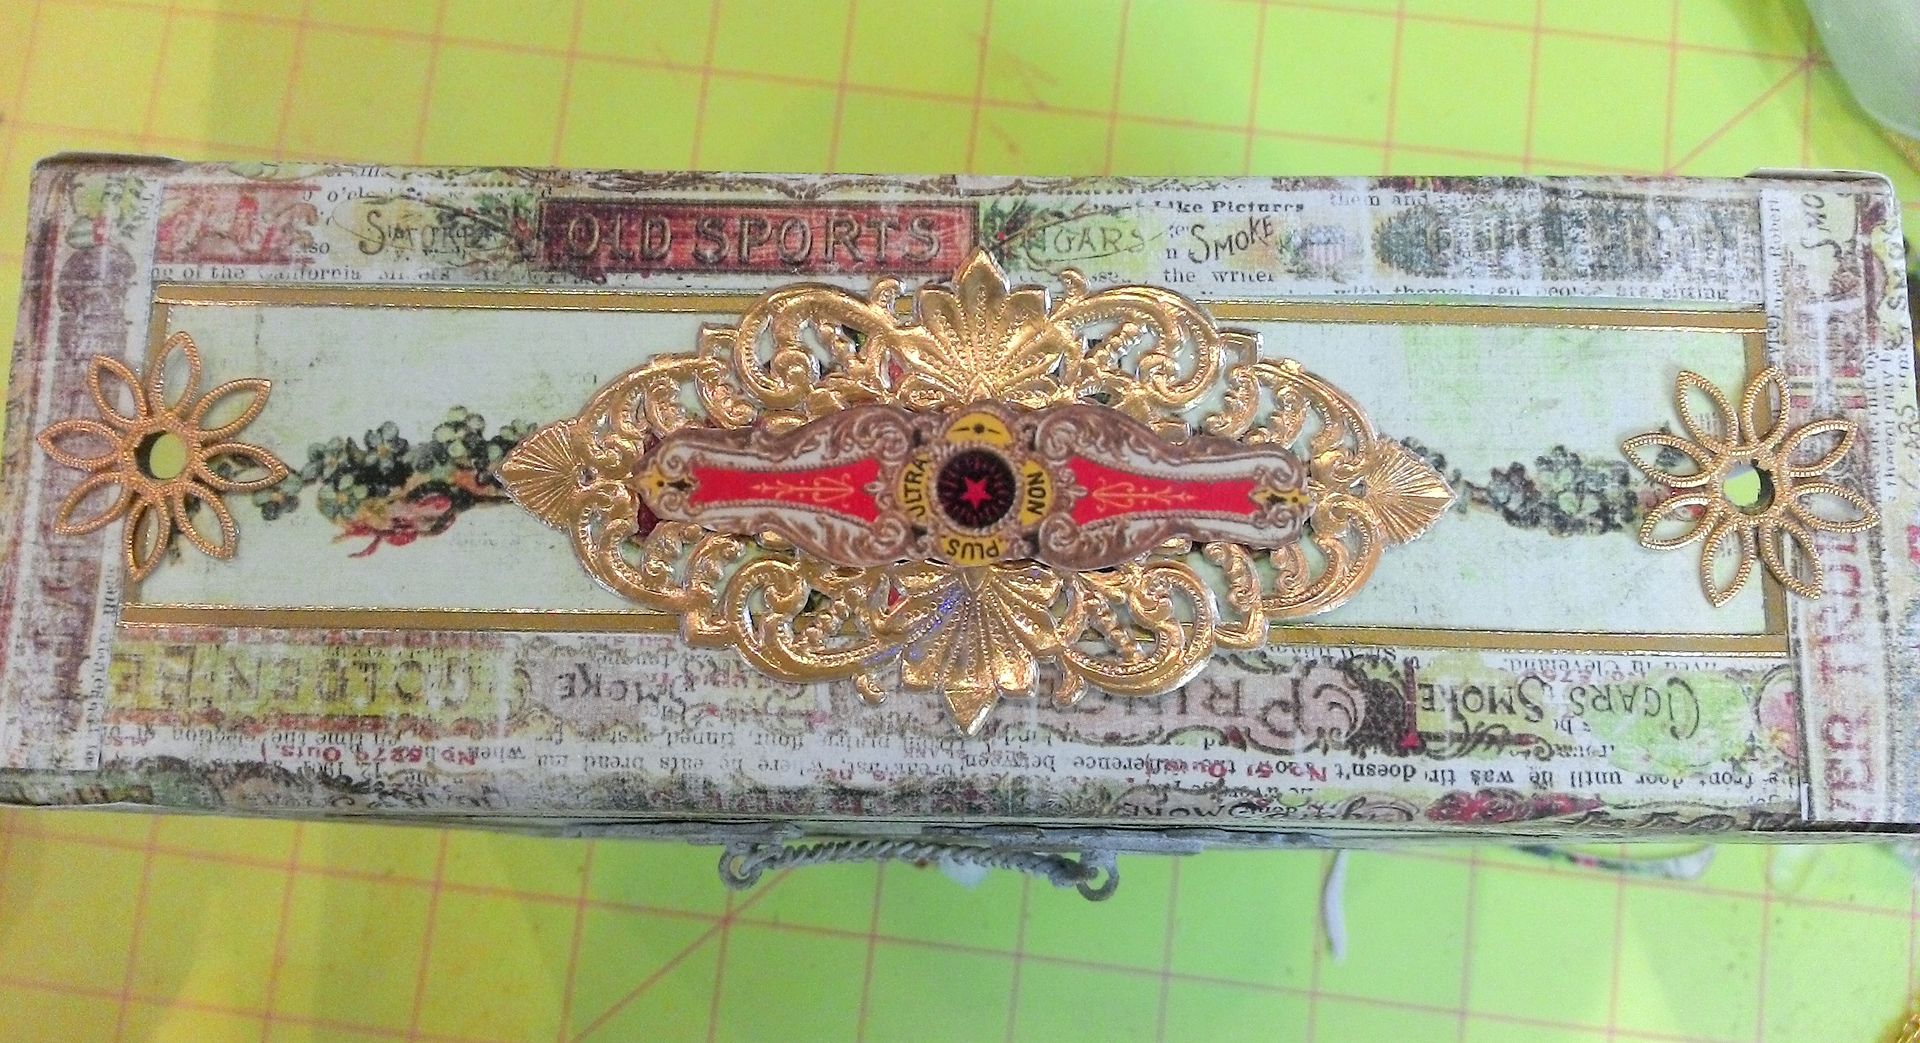
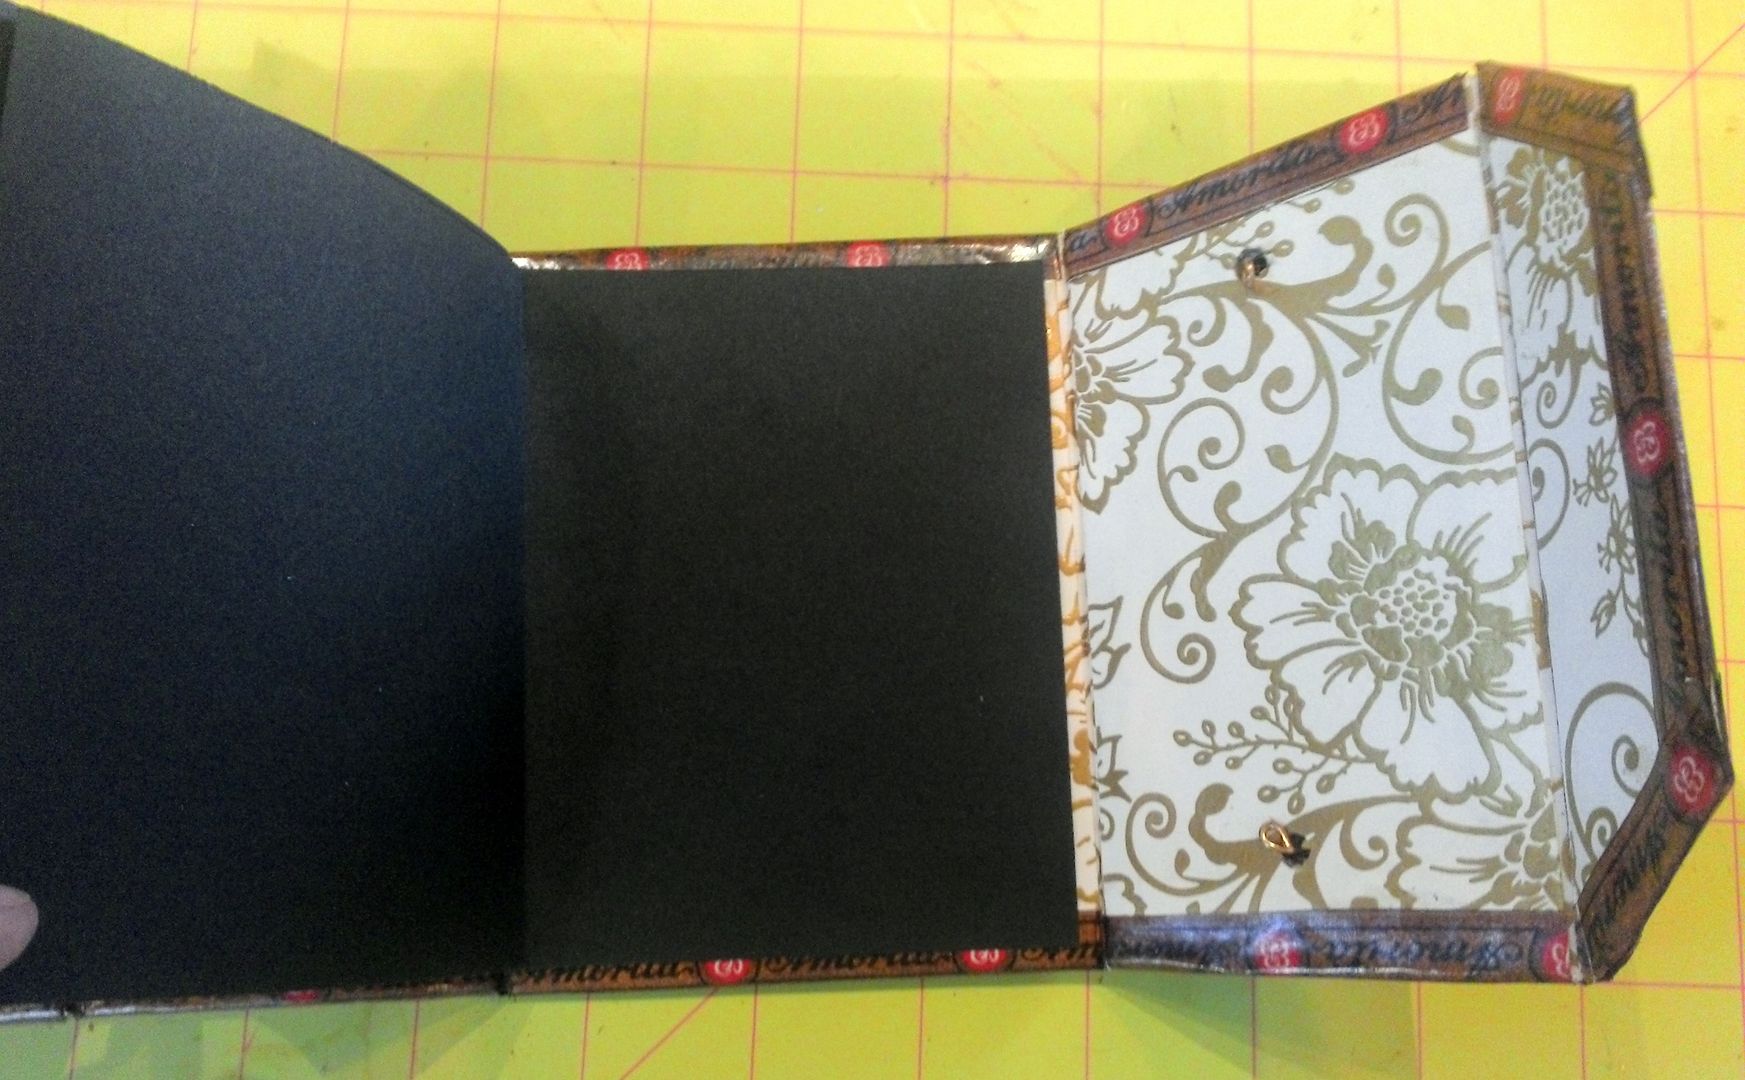
One last detail I added was gold stickers around the inside lines of the cigar box edging. This was to add the gold embossed look you see on many paper cigar boxes.
I also used decorative gold stickers on the back to add even more of an embossed look.
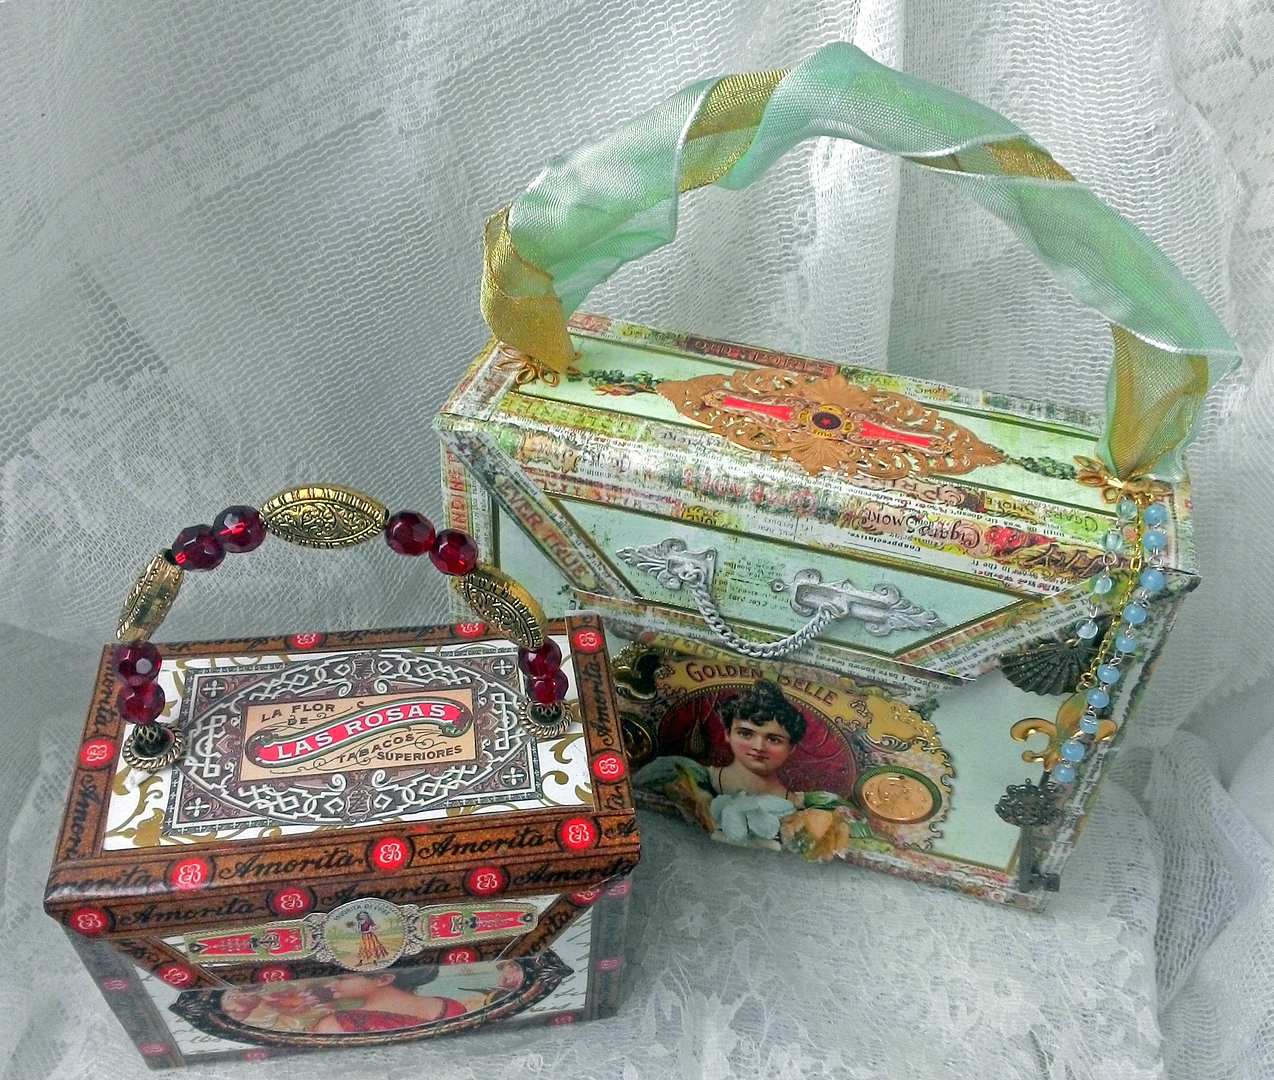
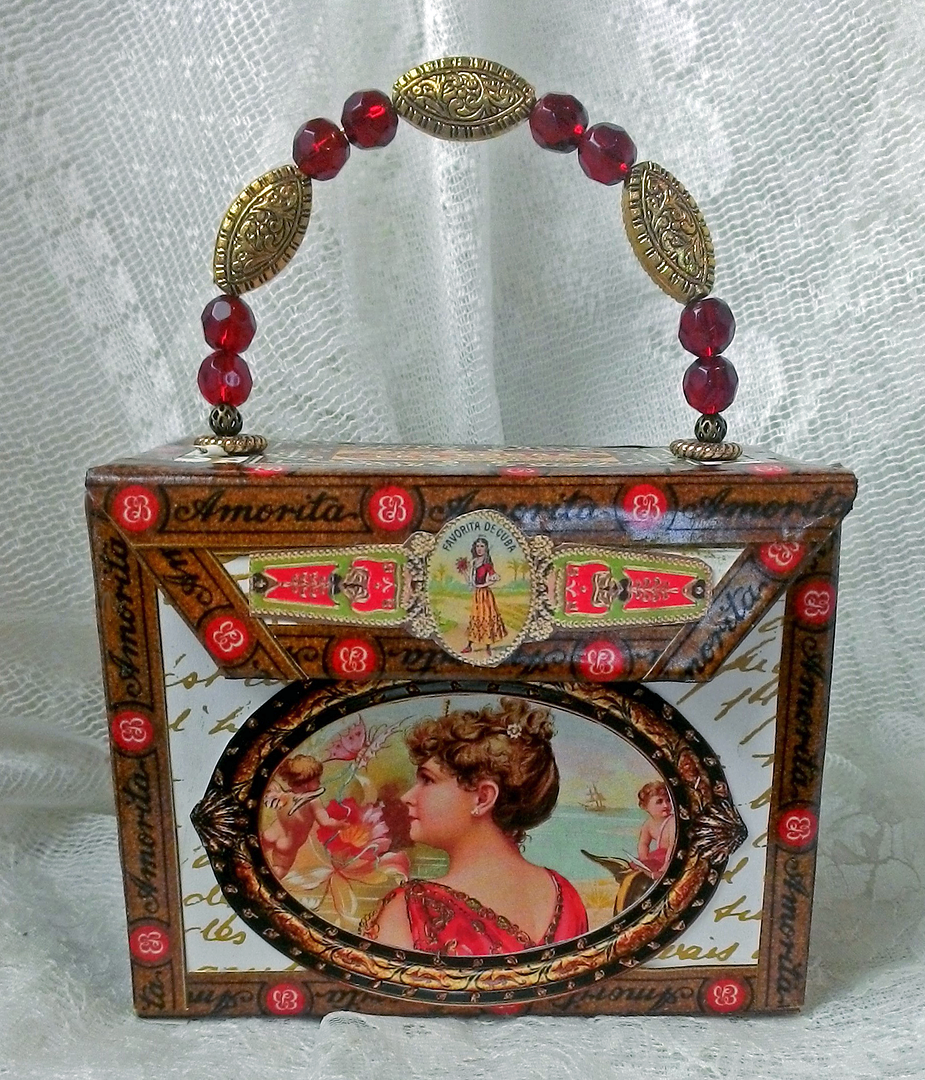
SMALL RED PURSE
The idea with the small red purse was
to make something that was sized for ATCs and to use accordion folded cardstock
as the book section instead of envelopes.
The assembly of this purse is
identical to the assembly of the first larger teal purse with the only
difference being the measurements of the chipboard and the accordion folded
cardstock attached inside the purse. Note the measurements below.
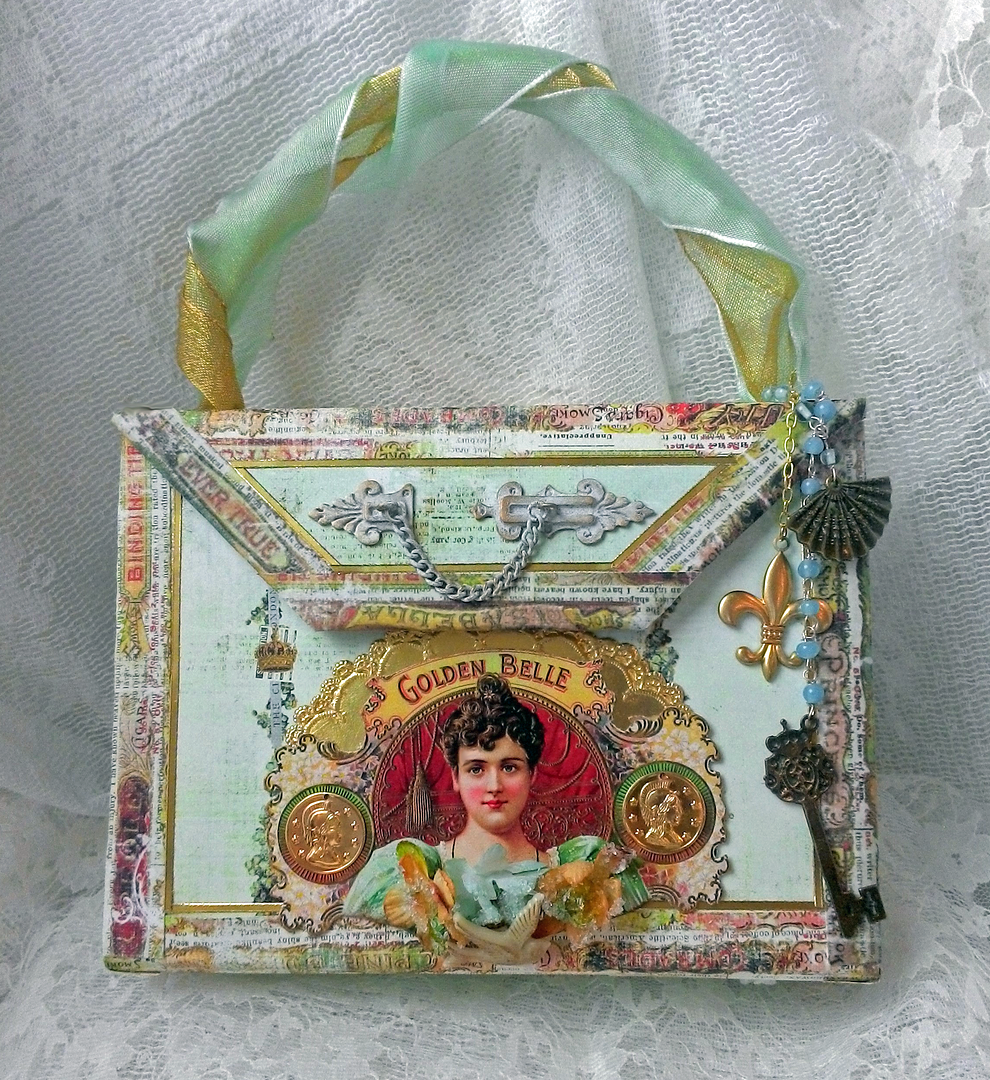
For this purse, I also made the purse
flap smaller in proportion to the size of the purse. I did this to accommodate the image I wanted
to use on the front.
ACCORDION FOLDED CARDSTOCK
Cut strips of cardstock 4 1/4” wide and as long as the length of
your paper (I used 12x12 paper).
To create the individual pages you are going to score and fold the
paper. Score the paper every 3 1/4". You may end up with a strip where the last
score is less than 3 1/4"; that’s
ok, as the short piece will be used to attach the strips to each other.
Once the strips are scored, accordion fold the strips.
You should end up with strips of cardstock that look like the picture below.
Glue all of the strips together. You can use the short piece or short page of
one strip to attach it to a full page of another sheet. The only exception is if the short page is
less than ½” as this amount is too short and your book may fall apart. If you don’t have at least a ½” piece, glue
one full page to another full page.
When you are gluing one strip to another, you may need to change
the direction of the folds of the newly glued strip so that all the strips fold
in the same direction.
Regardless of how many strips you glue together when you are
finished attaching all of the strips, you must end up with a full-page on each
end (cut off the excess short page) and an even number of pages.
Glue each end of the accordion folded cardstock to the insides of
the purse as was demonstrated with the accordion folded envelopes in the teal purse.
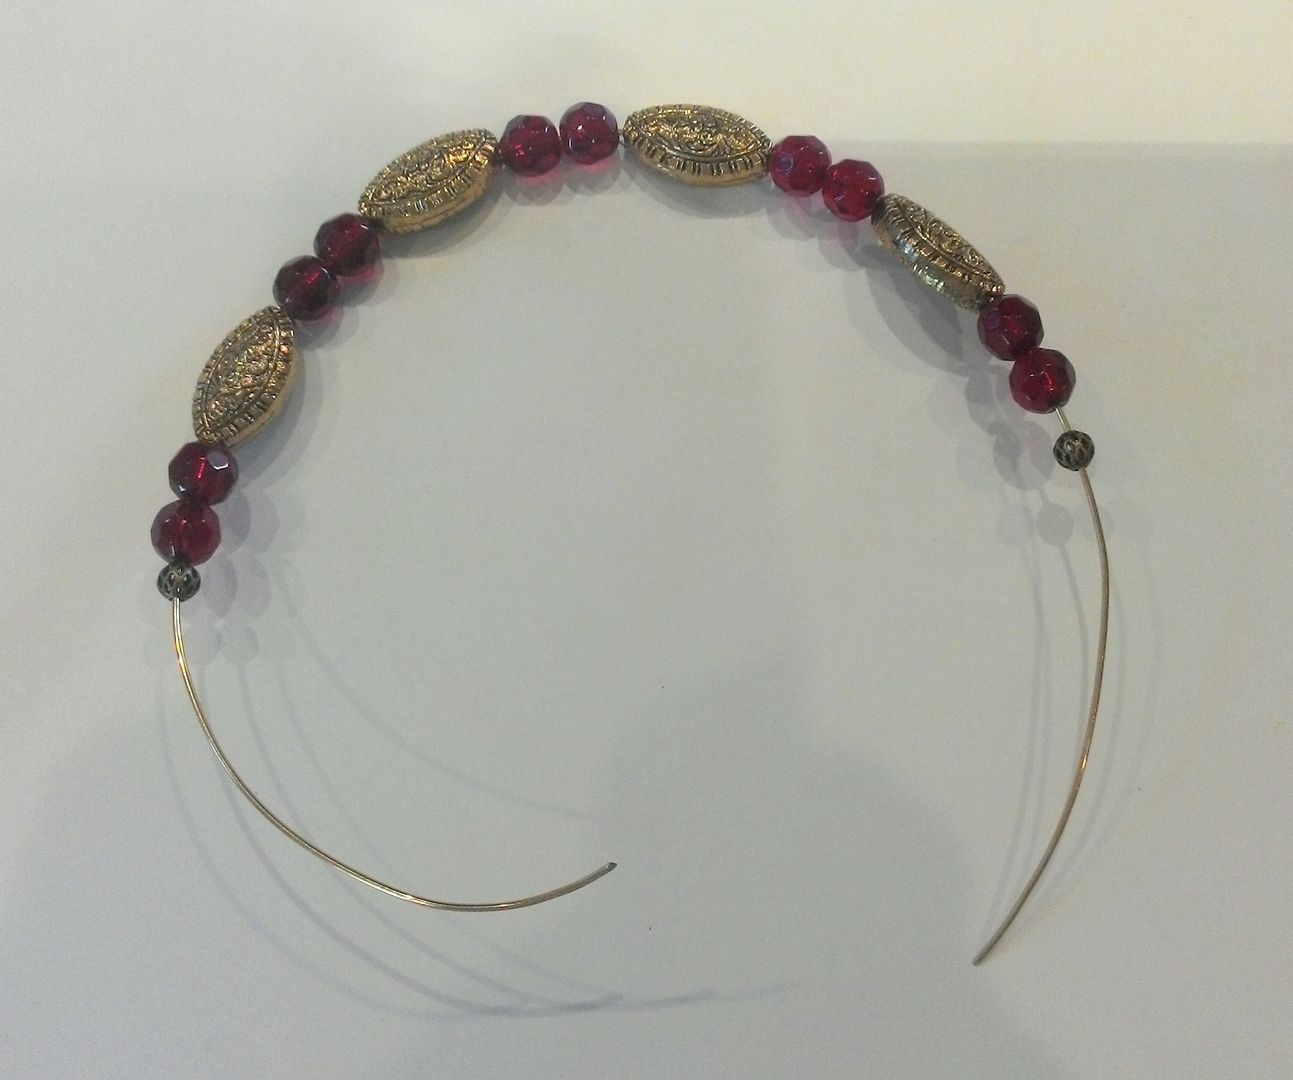
For this purse, I decided to go with a
beaded handle. I strung beads on a heavy
wire. I punched two holes on the top of
the purse and added rondelles to pretty up the holes. I threaded the wire through the holes and
looped the wire on the backside to keep it from slipping through the holes. Just like with the teal purse I used Velcro to keep the purse closed.
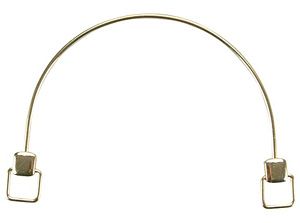
Another option for creating a beaded
handle is the Brass
Purse Handle Frame pictured below.
The bases screw off, so you can thread the beads onto the handle. To attach the handle to the purse, you could punch
holes in the top of the purse, use ribbon threaded through the square-shaped
“D rings” and then through the holes. Lastly, tie the ribbon in a knot on the backside of the top.
You could also go with using these yummy Amber
Plastic Purse Handles, which I think would work great with the cigar box look. To attach them, I would again punch holes in the
top of the purse and use either ribbon or pieces of leather to anchor them to the top.
PURSE ALTERNATIVES
If you are not comfortable constructing
a purse out of chipboard, Alpha Stamps is carrying some paper mache and wooden
purse boxes that are ready to be altered and decorated. Click
here for more details.