-->

Welcome

I love answering your questions. If you ask them in the comment section, I have no way to answer you (if you haven't heard from me, that is why). If you use the "EMAIL ME" in the left column of this page, I will be able to respond to you. You can also use it if you want to be added to my newsletter. Laura

Saturday, June 11, 2016

Alice in Wonderland "Down the Rabbit Hole" & Four Alice Themed Domino Books Plus a New Collage Sheet & Digital Image Set

 
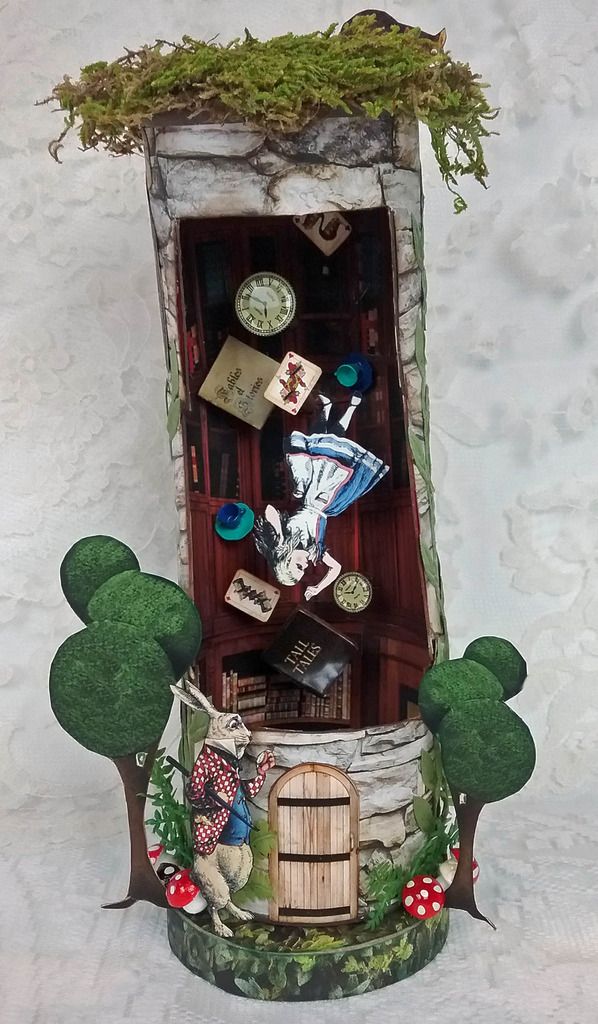
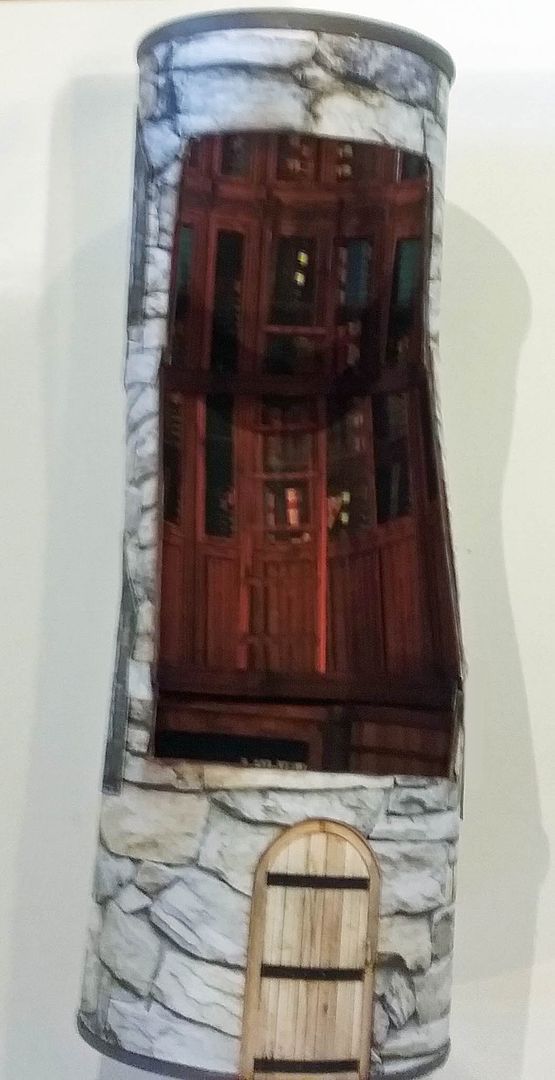
Cut up a Pringles Potato Chip can glue it back together cattywampus, and you get Alice falling down the rabbit hole.  To create the effect of Alice and other objects free-falling down the hole, I used wooden dowels and double-stick tape to suspend and anchor the images and items to the back wall.
Cobblestone paper, window and door images, leaf ribbons, ferns, and mushrooms decorate the outside.
In the front at the bottom, you’ll see the White Rabbit waiting impatiently for Alice at the door.

ALICE DOMINO BOOKS
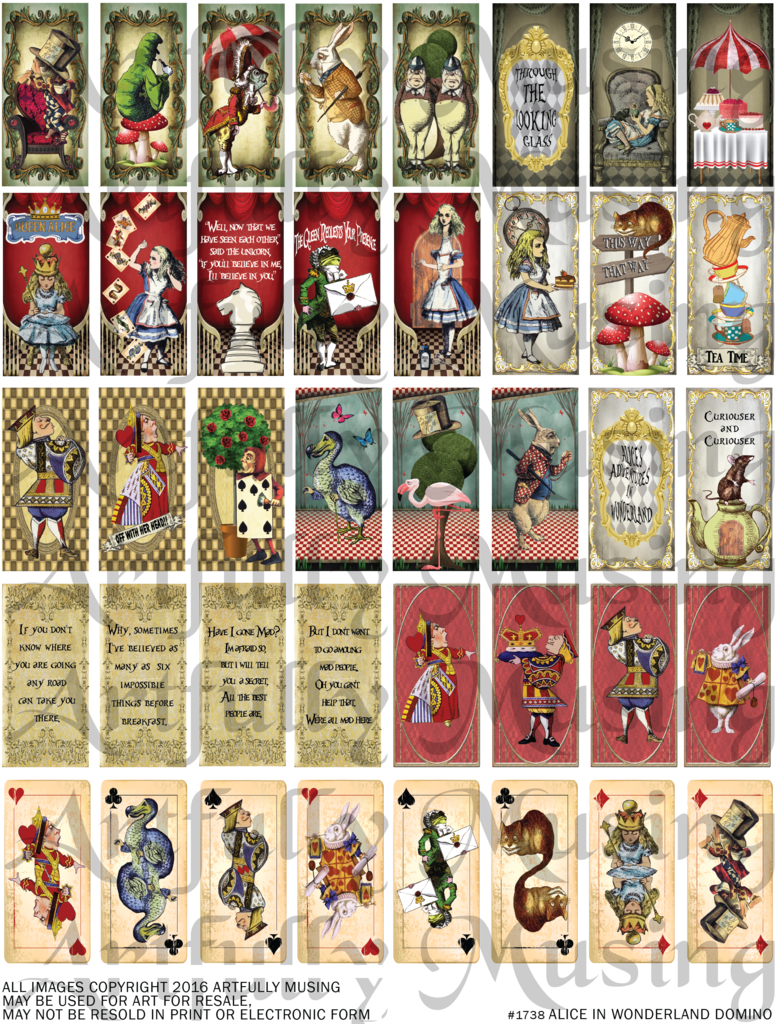
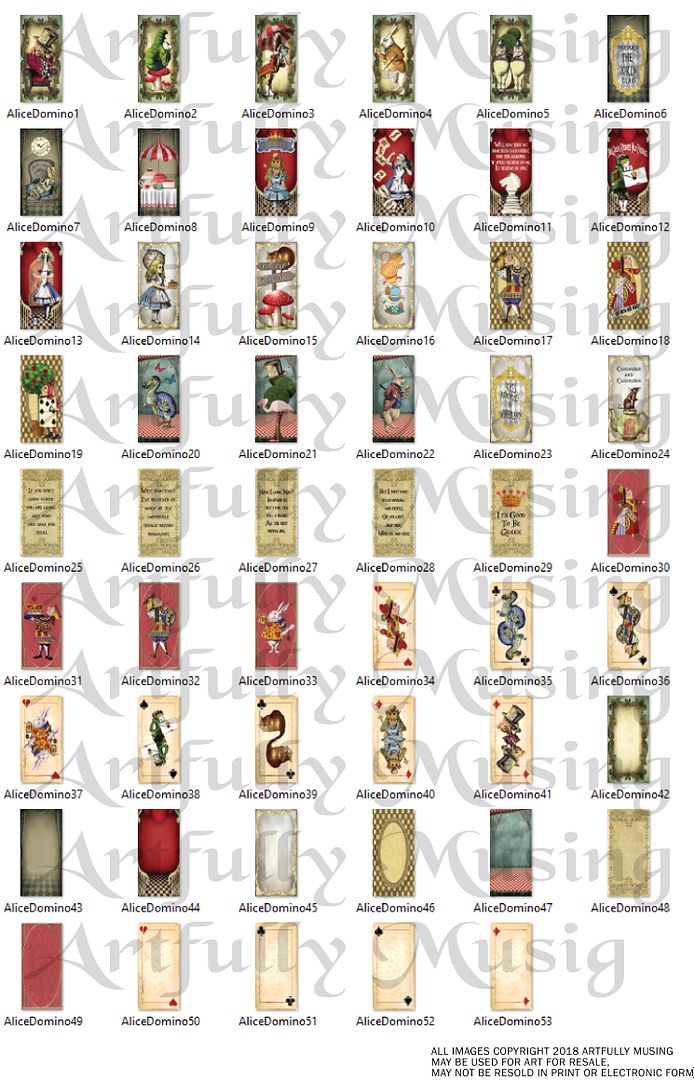
If you are looking for a smaller-scale project, you might want to create an Alice-themed domino book.  Domino books are so easy to quickly put together.  I’ve created a new Alice-themed collage sheet filled with domino panels that are sized for standard 1” x 2” dominoes.  In addition, there is an Alice domino digital image set. I also have 4 sample books to give you some ideas.

This sheet contains 40 Alice in Wonderland-themed panels that are sized to fit a standard 1” x 2” domino.  These panels work great for domino jewelry and books.

This set contains all of the images in the Alice in Wonderland Domino Books Collage Sheet, plus an additional 13 images for a total of 53.  All of the images in this set can be re-sized for your project as they are high-resolution (300dpi) PNG formatted images. 


I chose to keep the dominoes the original white color for all of the domino books.  I thought white worked well with the images; leaving them white was less work (great if you want a fast project).  I used ribbon and paper tape to add color to the dominoes' sides.

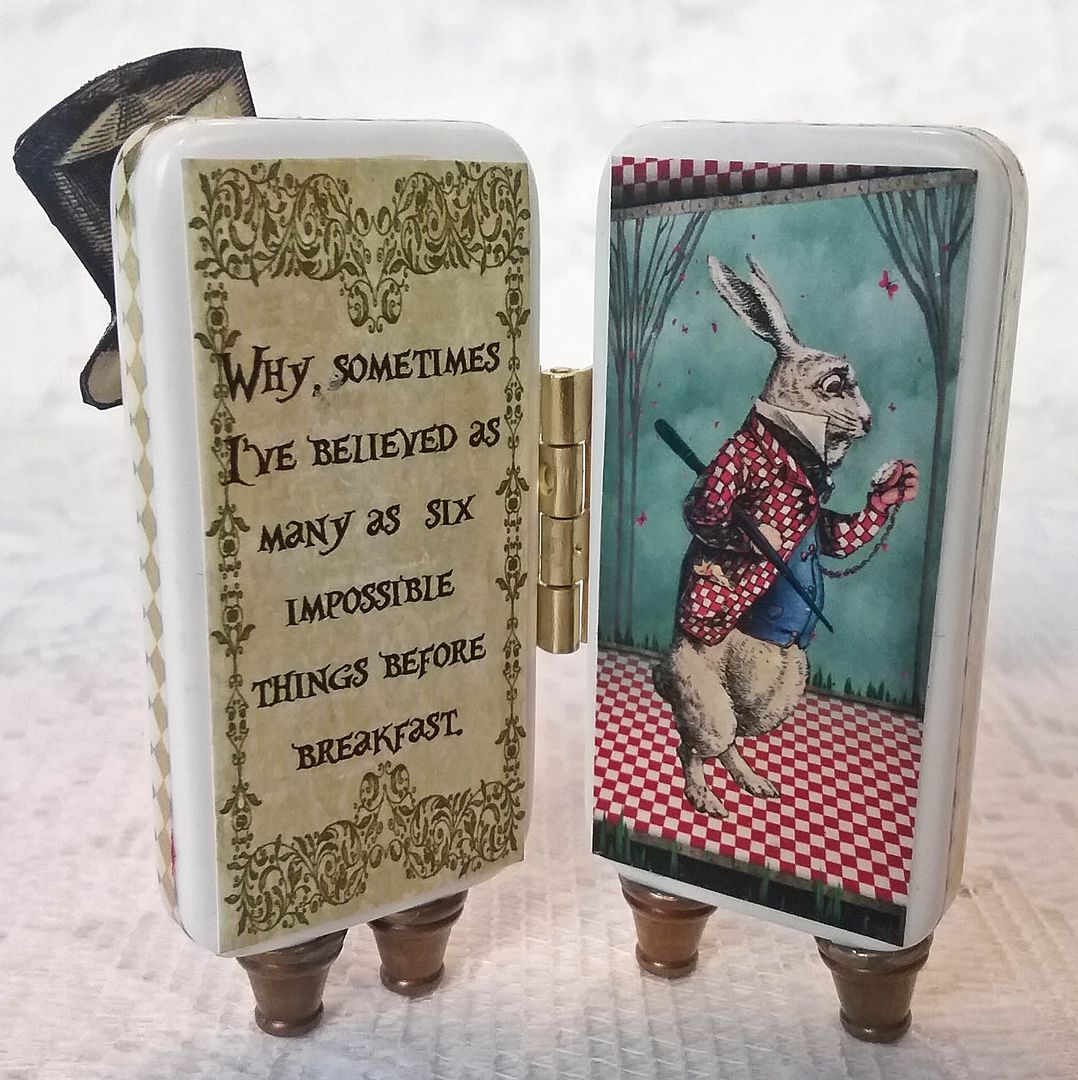
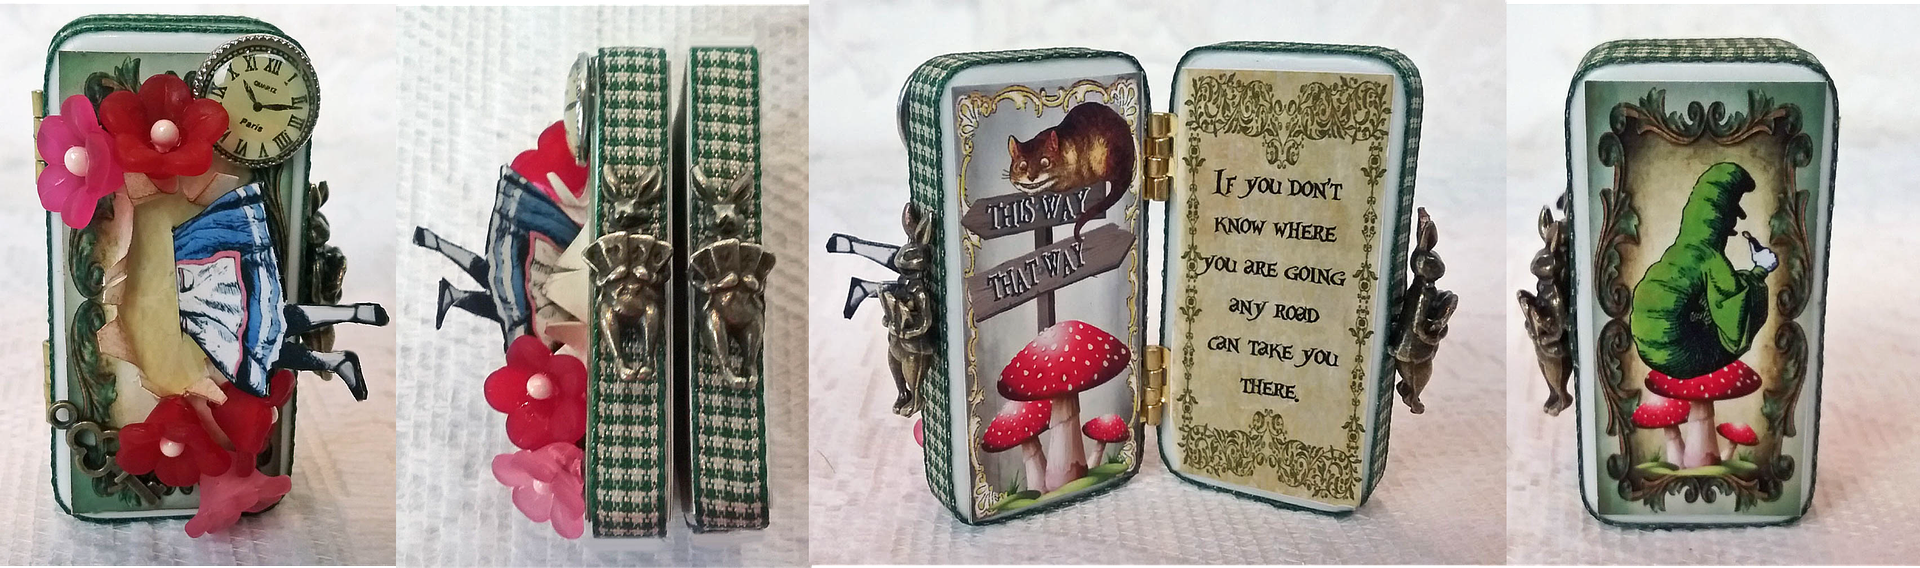
6 Impossible Things Domino Book
On the front of this book, I used one of the panels from the collage sheet, a couple of images from the Tea Party Alice Collage Sheet, or you will find the same images in the Tea Party Alice digital image set, plus a layered mini pink flamingo sticker.  I can’t look a pink flamingo and not smile.  Also, notice the raw brass box feet attached to the bottom of the dominoes.
Inside the book, you’ll see two of the panels from the new collage sheet.
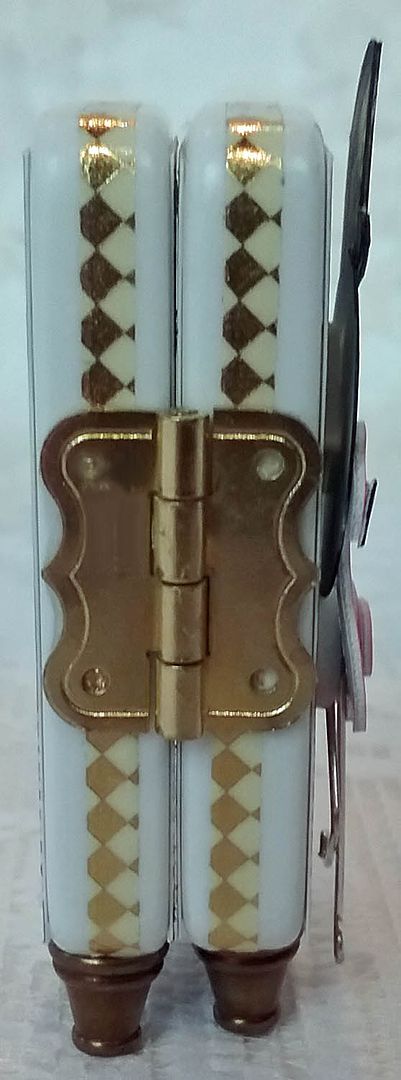
Below is a side view of the book.  I’ve dressed up the sides with diamond paper tape and attached the hinge to the outside of the dominoes.
On the backside is another panel from the new collage sheet.

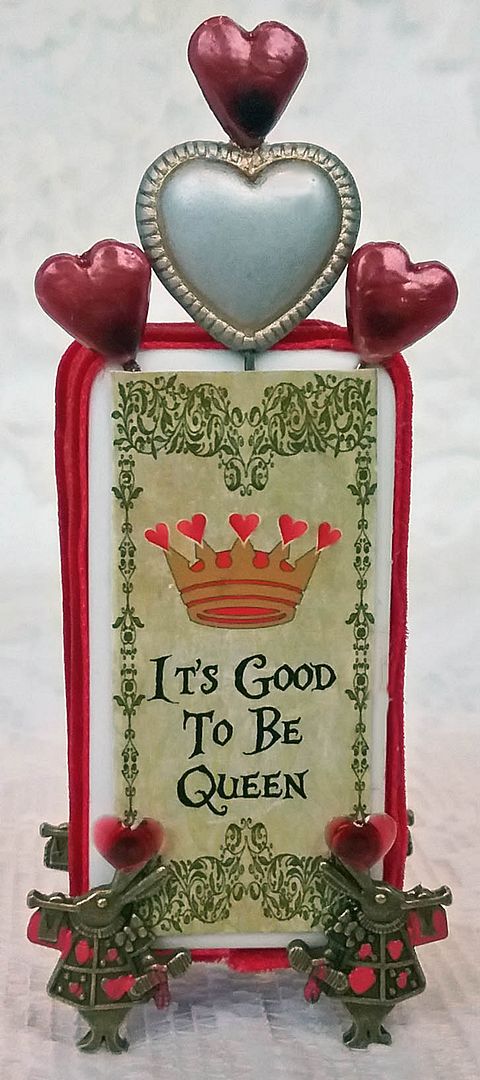
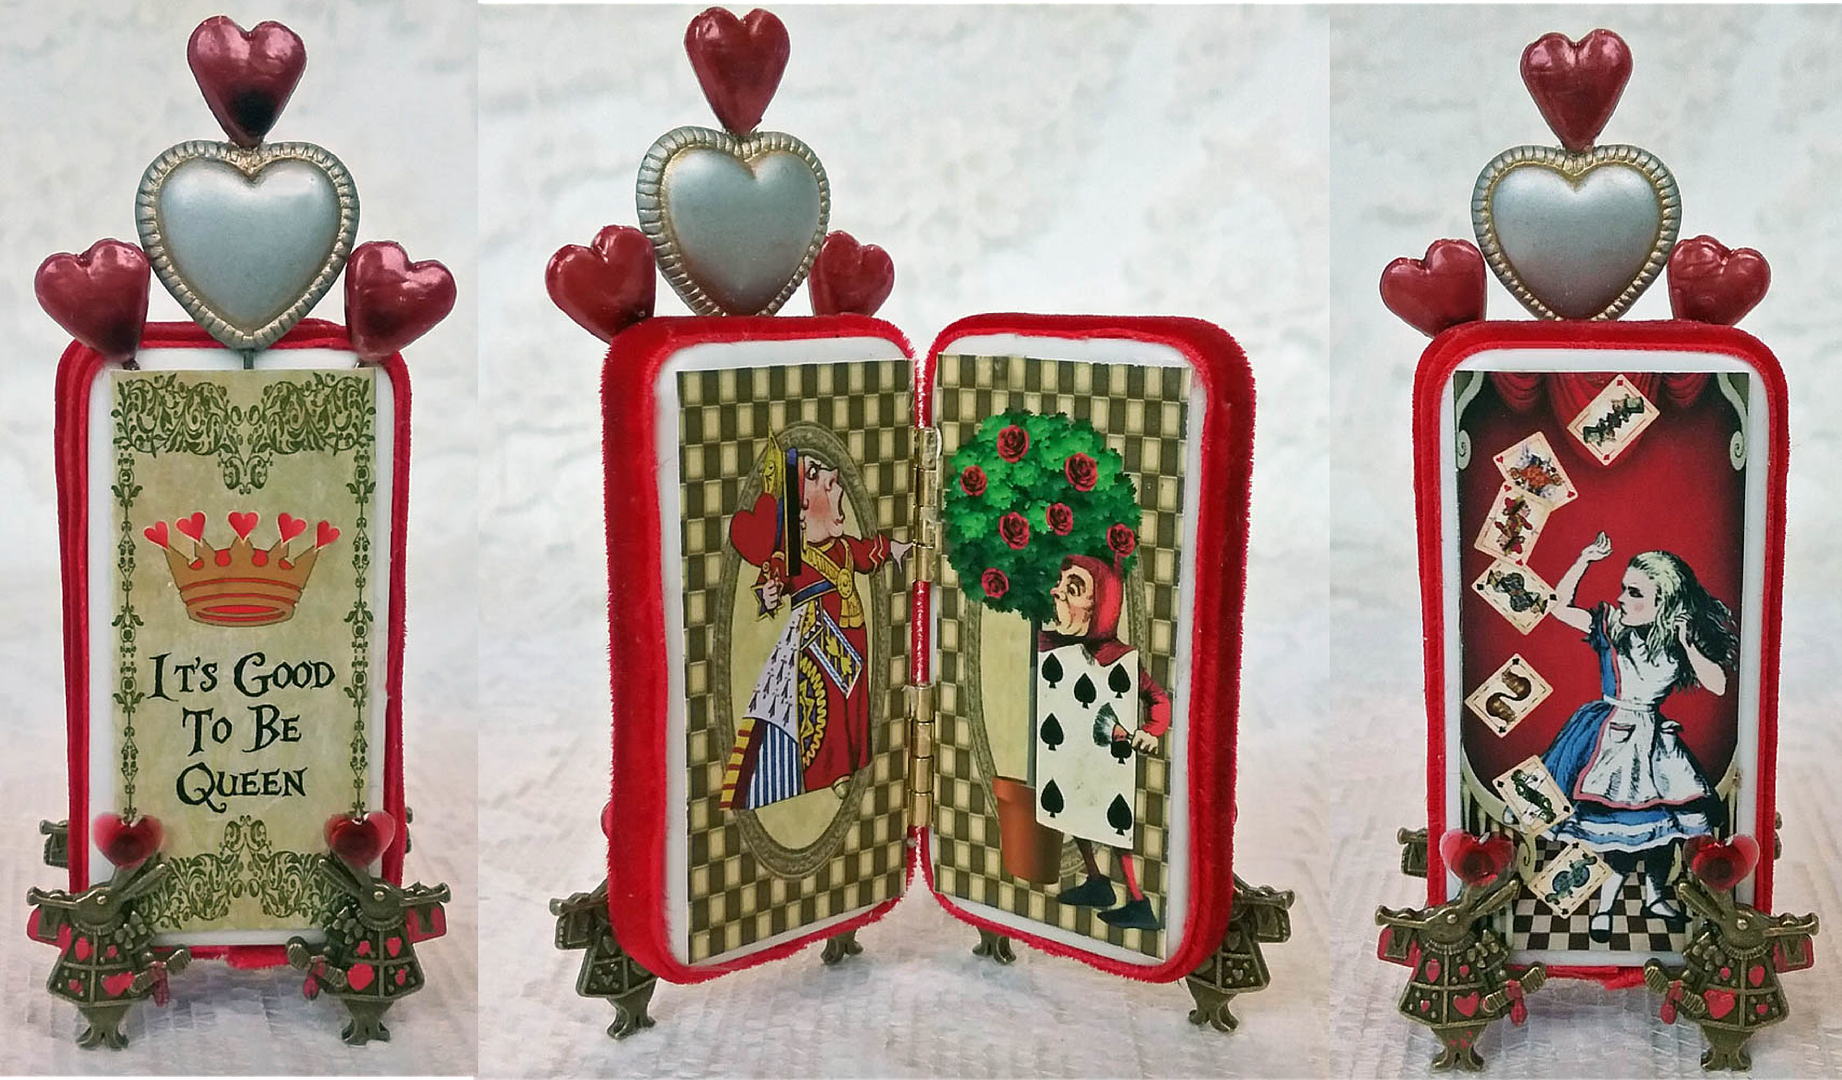
It’s Good to Be Queen Domino Book
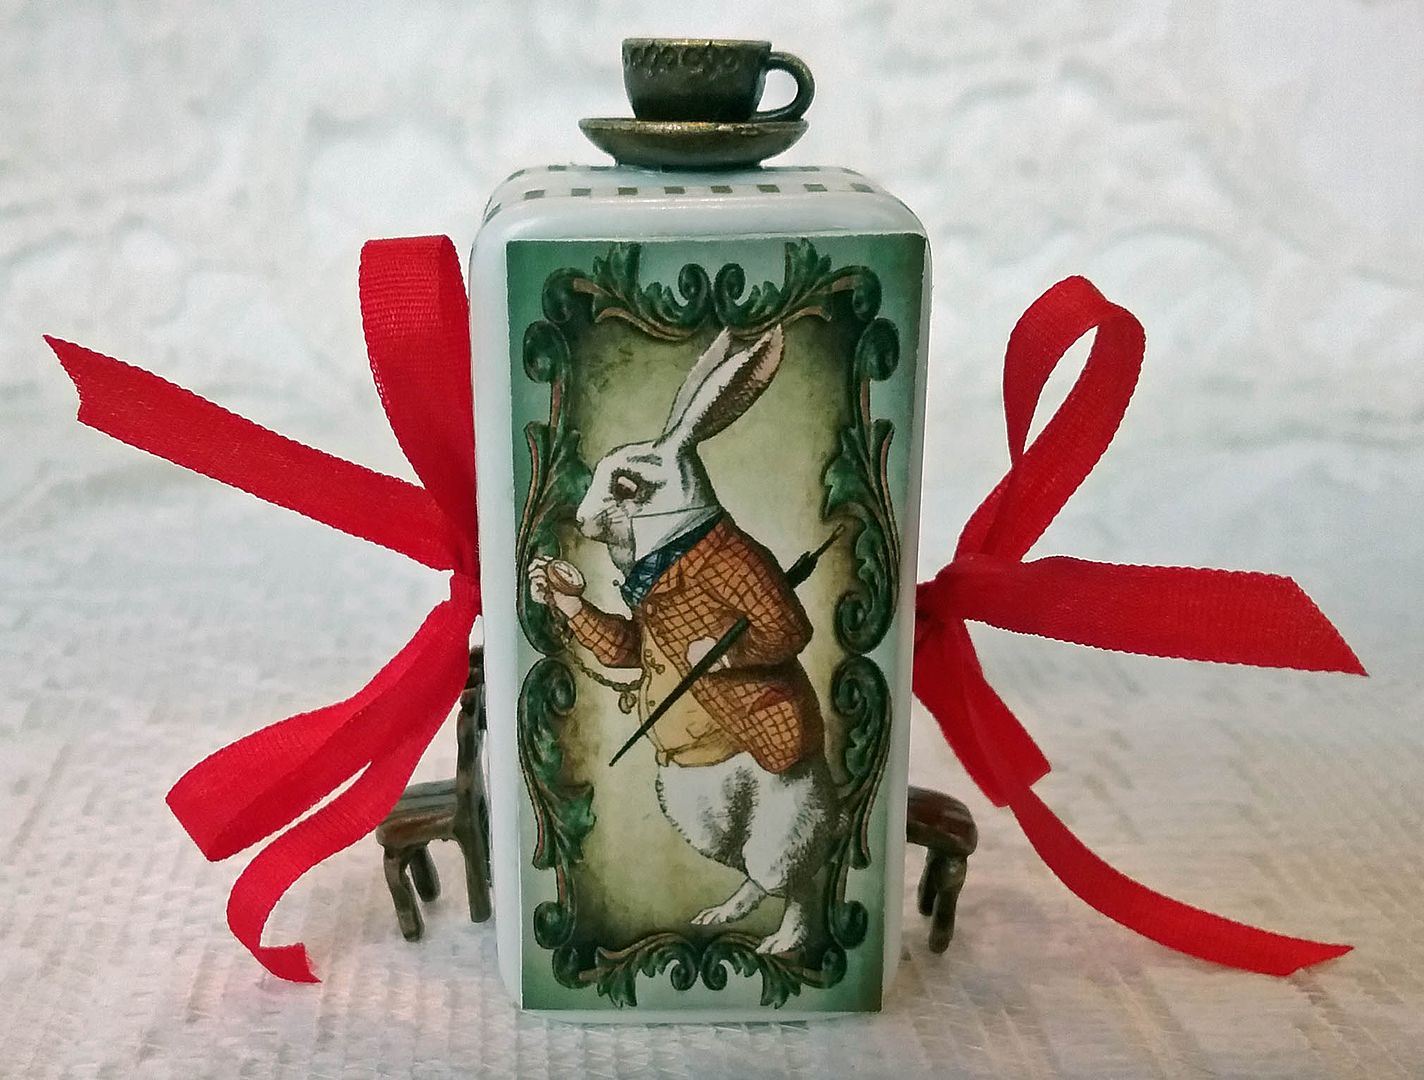
I think this one is my favorite of the bunch.  Dominoes may be small, but many surfaces add dimensional elements.  Before attaching a panel from the collage sheet, I glued place heart stick pins.  One of the stick pins is threaded through a puffy heart bead.  On the bottom, I’ve used bronze White Rabbit charms as legs.  
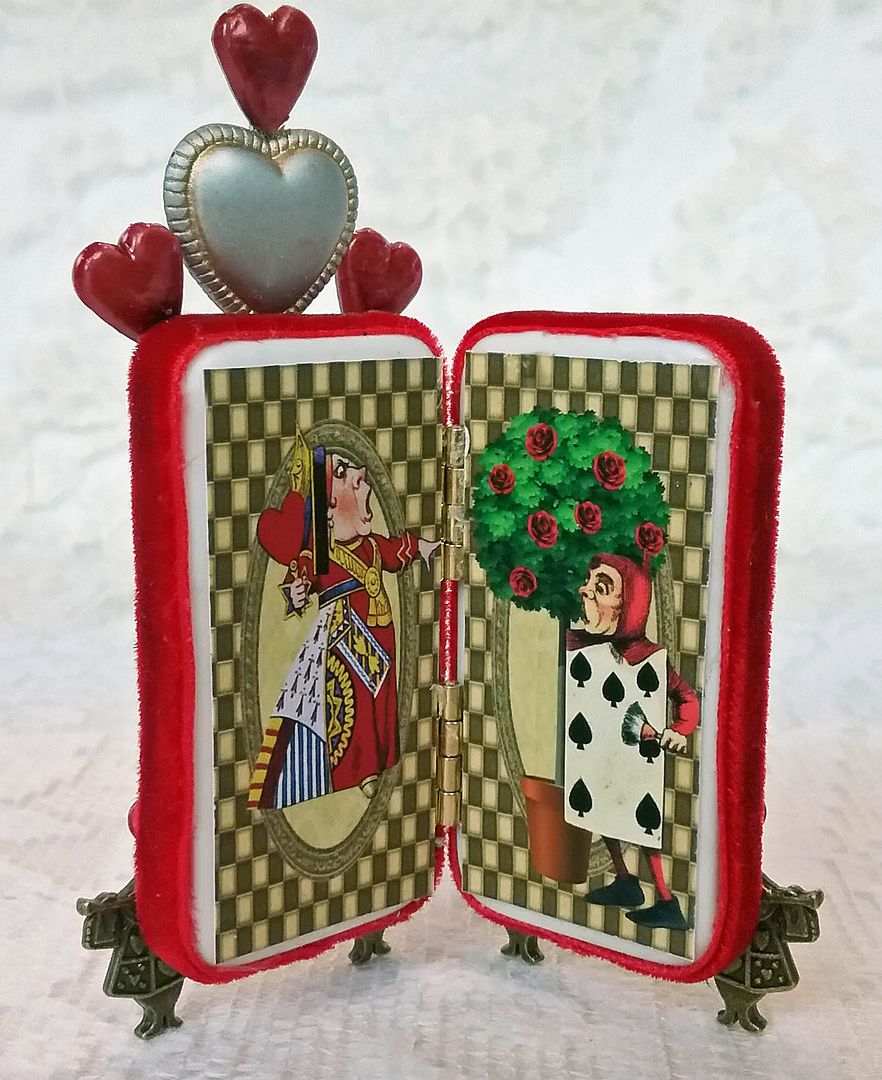
Inside the book are two images from the collage sheet.
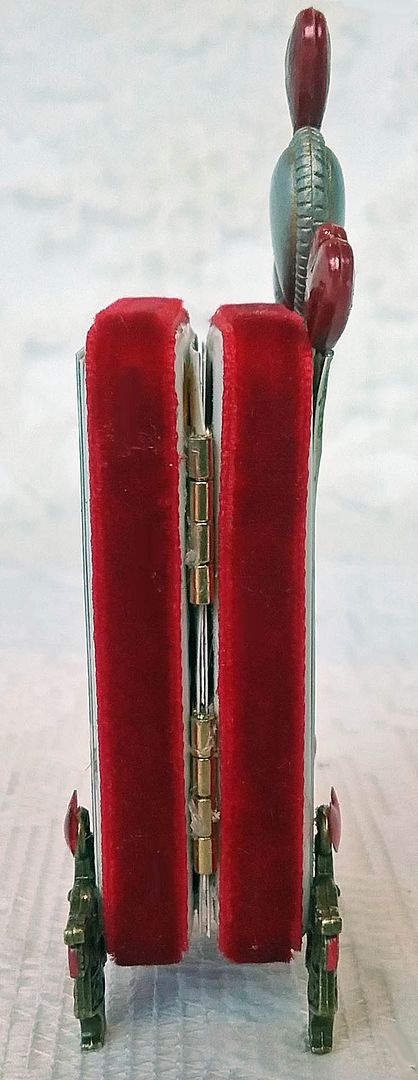
On the sides, I used a red velvet ribbon.  I ran it through my Xyron machine to attach the ribbon, which applies dry adhesive that won’t bleed through the ribbon.  You’ll also notice that the hinges are hidden and can only be seen from the side view.
On the back of the book is a panel from the collage sheet.

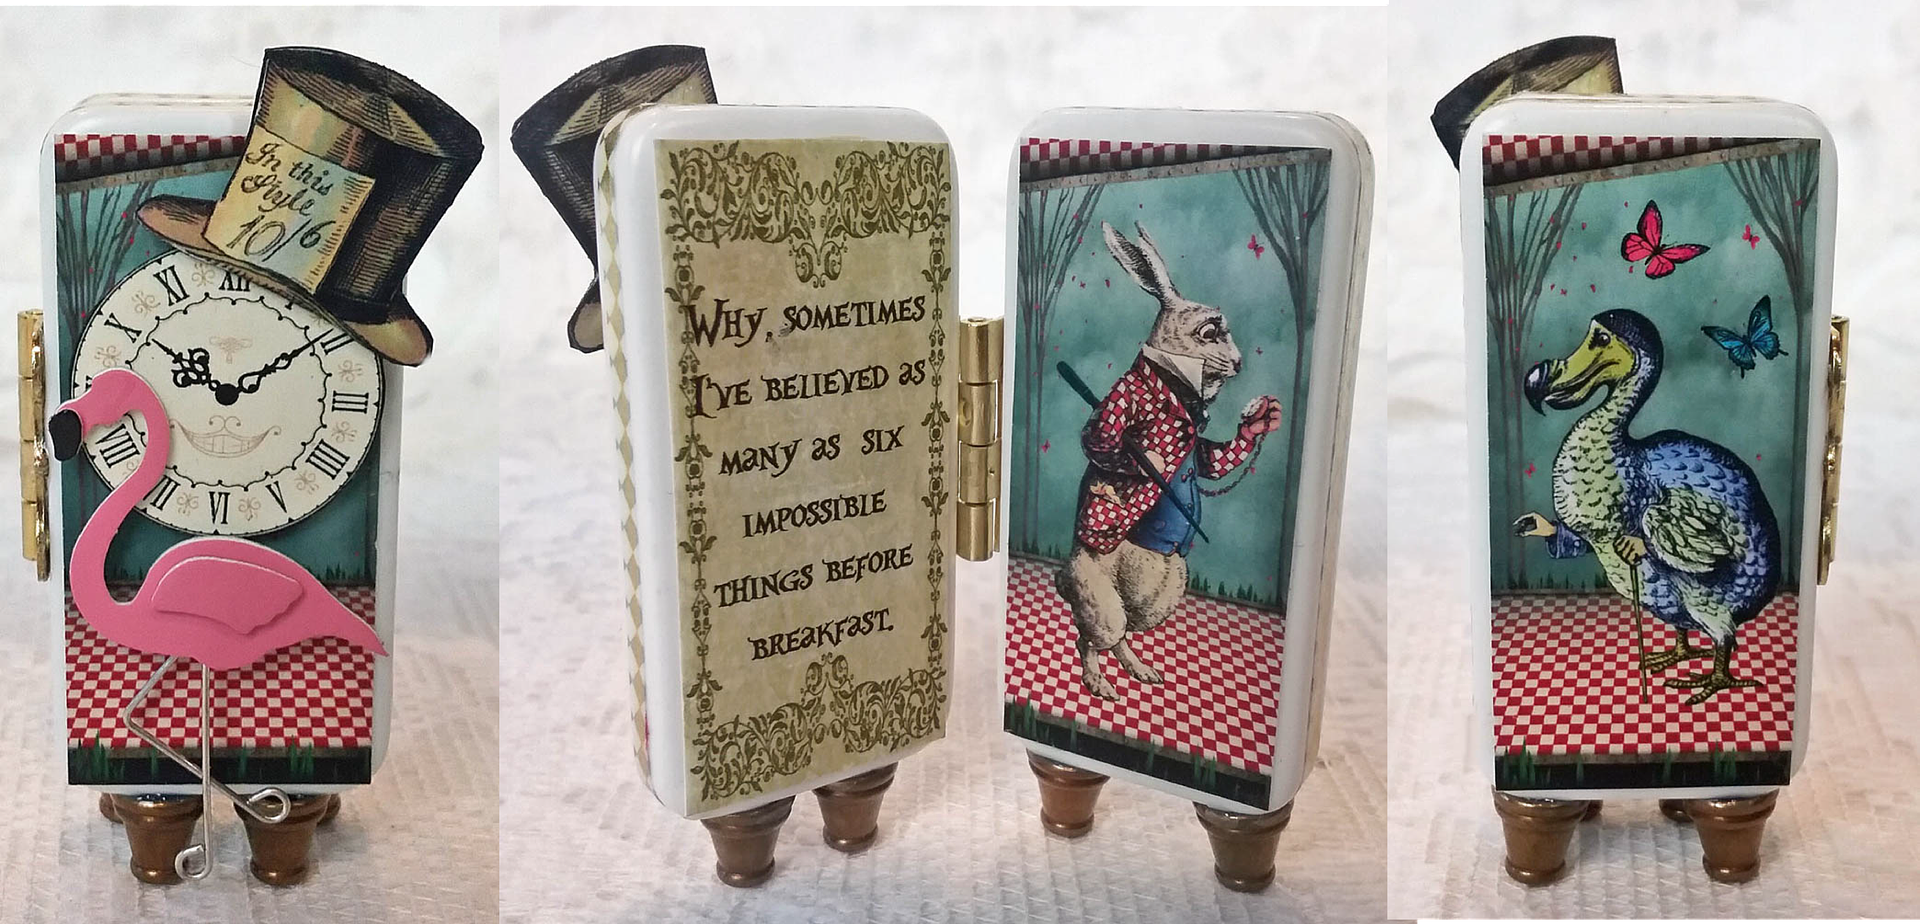
Down the Rabbit Hole Domino Book
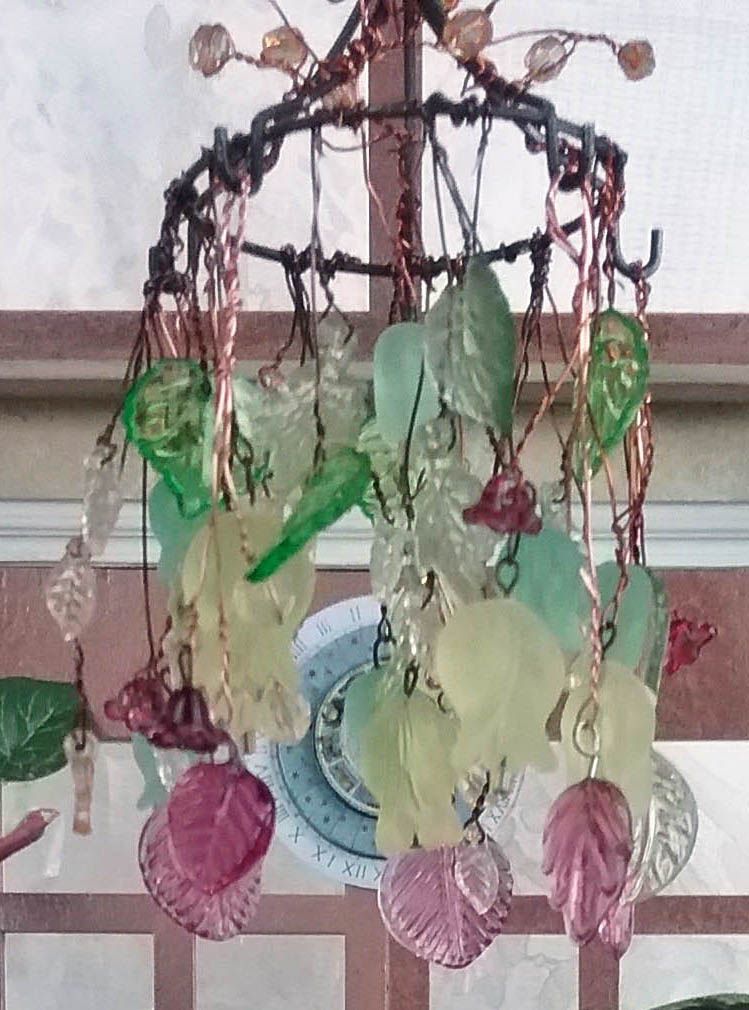
On the front of this book are acrylic flowers, a key, and a clock that surround a hole that Alice is falling into.  The flowers and key are from the Alice in an Altoids Tin Kit from Alpha Stamps, which is full of Alice-themed embellishments.
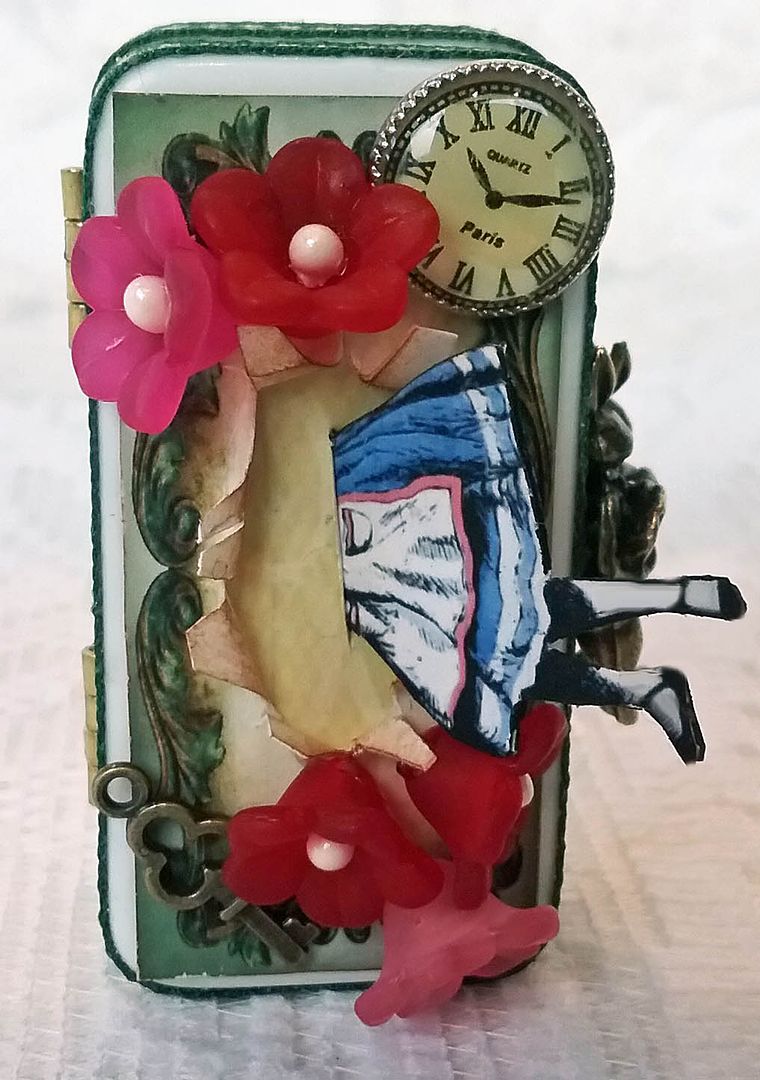
Below you get a better view of how the front is put together.  I used one of the background panels from the new digital image set.  I cut a hole in the panel and peeled back the edges of the hole.  Next, I glued the panel to a piece of decorative paper and cut a slit in the hole, which is where I inserted the partial image of Alice.
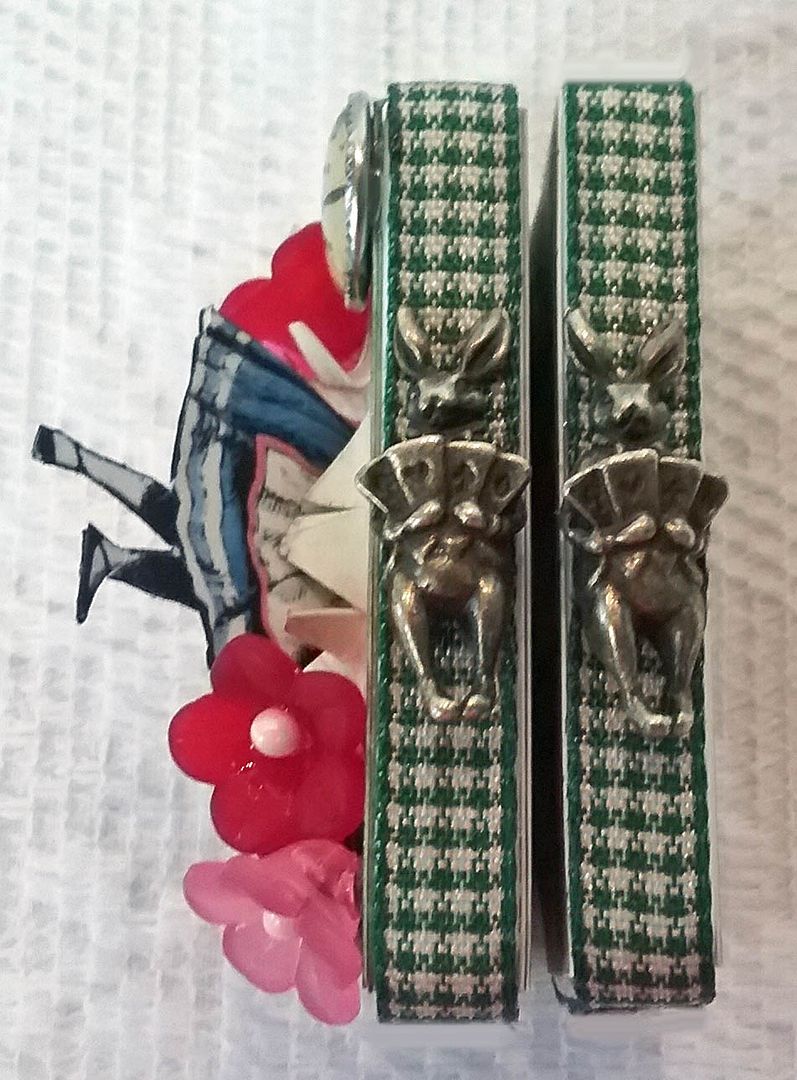
I used ribbon for this book to decorate the edges and attached two bronze 3D White Rabbit charms.
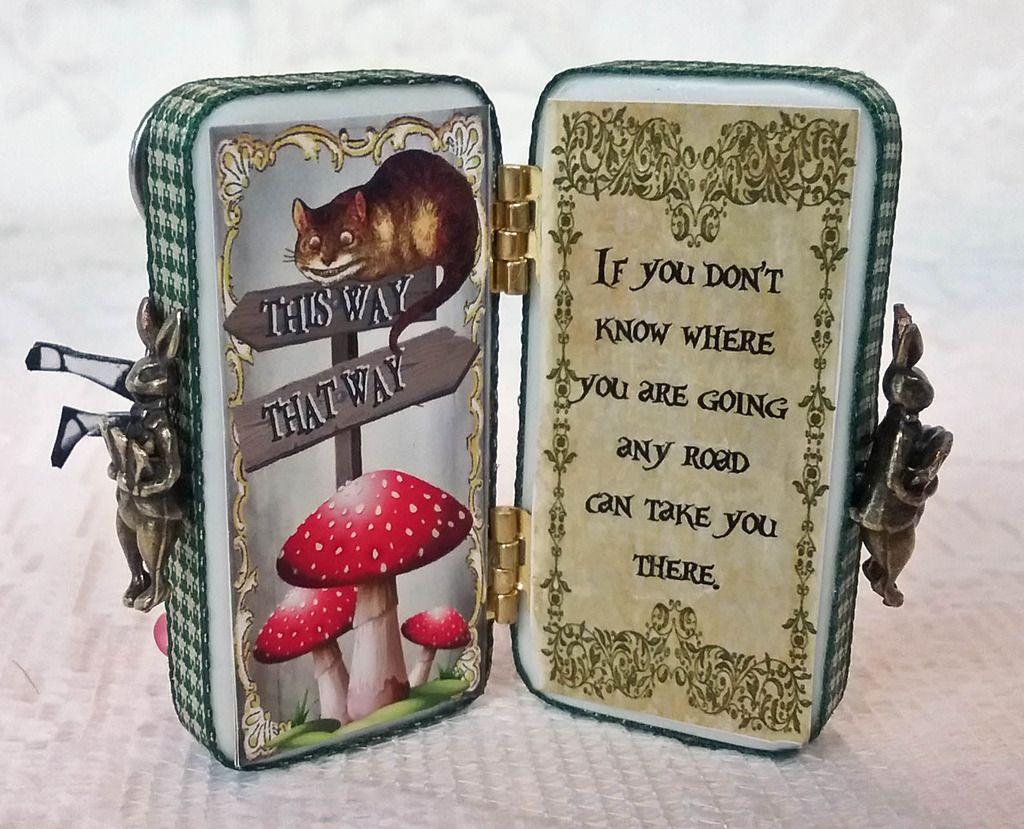
Inside are two panels from the collage sheet.
The hinges are hidden just as with the “It’s Good to Be Queen” domino book.
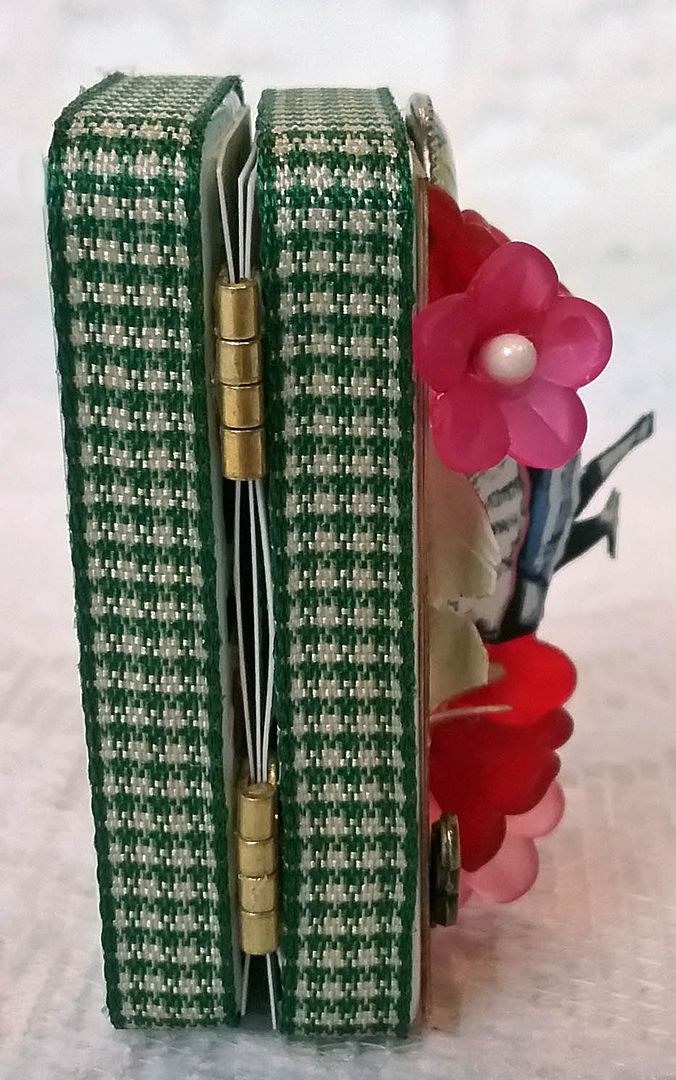
To hide the hinges, glue them to the inside of the dominoes before adding the panels.
On the back is another image from the collage sheet.

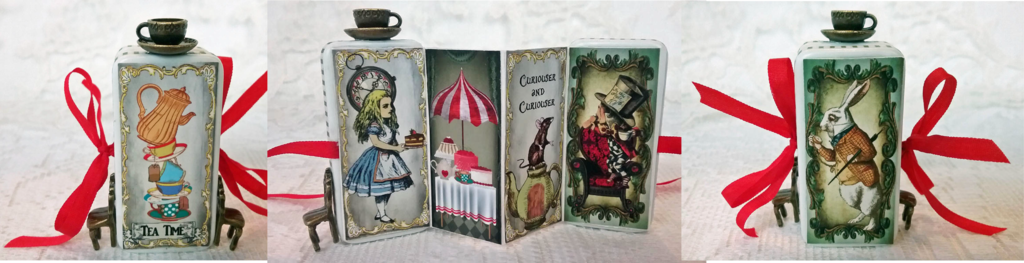
Tea Time Domino Book
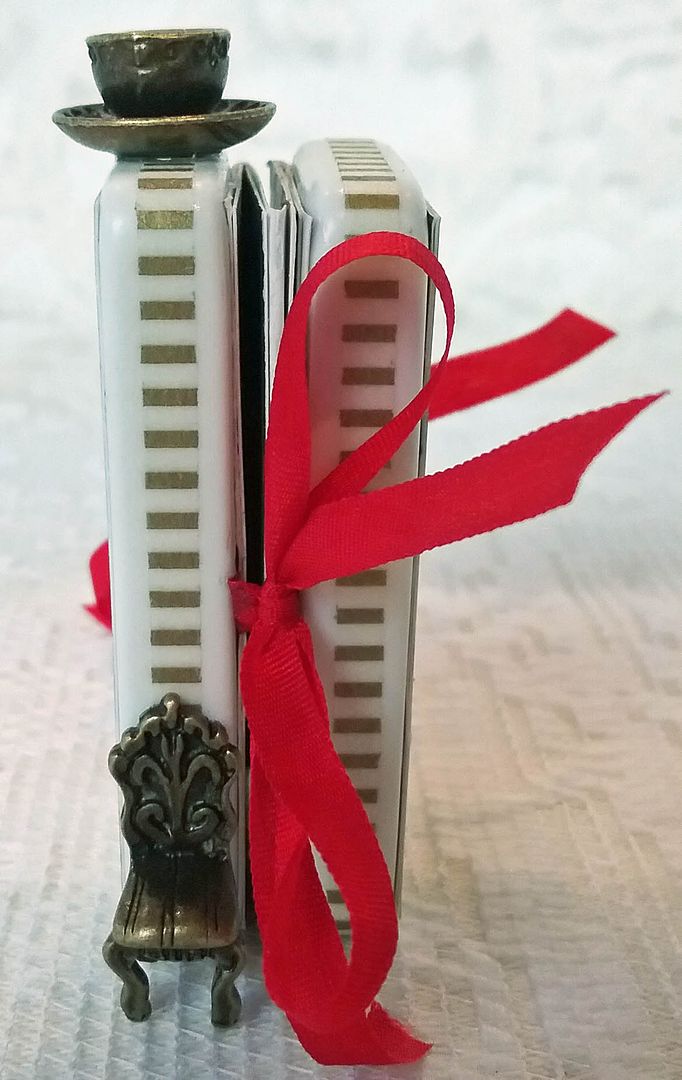
This book is different from the others in that it has a ribbon on each that acts as the closure, and inside are accordion folded pages.
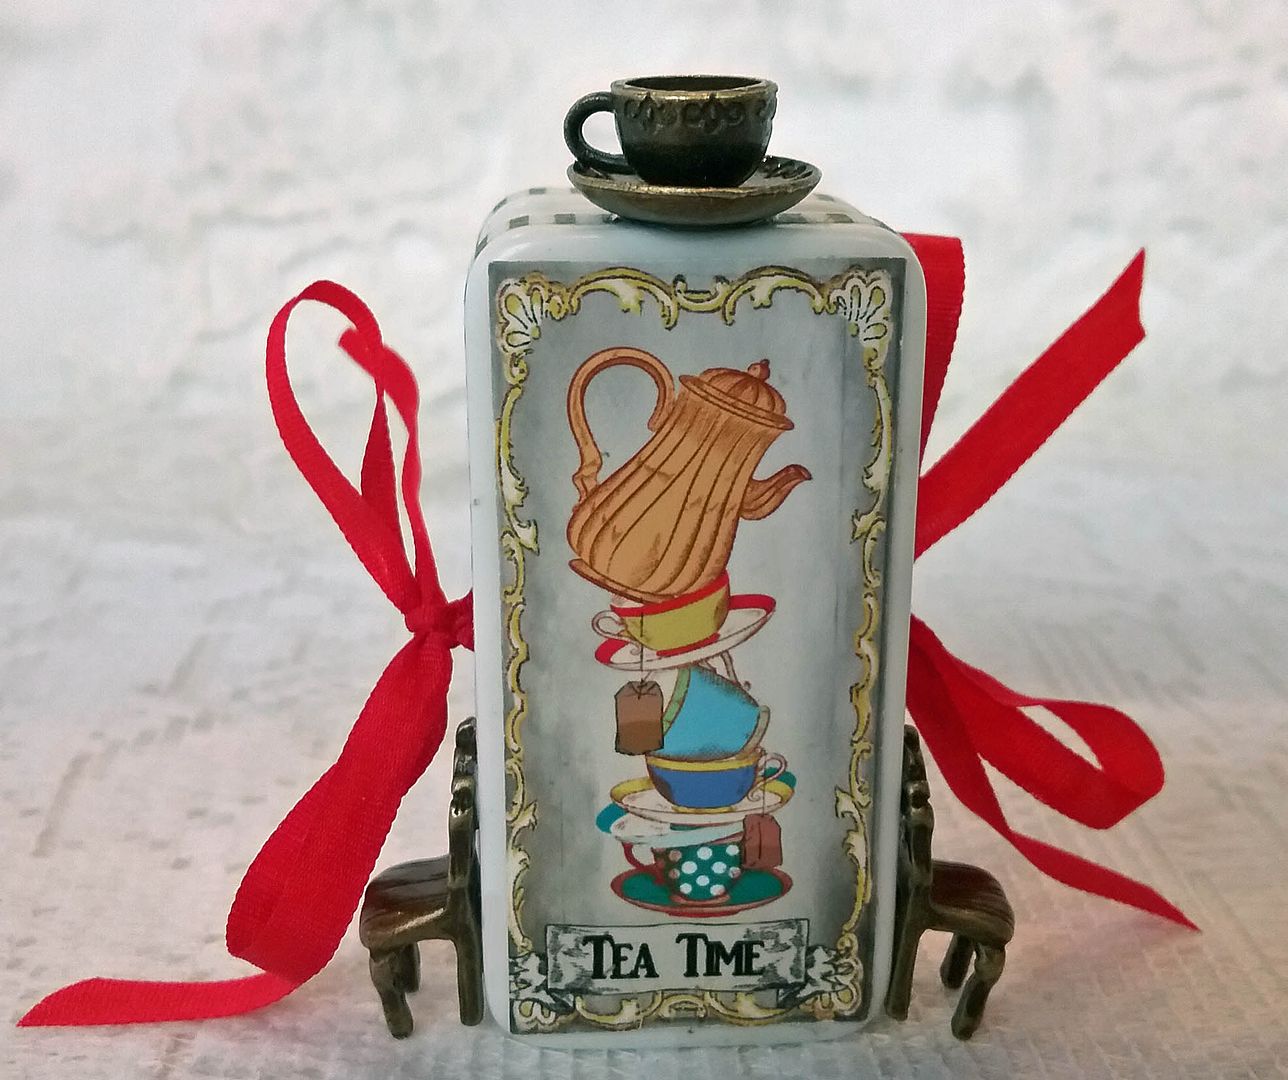
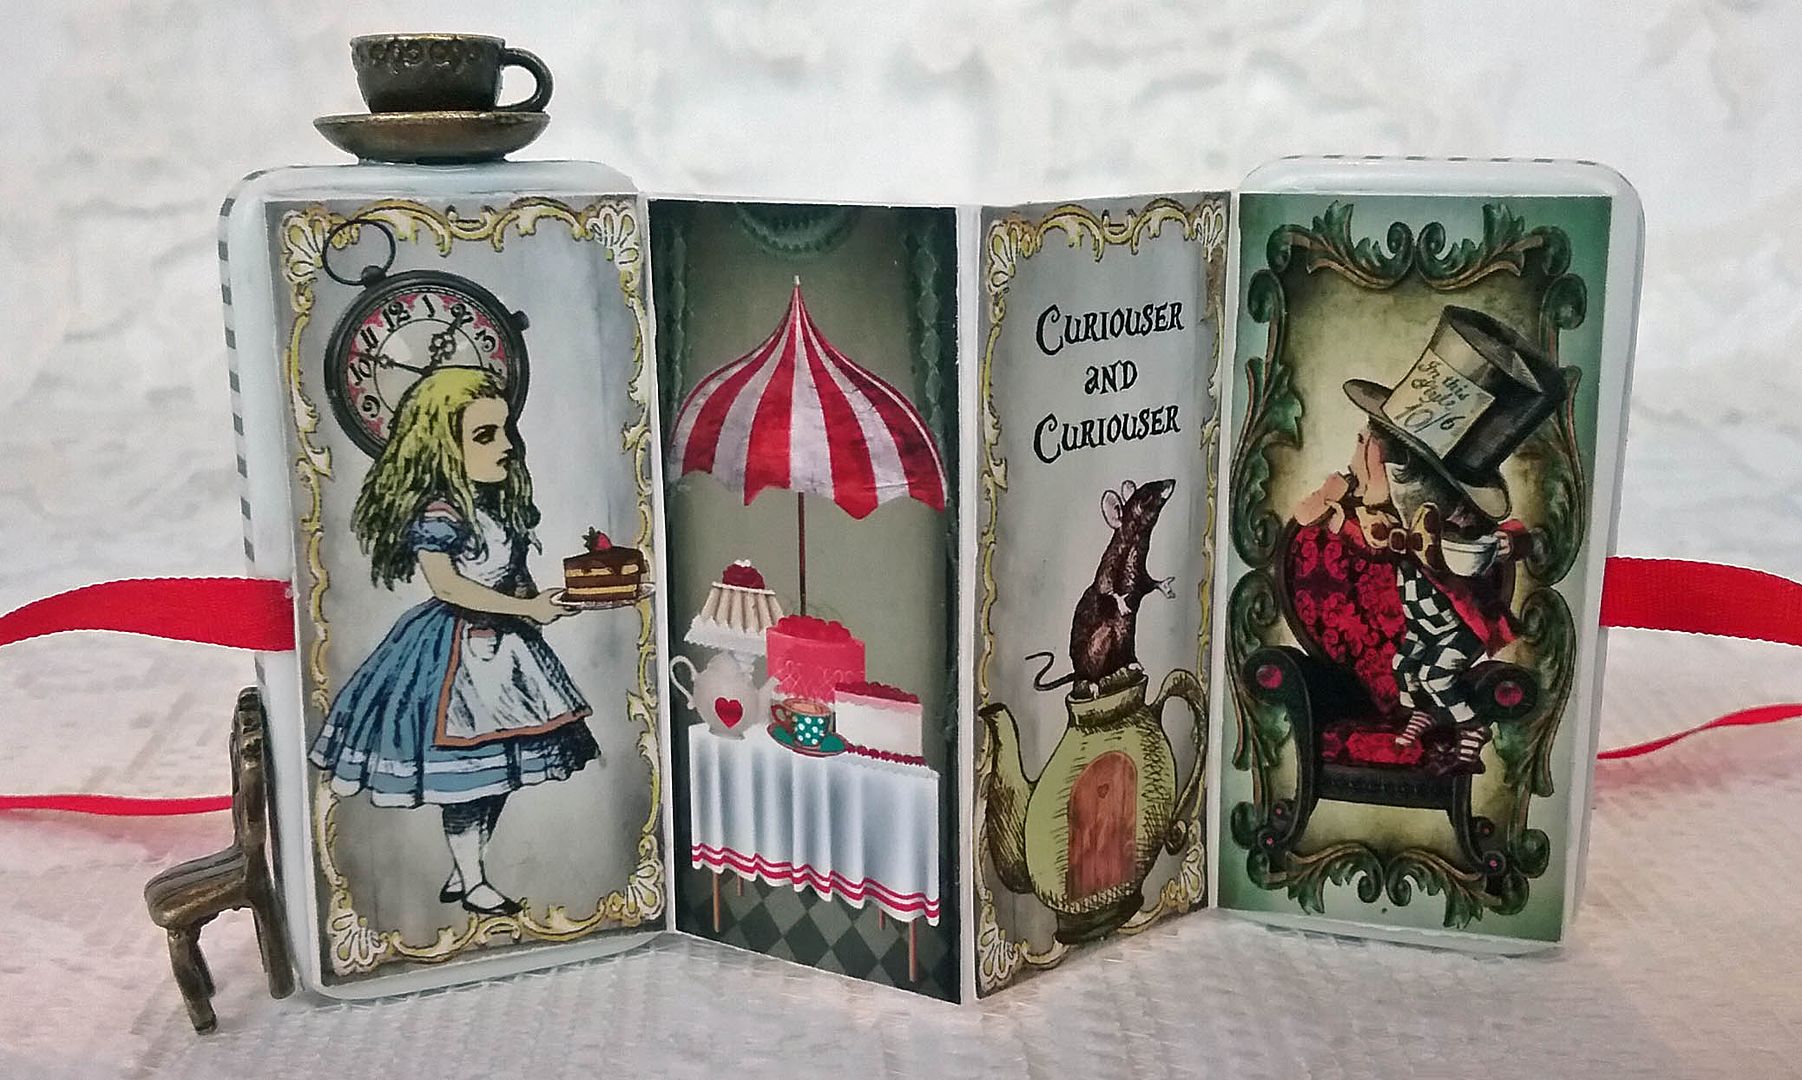
Notice the metal chair pendants attached to each side of the front domino and the teacup and saucer on the top.  Inside are a series of panels from the collage sheet.  You can have as many panels as you like as long as it is an even number.
Below is a side view of the cup and chair.  You can also see that I used gold-striped paper tape to decorate the sides.
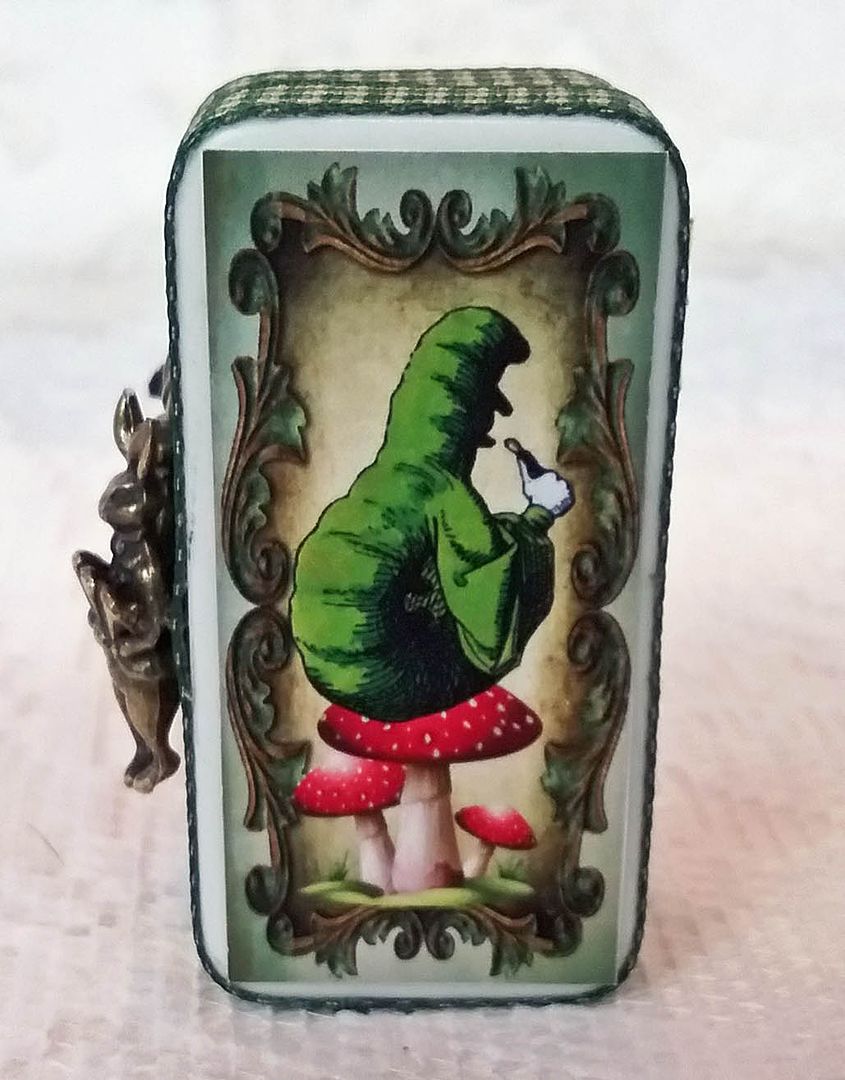
On the back is a White Rabbit panel from the collage sheet.

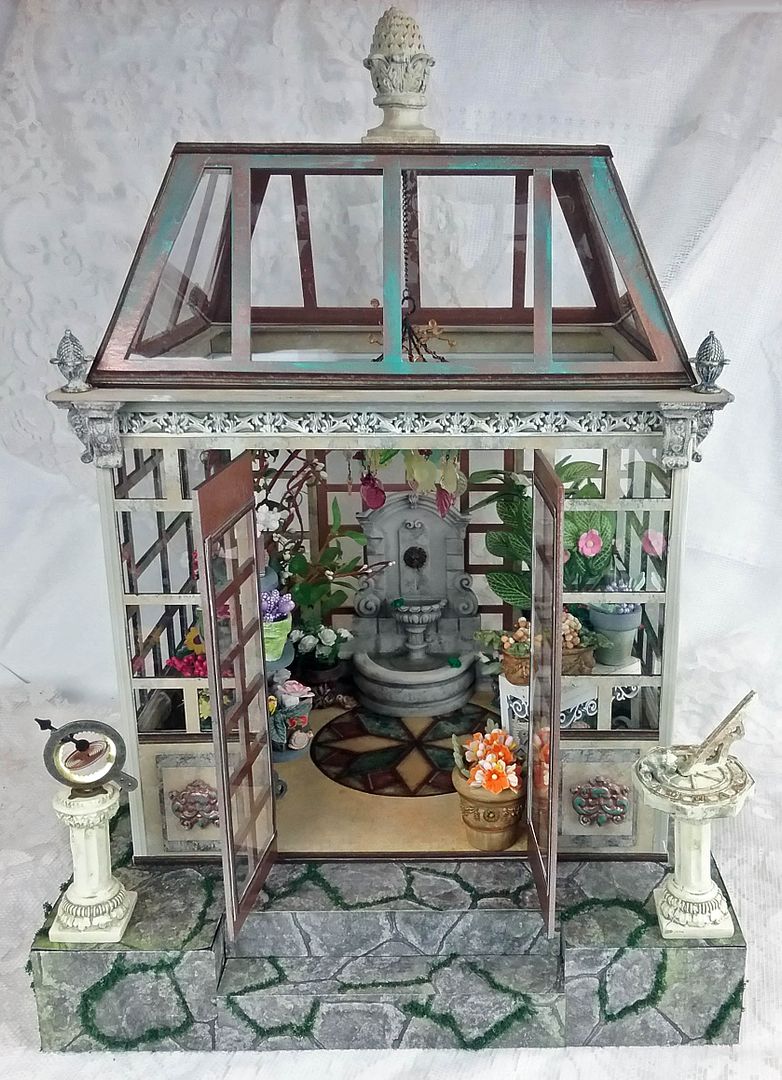
DOWN THE RABBIT HOLE (altered Pringles can) TUTORIAL

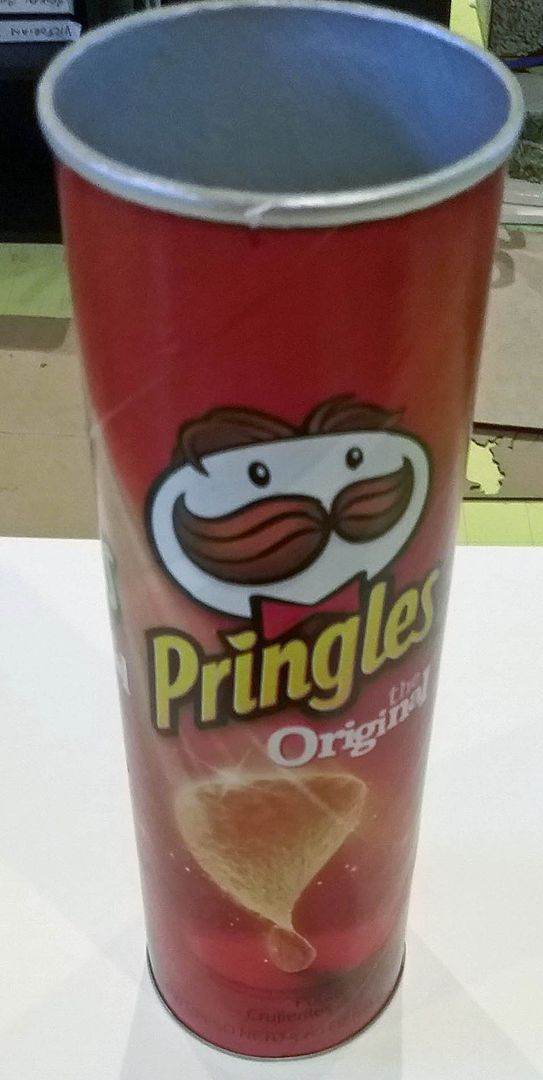
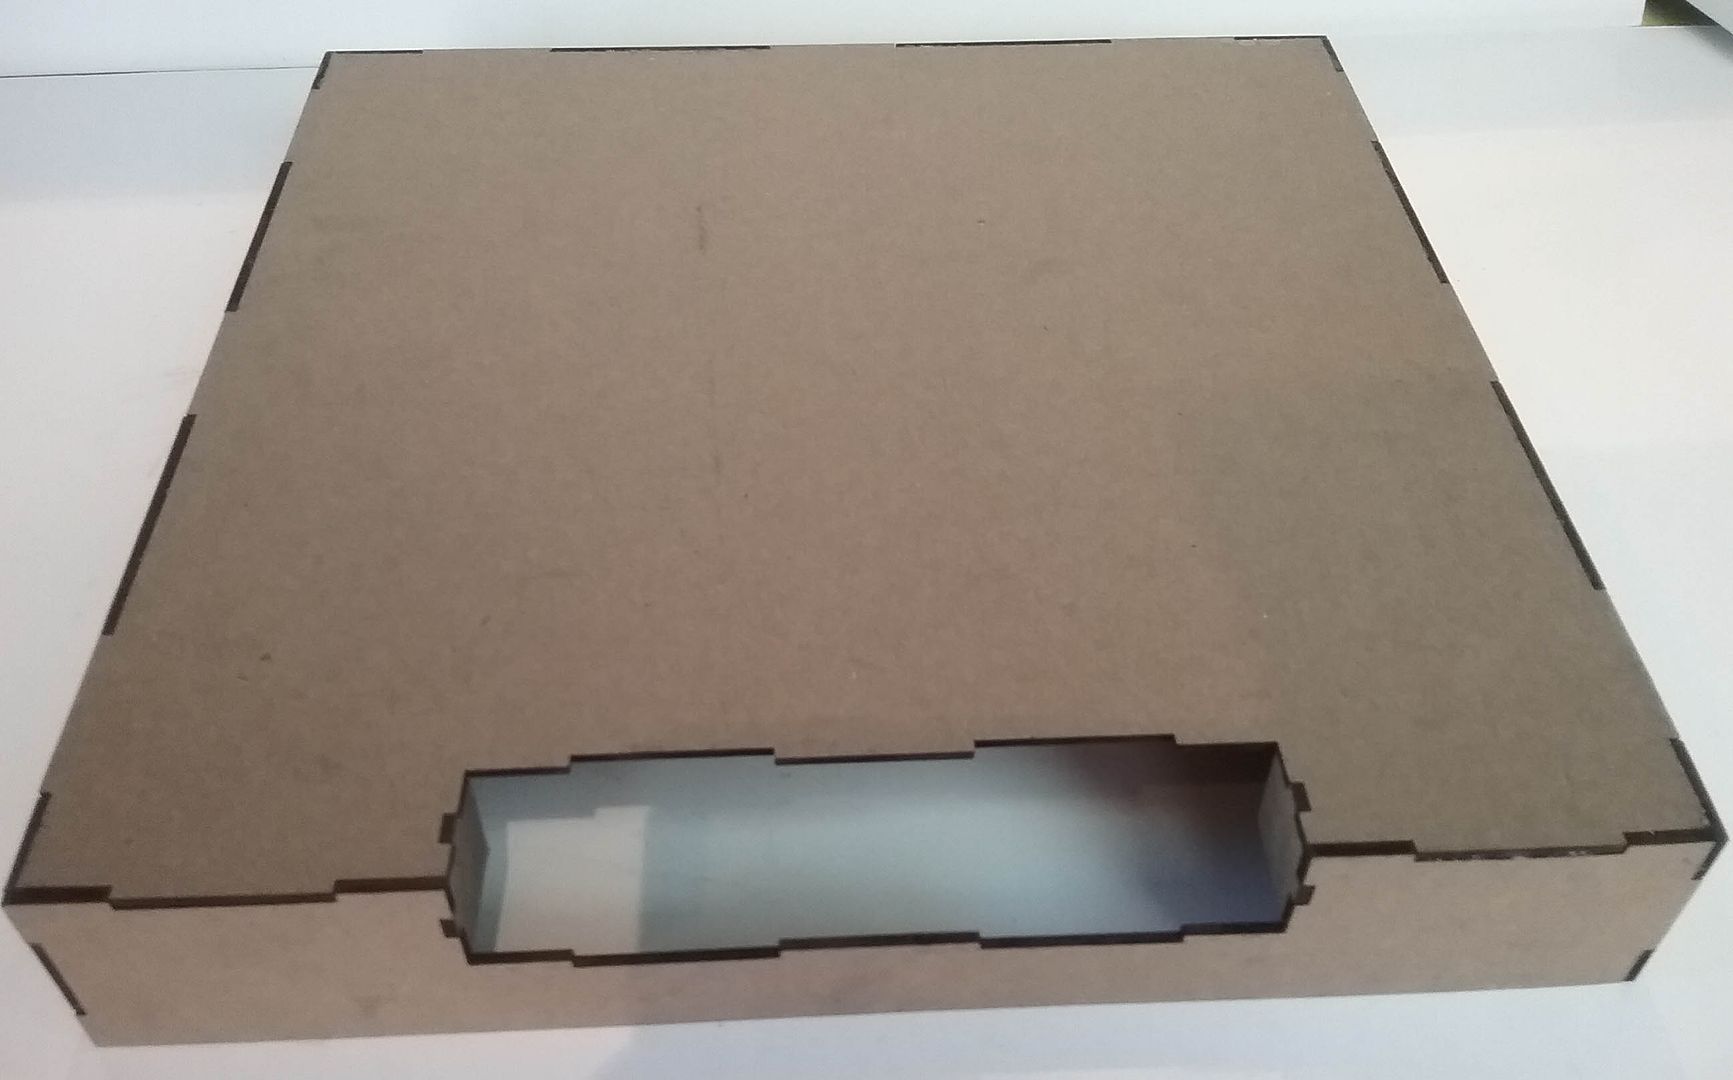
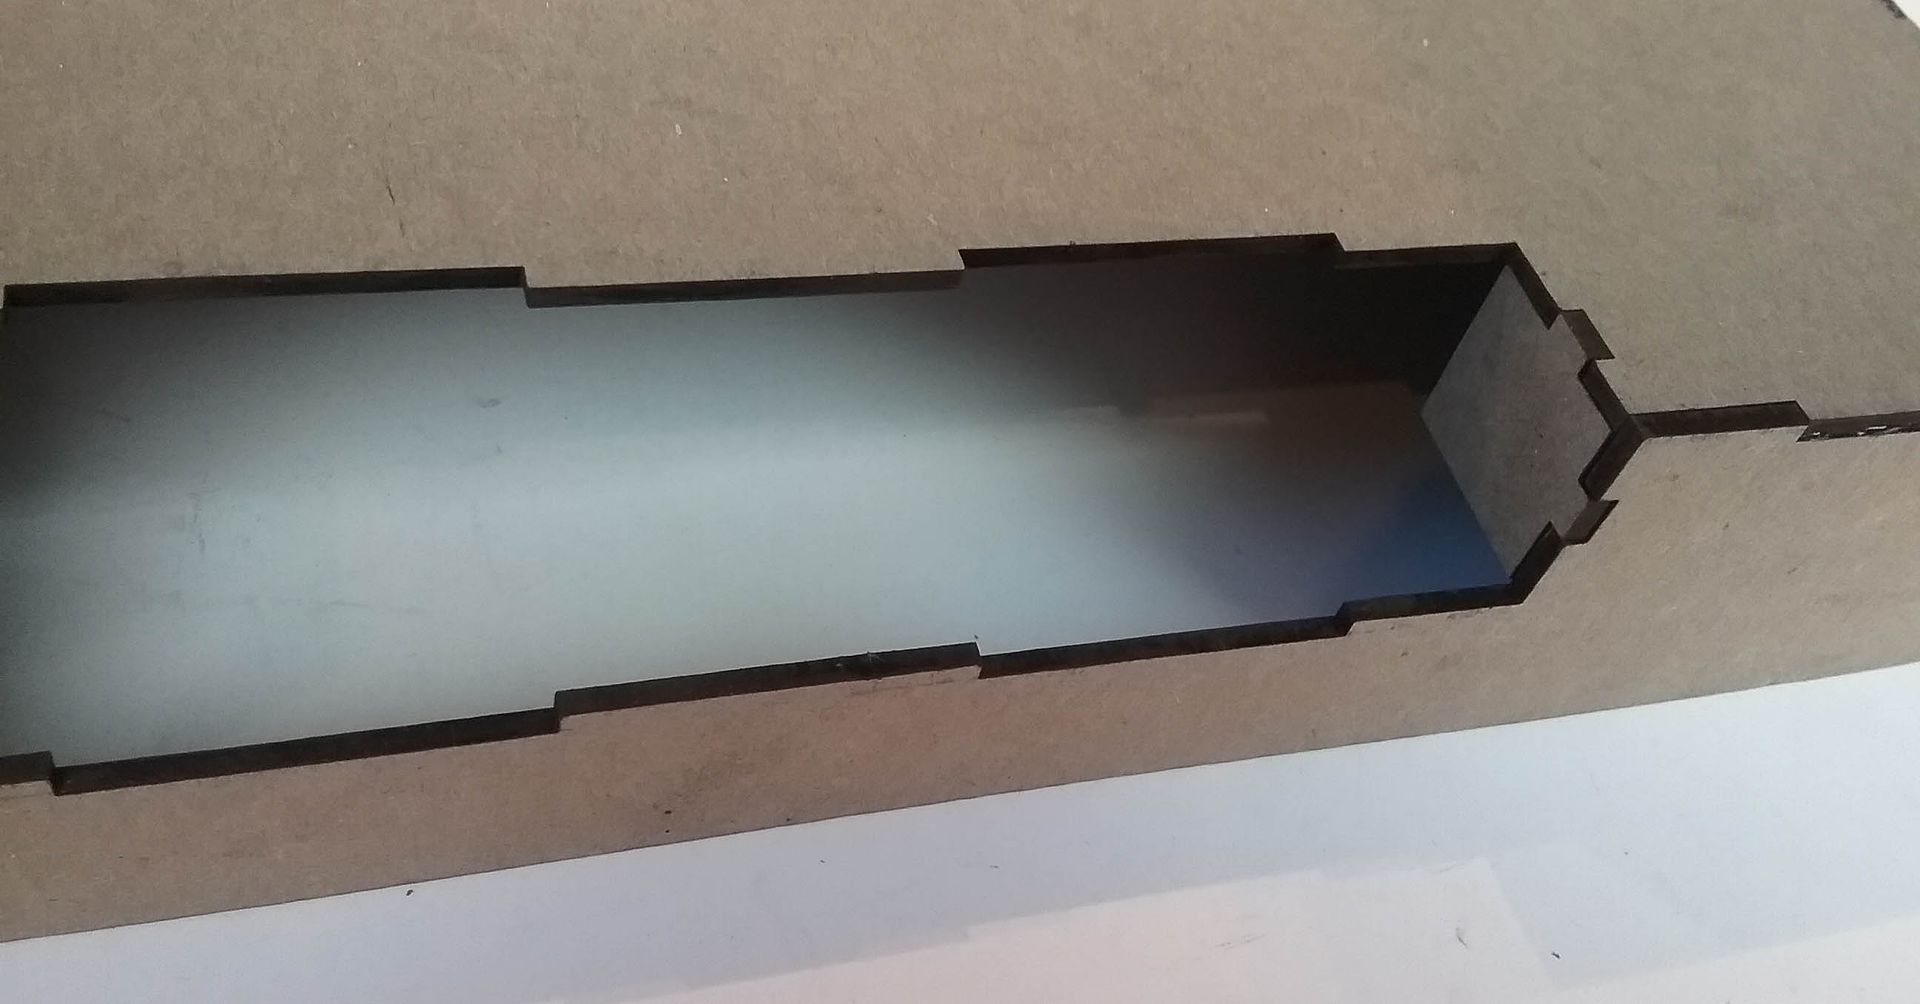
Start by cutting a long rectangular hole on one side.  I found that the nutrition label edges were a good guide for the long sides of the hole.  Leave approximately 1 inch on the top and 2 1/4 inches on the bottom.

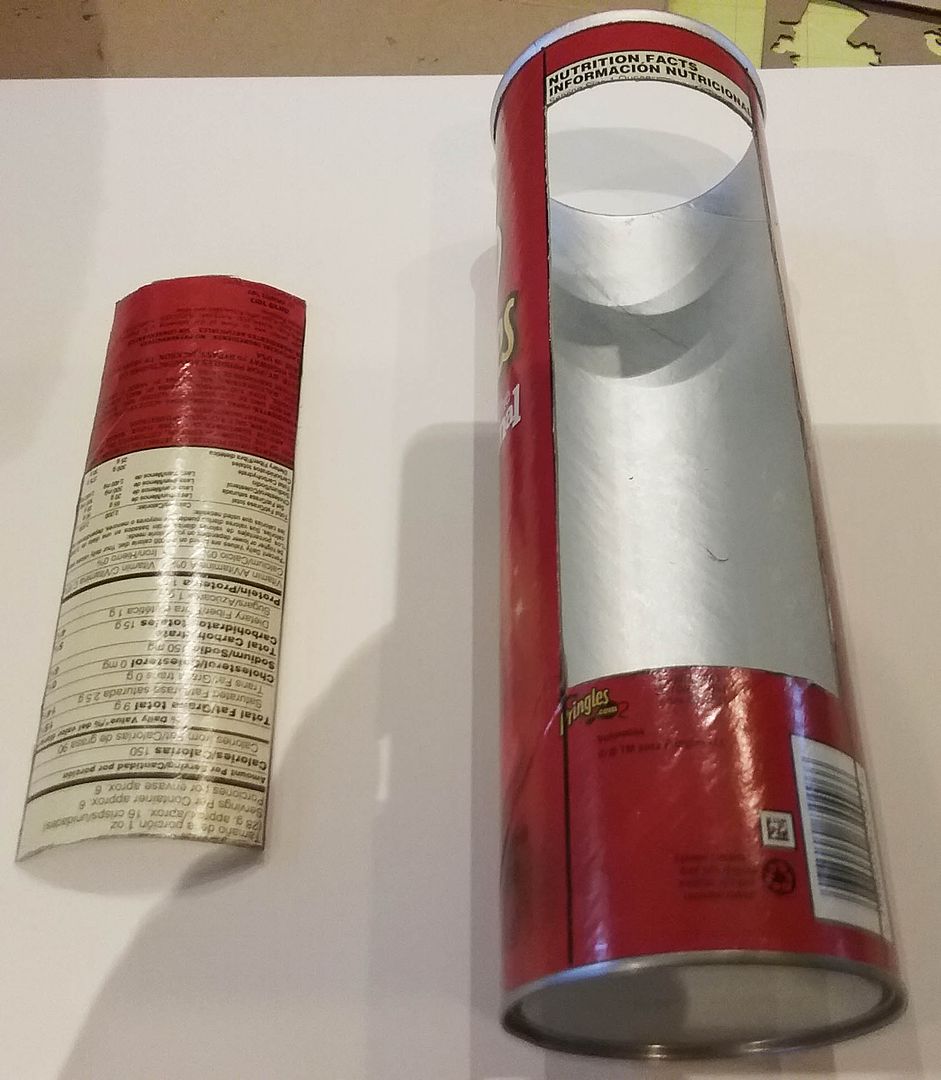
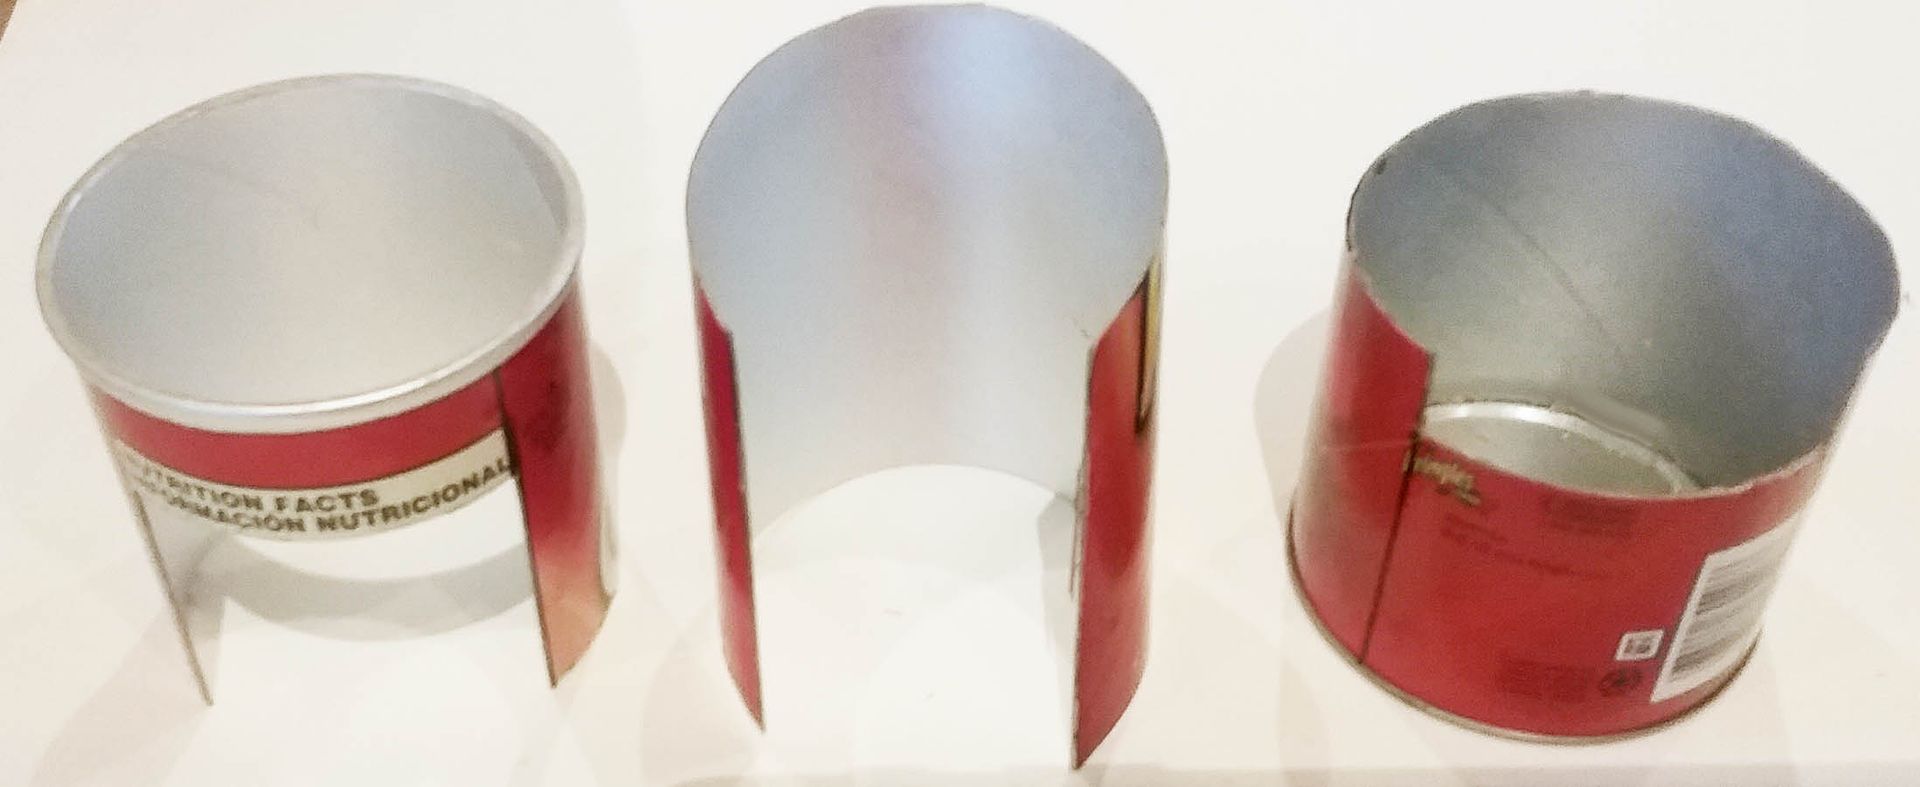
Next, you are going to cut the can into 3 pieces.  The top piece should be approximately 3 inches tall, and the bottom piece should be approximately 2 3/4 inches tall.
To make the can cattywampus, you need to cut the middle piece at angles on each end.  First, insert the middle piece at an angle into the top piece using the top piece and the middle piece.
 
Mark a cut line on the middle piece using the edge of the top piece as a guide.  Note how I have used a clip to keep the pieces in place so that I can mark the cut line.
Next, repeat the same process with the middle and bottom pieces.  You should have two angled cut lines on the middle piece.  Cut away the marked sections on the middle piece.  NOTE:  I made the angle on the top more severe than the angle on the bottom.
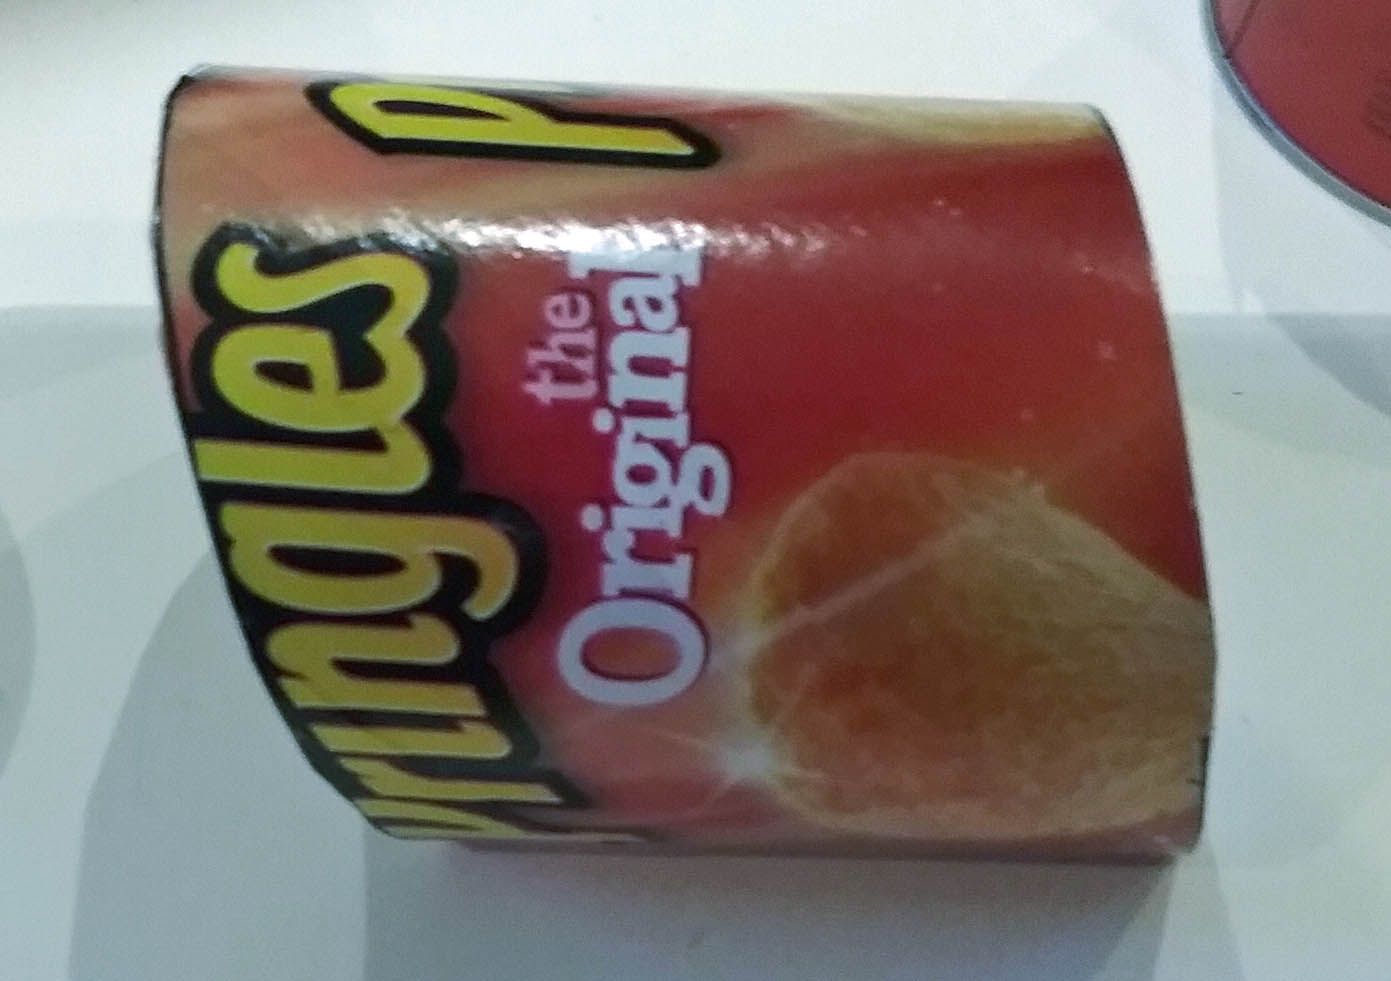
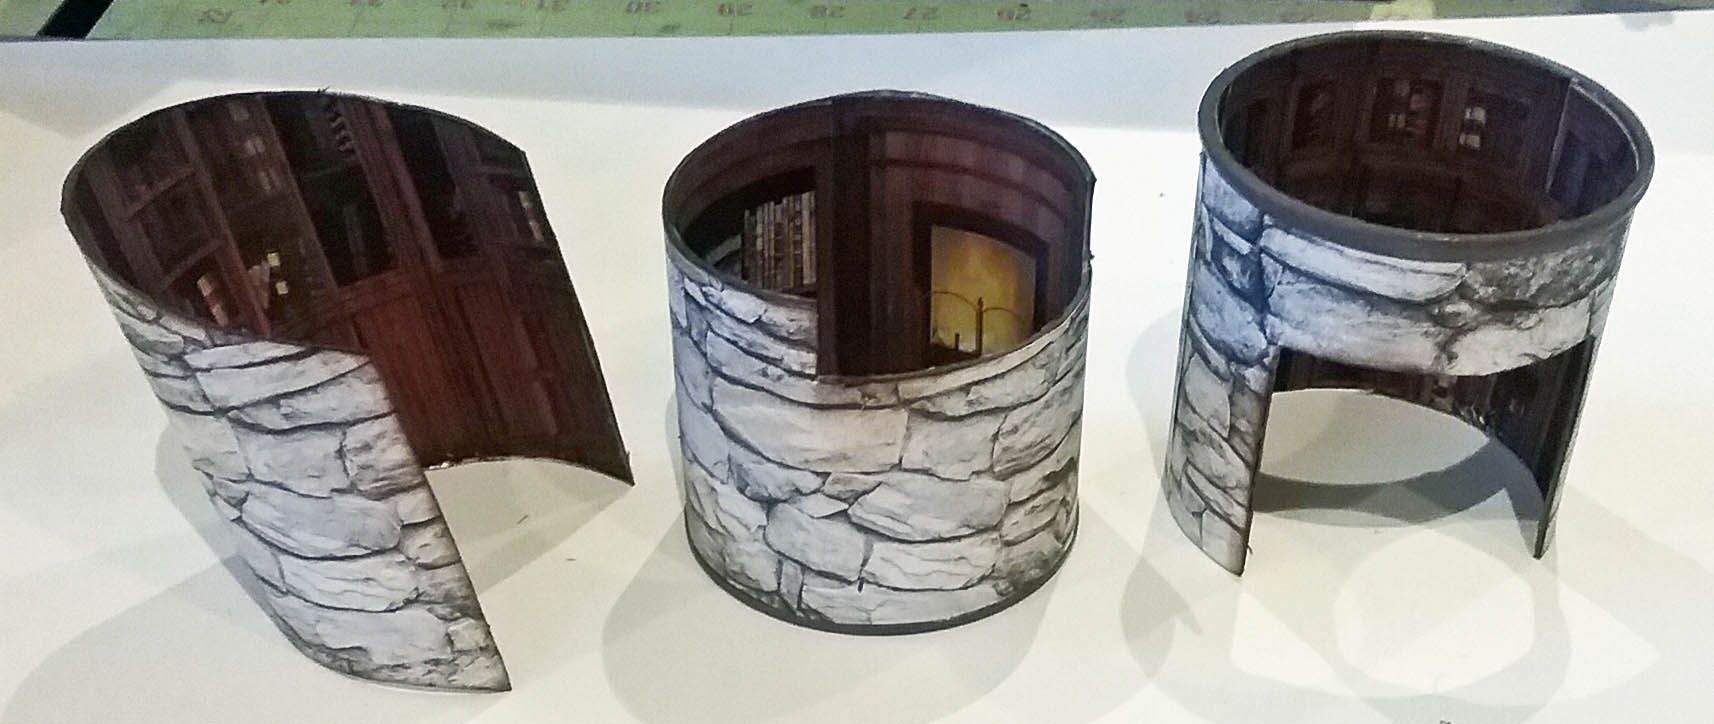
Below you can see the three pieces.  The bottom and top pieces are cut straight, and the middle piece is cut at an angle on the top and bottom.
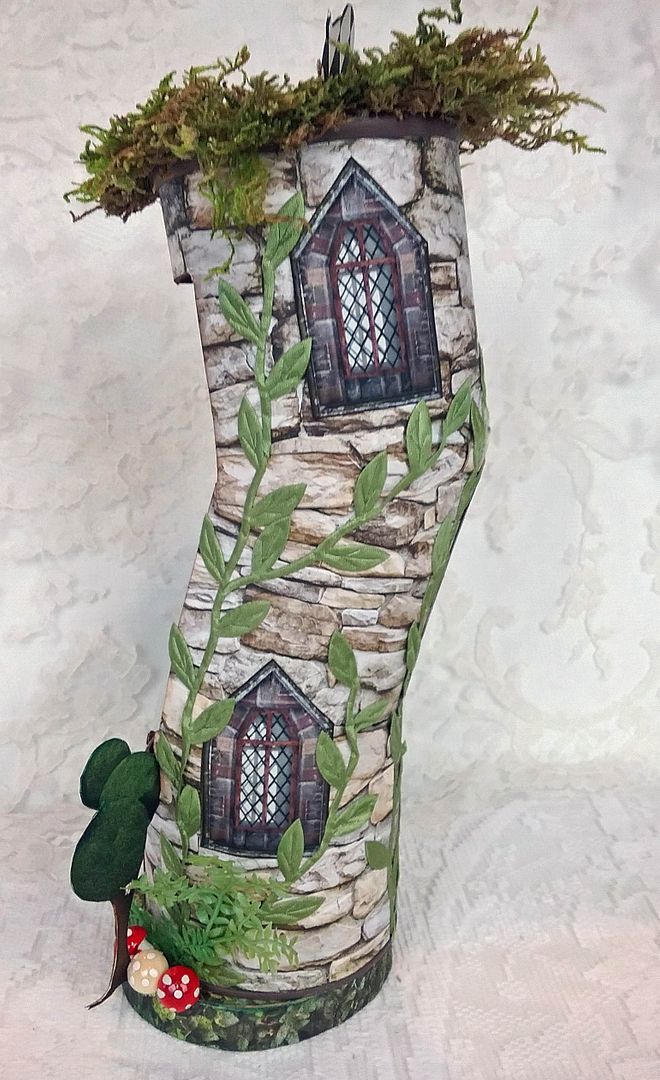
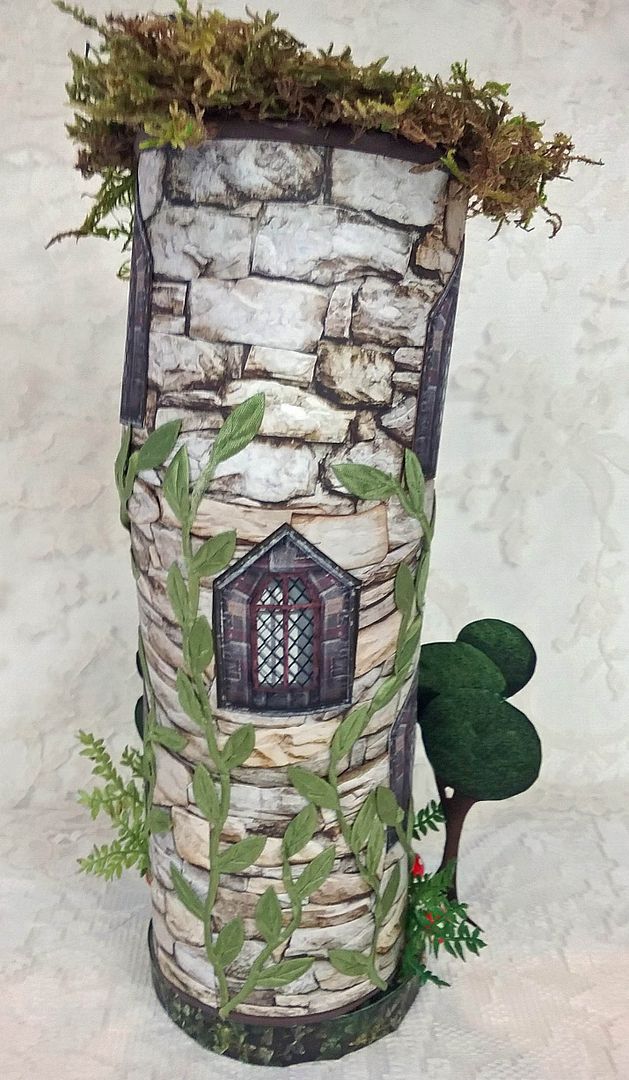
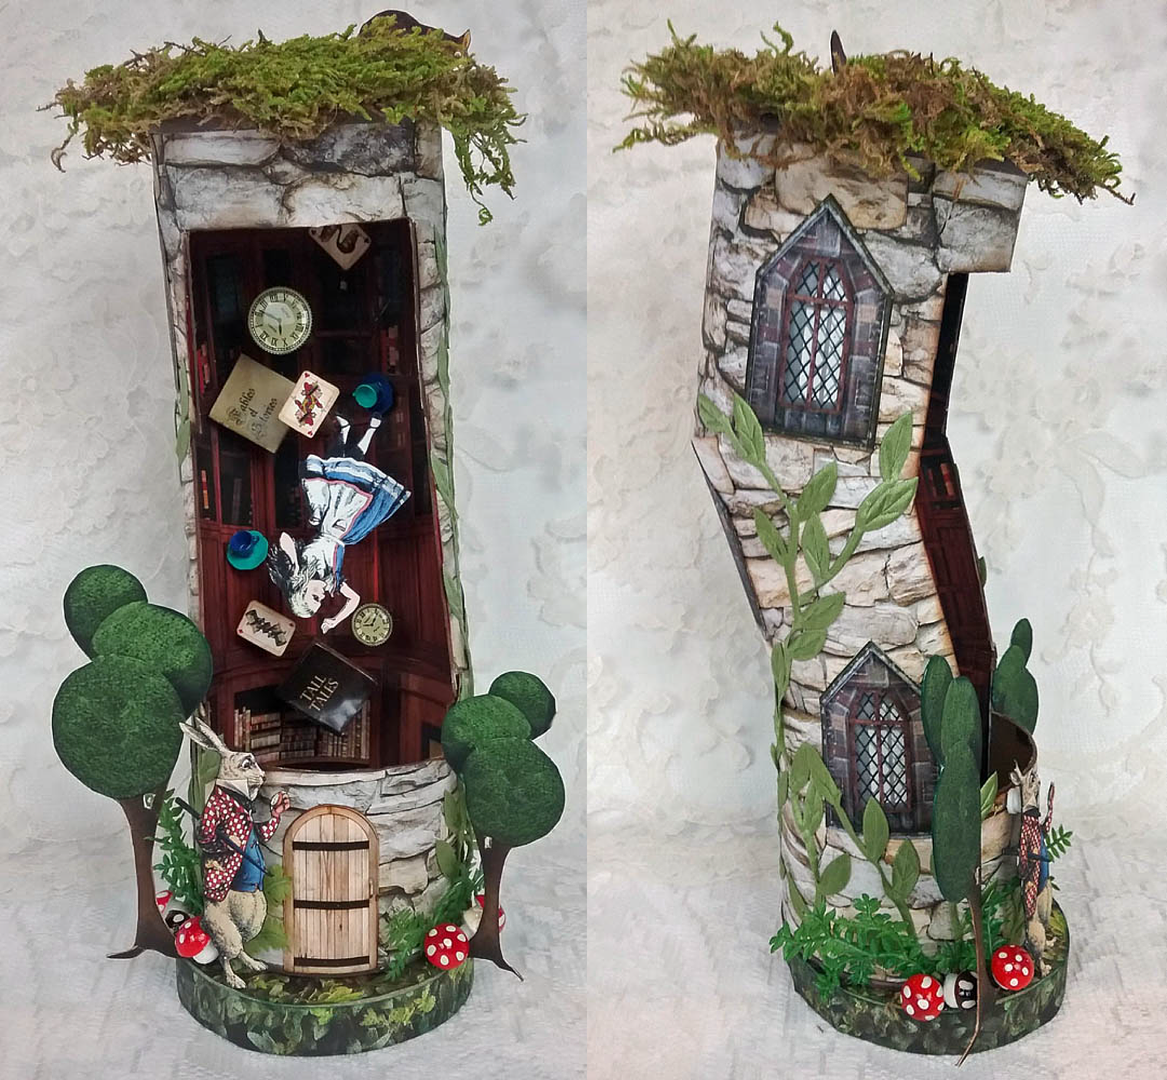
Next, paper the outside and the inside of each piece.  I used cobblestone scrapbook paper on the outside and an image of a library from the Steampunk Time Machine digital image set.  Notice that I painted the top and bottom metal rims brown.
Glue the pieces together, matching the edges.  To hide and blend the seams where the pieces are connected, I cut out stones from the paper and glued them on the seams.  Notice how I added windows to the outside, which can be found on the More Old Windows Collage sheet.
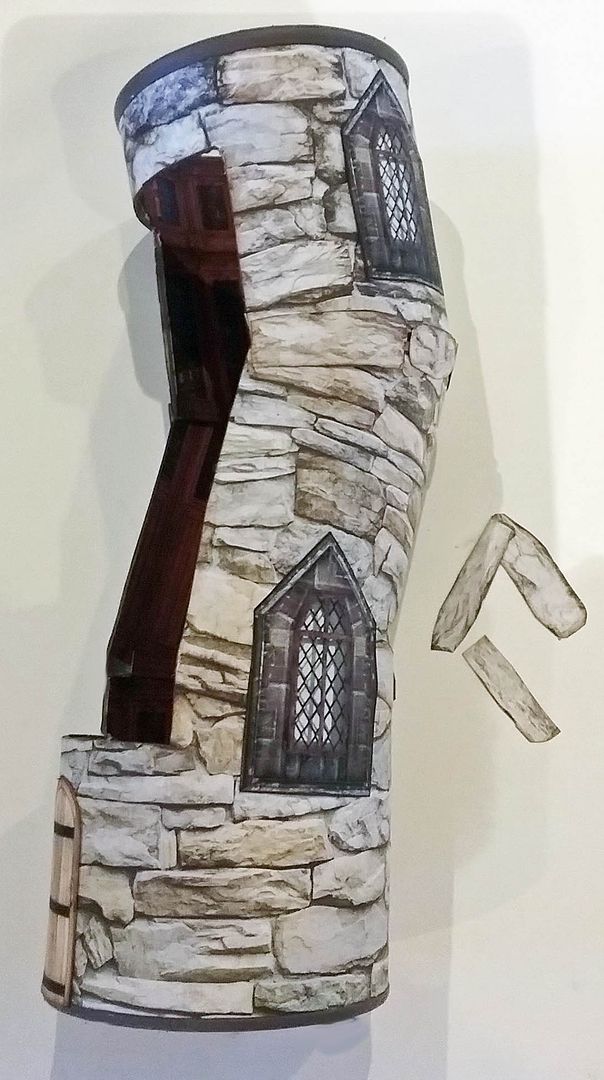
On the inside, I cut strips from the library image and used them to hide the seams on the inside.
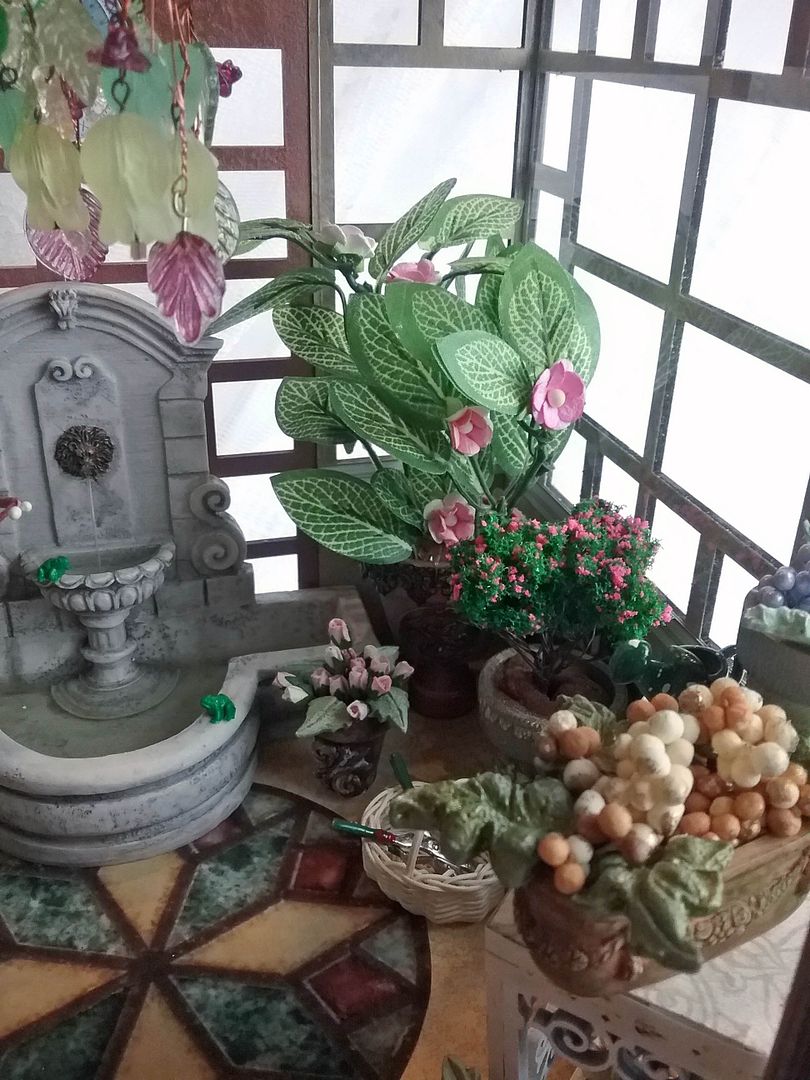
To attach the images and object inside and to give them the appearance of floating, I used wooden dowels and double stick tape to pop them out from the walls and to secure them in place.  I cut the dowels at various lengths.  When you attach them to the wall, think about the angle you will be looking at as you view the piece.  Use this to determine where to attach the image or item so that you will not see the dowel when you look in the opening.  For smaller items like the card and teacups, I used double-stick tape. 
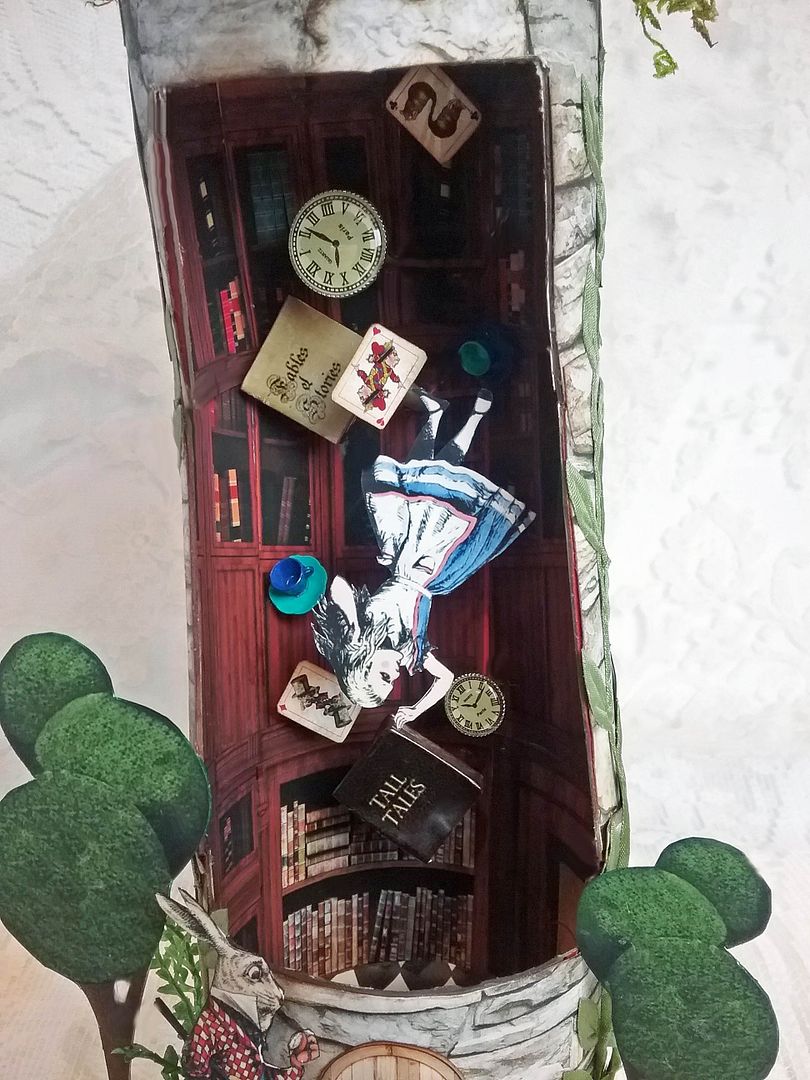
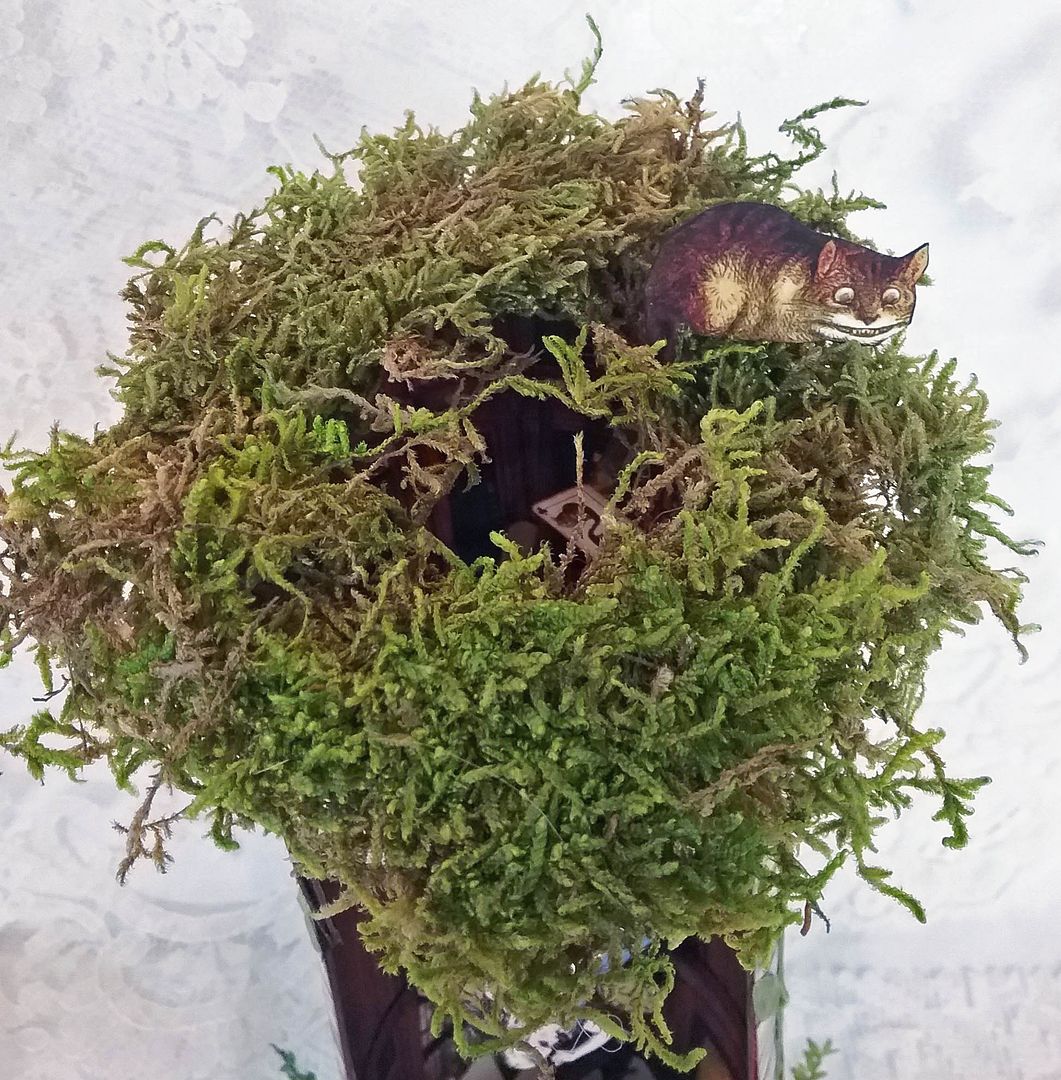
At the top, I used sheet moss, leaving a small hole for Alice to fall through.  Notice the Cheshire Cat sitting in the moss.
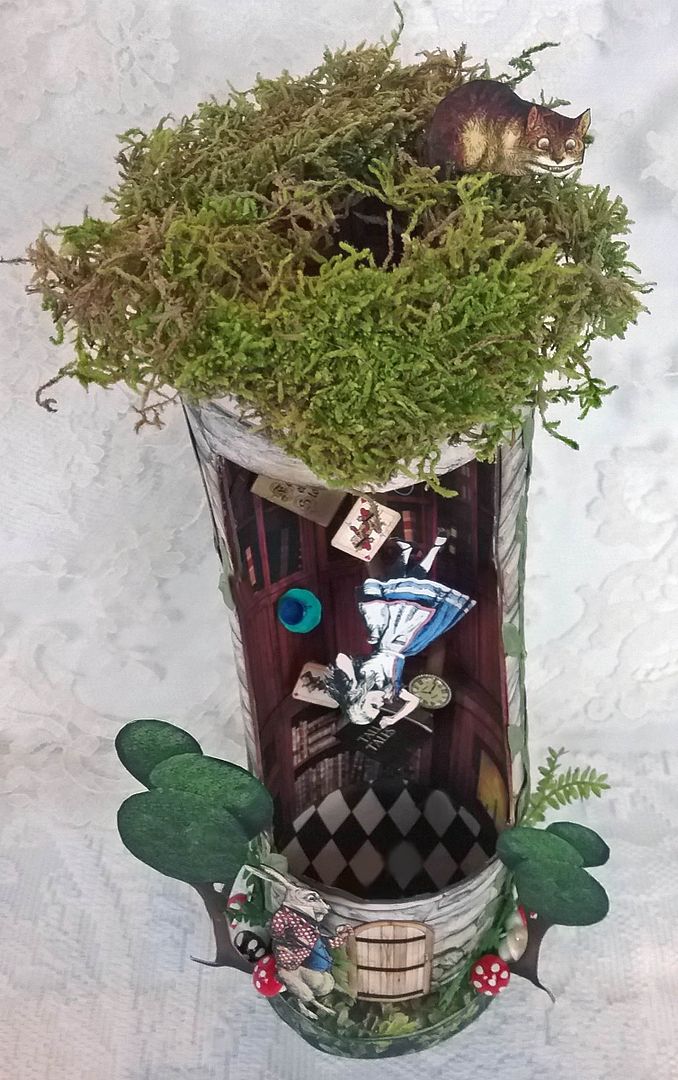
At the bottom, I’ve added a door from the Mini Old Windows and Doors collage sheet, the White Rabbit, and trees from the We Are All Mad Here collage sheet.  I also used mushrooms and ferns.  The base is a round box lid from my stash covered with hedge scrapbook paper.
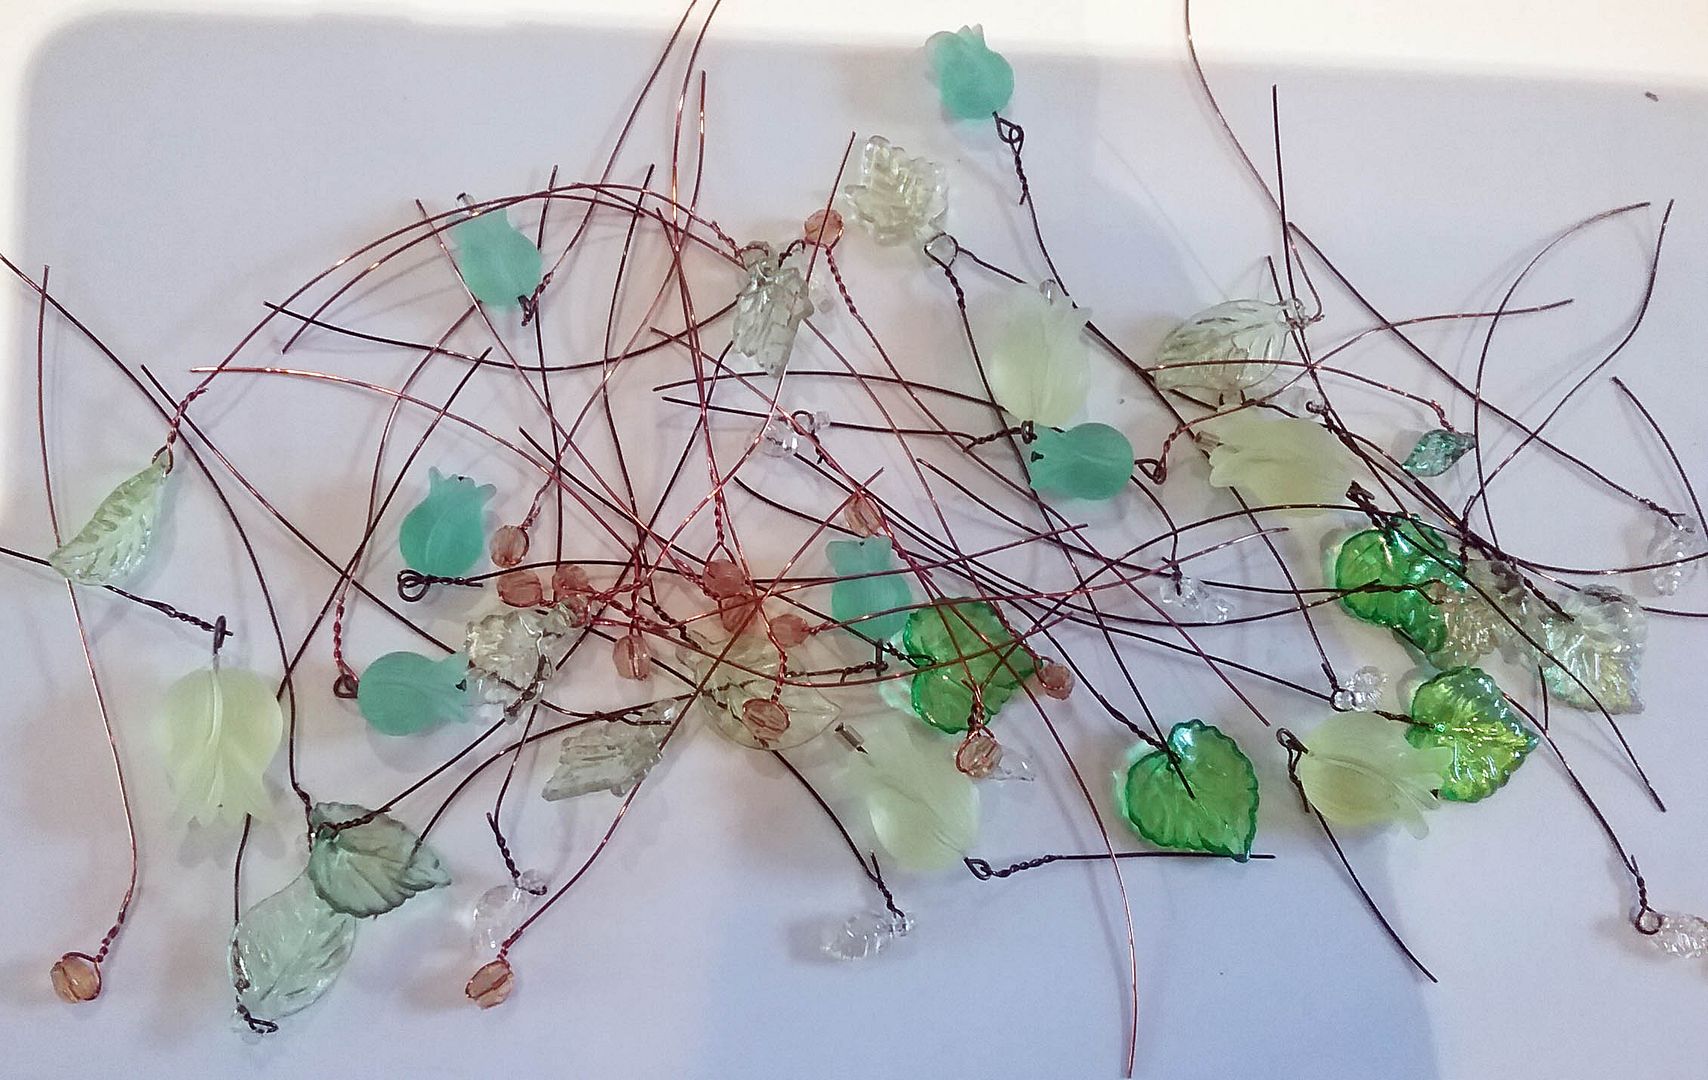
Climbing up the can is stitched leaf ribbon that I ran through my Xyron machine, which applies dry glue that will not bleed through the ribbon.
COLLAGE SHEETS - Down the Rabbit Hole
Mini Old Windows & Doors Collage Sheet – Door Image
Time Machine Digital Image Set – Library Image
More Old Windows Collage Sheet
or
Old Windows & Doors Digital Image Set - Window Images

Saturday, June 4, 2016

MINIATURE VICTORIAN CONSERVATORY - New Collage Sheet & Digital Image Kit & Making Molds From Objects

Creating a conservatory has been something I have wanted to tackle.  I approached Leslie at Alpha Stamps about the idea, and she loved it; the end result is the Victorian conservatory you see here, filled with lovely plants, a beautiful fountain, and a nature-inspired chandelier.
You might be looking at this project and thinking, "there is no way I could do this," but you are wrong.  The entire structure comes as an easy-to-assemble kit, yeah, for kits!  All that is required for assembly is that you glue the die-cut pieces together using the tongue and groves cut into the chipboard.  Paint, decorative paper, and paper images give the piece its architectural details.
Further in the post below, you'll find a tutorial covering how I assembled and decorated the conservatory and the items inside.

I've assembled a new Conservatory/Garden collage sheet and a companion digital image set for this project.

This collage sheet is filled with lots of lovely images to decorate a conservatory or garden.  These images would also work well for standalone nature-themed artwork.  Included are:
3 Fountains
3 Statues
4 Urns
2 Bases or Bird Baths
1 Pedestal
1 Sun Dial
1 Sun Plaque
1 Astrological Dial
2 Styles of Green Man Plaques
Click on the image below to purchase this collage sheet.


This set contains 23 images, including all the images from the Conservatory/Garden collage sheet, plus 5 borders.  The border images are scaled to fit the Conservatory kit carried by Alpha Stamps.  All the images in this set can be easily re-sized for your project as they are high-resolution (300dpi) PNG formatted images.
Click on the image below to purchase this digital image set.

TUTORIAL
THE BASE
The base is made from a kit containing the top, sides, and a step.  
I started by gluing the pieces together.
Next, I covered the base with cobblestone scrapbook paper.

WALLS AND FLOOR
The conservatory kit contains everything you need (floor, walls, doors, and roof) to build the conservatory.  Below is a picture of the floor, sides, and doors.
I started by painting the walls.  The end result consists of three colors, the original brown of the chipboard and two acrylic paint colors.
First, I applied Apple Barrel acrylic paint (antique white).  I used a stencil brush and a taping motion to apply the paint.  I used a paper towel to remove most of the paint from my brush so I wouldn't apply too much paint.  I also used a paper towel to remove excess paint from the wall surface.  The idea is to add the color without covering up all of the natural browns of the chipboard.
Next, I applied Apple Barrel acrylic paint (Khaki) using the same method as the previous paint.  Again the idea is to not cover up all of the original browns of the chipboard and the antique white acrylic paint.
I did this to both sides of the walls.  Below is a close-up picture of the end result.
Next, I cut faux glass for the windows using clear plastic that comes in 12x12 sheets.  I cut the plastic slightly larger than the windows in the walls, then glued the plastic to the walls using Glossy Accents. 
NOTE: Before applying the plastic to the windows, remove the film covering one side of the plastic.
If the Glossy Accents ends up somewhere you don't want (I do this all the time), use a Q-tip wet with Windex to carefully remove the excess glue.  You can also use Windex to wipe away fingerprints.
Next, I glued three sides to the base.  Starting with just three sides made it easier to work inside.
I used 2 borders from the Conservatory/Garden digital image set to decorate the inside.
I placed the large colorful board in the middle of the bottom section of the walls.
I used the cream border at the bottom and top of the windows.  In addition to looking architectural, the borders covered the edge of the windows where the plastic is glued to the wall.
For the floor, I used Double Dot Vintage Chiffon scrapbook paper.  In the center of the floor, I placed a large medallion from the digital image kit.
TRIMMING THE OUTSIDE
YOU'LL FIND ALL OF THE BORDERS USED IN THIS PROJECT IN THE CONSERVATORY DIGITAL IMAGE SET
  • First, I attached the roof base to the top of the windows.  I used the dark border to cover the tongue and grove where the roof and walls meet.

  • I then added the dark border to the bottoms of the outside windows.
  • Next, I added a wide cream border to the edges of the walls where the walls meet.  This gives you nice clean corners and hides the tongue and grove used to hold the wall pieces together.
  • To the bottom, I added more of the dark border.  I also added the border to the open area on the floor where the doors will be attached.
  • Finally, I backed the fancy cream border with chipboard to make it pop out and glued it to the top of the windows under the roof base.

MAKING MOLDS
I made paper clay panels featuring a Green Man plaque.  I needed 10 panels, three for the closed walls and 2 for each open wall, so I decided to use brass stamping to make a mold.  This allowed me to make as many as I wanted and reduce expenses. 
GENERAL INFORMATION
  • You can make a mold from metal or plastic objects and from rubber stamps.  The mold you make can be used with various materials, including UTTE, wax, soap, and clay.  The mold can withstand the heat of materials such as melted wax.  For the purposes of this tutorial, I'm going to focus on using paper clay.
  • You'll want to select objects that you repeatedly use.  The object you choose shouldn't have lots of holes or too much detail, as it is difficult to get a good mold and remove the excess clay from the dried clay piece.
  • The molding in the product is Ice Resin Silicone Molding Putty.
IMPORTANT: Combining the materials from the two containers causes the mold to set, so don't mix the materials until you are ready.
Remove enough material from one of the containers (it doesn't matter which one) to cover one-half of the item you wish to mold.  Roll the material into a ball.
Remove the same amount of material from the other container and roll it into a ball.  Rolling the materials into balls makes it easier to see that you have equal amounts.  The balls should be close in size but don't fret if they aren't perfectly identical; it will still work.
Now you are ready to mix the materials together.  Mix the materials as quickly as possible until they are completely blended and the color is a light grey, and there are no swirls.  The material will start to harden in about 3 to 4 minutes, so it is critical that you work quickly.
Spread the combined material over your object, making sure all of the object is covered.  
I then flip the object over on a flat surface so that the edges around the object are flat.
Allow the mold to set, which takes approximately 10 minutes.  Remove the object from the mold.
Now your mold is ready to use.  Fill the mold with paper clay and allow the clay to dry for a short period to make it easier to remove from the mold.  If you have the time, you can allow the clay to dry in the mold.  If you remove the clay from the mold, keep it flat, as it will warp.  After the outside is slightly dry, I put a lightweight on the piece to keep it from warping as it continues to dry.  Placing the piece on a paper towel will help it to dry faster as the paper will draw the moisture out of the clay

I cut two sizes of chipboard for the panels and used the same painting technique as I did for the walls.  The chipboard pieces measure:
2" x 2" and 1 1/2" x 1 1/2" for the side panels (cut 6 of both sizes)
1 1/2" x 2" and 1 3/8" x 1 1/2" for the front and back panels (cut 4 of both sizes)
I painted the clay pieces with copper-colored acrylic paint and rubbed them with Patina Gilders Paste.
ROOF
Below are the pieces that make up the roof. You'll also see the roof base that I already discussed in the Wall & Floor section above.
  • First, I cut plastic pieces for each of the sides and the top and put them aside.
  • I then glued the four sides to the top piece and to each other.
  • Next, I spray painted the roof with copper-colored spray paint (this was much faster than hand painting).
  • Then using my finger, I rubbed on Patina Gilders Paste to give the roof a weathered copper look.
  • I then glued the plastic pieces on the inside of the roof.
  • Just as I did with the doors, I glued strips of the dark border to the edges of the plastic to hide where it was glued to the roof windows.
  • I also added the dark border to the outside of the roof as extra detail.  It also hides the seam between each of the windows and the top and side windows.
  • To accommodate the chandelier, I cut a small hole in the center of the top window (in plastic).
To support the pineapple final on the center of the roof and to accommodate the chandelier chain, I painted a stackable die-cut label and inserted an eye pin, cutting the pin short enough to make a loop for the chain.
Next, I glued the roof to the roof base.
After attaching the roof, I added knobs as finals to each corner.
The last architectural detail is the brackets that I added to each corner.

DOORS & OUTDOOR DECOR
  • I painted both sets of doors copper.
  • I cut plastic pieces (like the windows) for each door.  I glued the plastic to the door and used the dark border to cover where the plastic is glued to the door.
  • I glued the door behind the fountain in place (closed).
  • I glued the front doors in place (open).
Flanking the front door are two pillars supporting an astrolabe and a sundial.  The astrolabe is made from stuff in my stash.  The sundial is a separate piece from the column.  Notice the cute frog sitting on the dial.
As a final touch, I added Flower Soft to some of the edges around the cobblestone.

Another option for external décor is a garden gazing ball with a stand. 

CHANDELIER & FOUNTAIN
In the back of the conservatory is a beautiful fountain. It's one of those things that when I see it, I think, "I need to build a conservatory to showcase it." Notice the little frogs sitting on the fountain. 

In the fountain base and pedestal contain resin water.  Spraying out of the lion's head is a stream of resin water.  How cool is that!

CHANDELIER
The inspiration for the chandelier came from a life-sized real chandelier.

If you want to make a chandelier like mine, you'll need a mix of leaves (with holes) and flower beads.  Acrylic and Lucite look best as often these materials are semi-translucent.  
  • I started by inserting the wire in the holes of the leaves and flowers and wrapping the short end of the wire around the long end of the wire (easy peasy).  
  • For the flowers, I used a headpin inserted through the hole in the flower, sniping away the excess leaving enough to bend the pin to form a loop.  
  • Next, I inserted a wire through the loop and wrapped the wire just like I did for the leaves.  
  • I also inserted a wire into a few beads and wrapped the wire just like the leaves.  Below are all the pieces with wire.
Next, you'll need something to hang the leaves, flowers, and beads from.  The hangar I used comes from my stash.  
If you don't have something like this, you could use a bangle bracelet and wire to create something that functions like the piece I used.  
I wrapped the long end of the wires attached to the leaves and flowers around the hanger.  I wrapped the beads around the top of the hanger.  The hook on the top of the hanger hooks into the chain hanging from the roof.  Notice how the beads are wrapped around the top of the hanger.

TABLES
On the inside of the conservatory, I used two different tables to hold some of the pots.  The first is a lovely ornate 3 tier stand.
I first assembled the stand and then painted it a teal color.
Below you can see how the back side of the stand looks with the flowers.  This is the side you see through the window.
Below is the front of the stand that you see from inside the conservatory.
The second plant table is also made of chipboard which I painted white.
POTS 
Alpha Stamps is carrying all kinds of miniature pots that would work well for a conservatory or garden.  Most of the flowers in the pots are also carried by Alpha Stamps (you'll find them in the supply list at the bottom of the post).  The rest are from my stash.

For some of the pots, I started by adding decorative elements.  Below are two wooden pots decorated with Dresden and a paper clay shell.  If you want the shell to curve around the pot, you need to bend it on the pot while the clay is wet.  Make sure it stays curved on the pot as it dries.
Next, I painted the pot with acrylic paint.  Once dry, I used my finger to brush on a different color of acrylic paint.  This gives you an aged look.  Below you can see two different sizes of wooden pots using this technique.  Some of the leaves in the pots are made from paper clay using 2 different silicone leaf molds.  Using a mold is great, as you can make as many as you want.
Another option is to make the pots look like an urn.  I turned a smaller pot upside down in the pots below and glued it to a larger pot.  Next, I painted the pots copper and rubbed them with Patina Gilders Paste.  Unlike the wood pots, I added decorative elements on top of the paint this time.  Notice the Dresden and sparrows compass brass piece, which was easy to bend around the pot.
If decorating pots is not your thing, you'll like this set of pots pictured below that already have dimensional decorations.  If you don't like the color, just paint them.
Below you can see the finished pots.  I painted them with one color and then rubbed the raised decorative bits with another color.  The leaves in the pot in the middle are clay made from a silicone leaf mold.
Below are more wooden pots that paint in various colors.
The simplest option is the pre-decorated pots shown below.  Once again, all these pots have clay leaves.
Below are the two leaf molds I used.  Each has several styles of leaves.
You may have noticed that many of the leaves in the pots are curved.  This is accomplished by taking the wet clay out of the mold and bending it so that it dries curved.  Usually, you need to make sure that the clay is flat, as it will warp.  In this case, let it warp and curl.